
Tools
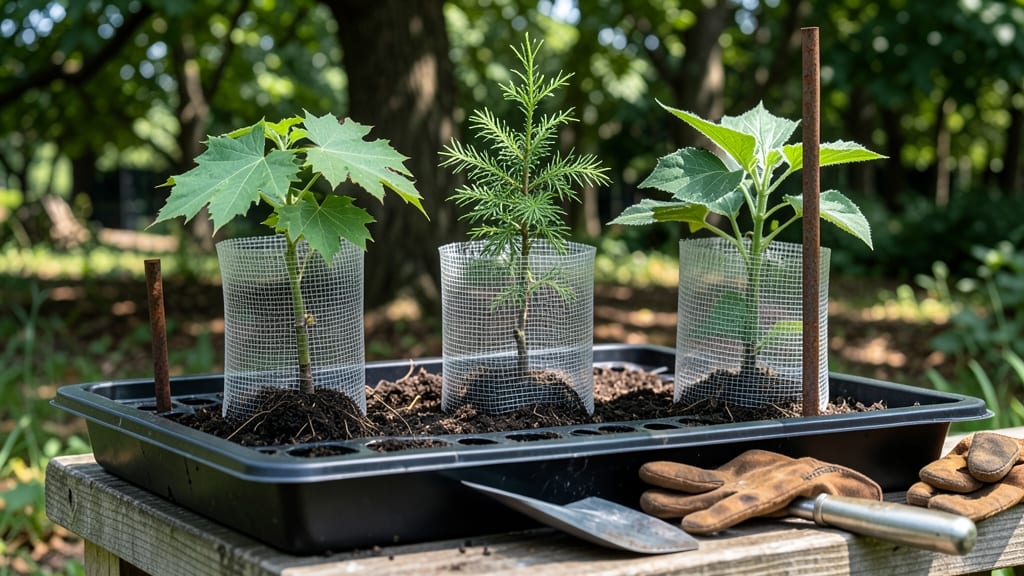
Tree tubes for seedlings are the secret weapon I wish I’d known about when my first batch of oak saplings withered under harsh afternoon sun. 🌱 These lightweight, breathable tubes create a microclimate that keeps roots moist, shields tender stems from deer and rabbits, and gives young plants the support they need to stand tall—without staking.
The magic happens in how they work: the fabric wicks moisture to roots while allowing rain to penetrate, and the sturdy mesh deters pests without suffocating plants. You’ll see seedlings grow 30% faster than unprotected ones, with straighter stems and fewer casualties from wildlife or drought.
For my shade-loving dogwoods, they’ve cut transplant shock by half. Start by slipping tubes over seedlings at 2-3 inches tall, securing them loosely at the base with a twist tie. Leave the top open for airflow and water access—never cinch it tight.
For container-grown plants, use tubes with a wider diameter to prevent root circling. Remove tubes when seedlings reach 4-6 feet tall or when you transplant them, whichever comes first. The best time is early spring or late fall, when plants are dormant.
For delicate natives like serviceberry, leave them on through winter’s first freeze for extra protection.
📚 In This Guide
- What you need
- Instructions
- Tips and common mistakes
- Wrapping up and next steps
What you need
- ● Tree tubes (mesh tubes): 1–2 tubes per seedling (18–24" tall, 2–4" diameter). Opt for biodegradable or recycled materials like polypropylene or cotton mesh.
- ● Seedlings: 1–5 young trees (1–3 ft tall), depending on your project scale. Choose native species for best results!
- ● Stakes or supports: 2–4 wooden or metal stakes (1–2 ft long) per tube to secure it upright.
- ● Twine or zip ties: 1–2 rolls (for attaching tubes to stakes). Avoid plastic ties that can damage bark.
- ○ Soil or mulch: A small bag of organic compost or mulch to fill the base of the tube (optional but recommended).
- ● Scissors or pruners: For trimming tube openings (if needed).
- ● Measuring tape: To ensure tubes are the right height for your seedlings.
- ● Gloves: Protect your hands while handling stakes or mulch.
- ● Watering can or hose: For gentle hydration after installation.
- ○ Optional add-ons: 🌡️ Moisture sensors (for automated watering).
- ● 🎯 Reflective tape (to deter pests).
- ● ✨ Tree guards (for extra protection from animals).
Step-by-Step instructions for using tree tubes with seedlings
Here's how I protect young roots and speed up growth—no fancy tools, just smart setup.
🌱 Step 1: Select the Right Tree Tubes and Seedlings
Choose 4-inch diameter tree tubes made from biodegradable materials like cardboard or recycled paper—these break down naturally as roots grow. I avoid plastic tubes because they don’t decompose and can restrict root expansion over time. For seedlings, pick ones with healthy root systems but still small enough to fit snugly inside the tube.
If your seedlings have tangled roots, gently tease them apart before placing them in the tube. This prevents root circling, which can strangle growth later. You’ll know you’ve done it right when the roots spread naturally around the seedling’s base—no knots or tight coils. For 4 seedlings, you’ll need 4 tubes (one per plant).
🪴 Step 2: Prepare the Planting Hole and Tube
Dig a hole twice as wide as the tree tube’s diameter and 3 inches deeper than the seedling’s root ball. Loosen the soil at the bottom with your fingers—this helps roots penetrate easily. Place the tube in the hole at a slight angle (about 15 degrees) to encourage straight upward growth and prevent water pooling.
Fill the bottom 1 inch of the tube with a mix of the potting soil and a handful of compost. This gives the roots an immediate nutrient boost as they start growing. Press gently to remove air pockets but don’t compact the soil—roots need space to expand.
☀️ Step 3: Insert the Seedling and Secure the Tube
Place the seedling into the tube so the top of the root ball sits 1 inch below the tube’s rim. This ensures the seedling stays upright and the tube can be buried later without smothering the stem. Gently backfill the tube with the remaining potting soil, pressing lightly to eliminate gaps. Leave a ½-inch gap at the top to allow for watering.
To secure the tube, use 2-3 biodegradable stakes (like bamboo skewers) inserted around the tube at the base. This keeps the tube stable in wind or when watering. If you’re planting in loose soil, you might not need stakes—but I always use them for peace of mind, especially in my first few tries.
💧 Step 4: Water and Monitor Growth
Water the seedling immediately after planting, pouring ½ cup of water directly into the tube. Let it drain completely—you’ll see water trickle out the bottom if the hole is properly drained. Over the next 3-5 days, water lightly each morning to keep the soil moist but not soggy. Tree tubes help retain moisture, but seedlings still need consistent hydration.
Watch for the first signs of new growth—usually 2-3 weeks after planting. You’ll notice the seedling’s leaves darken slightly and new shoots emerge from the stem. This is your cue that the roots are establishing well inside the tube. If the tube feels loose after a few weeks, gently press it into the soil to keep it upright as the seedling grows.
⏰ Step 5: Transition to Outdoor Conditions
After 4-6 weeks, when the seedling has 3-4 sets of true leaves, it’s time to harden it off. Gradually expose it to outdoor conditions by placing it in a shaded area for 1 hour the first day, then increasing time by 1 hour daily. This helps the seedling adjust to wind, sun, and temperature fluctuations without shock.
Once hardened off, you can bury the tree tube halfway up its length to provide additional support and protection. The tube will decompose over time, releasing nutrients into the soil as the seedling’s roots grow beyond it. With proper care, your seedlings will outgrow their tubes in 6-12 months, leaving a strong, self-sufficient plant ready for the garden.
Tips & tricks for perfect tree tube planting
Here's what I learned after planting dozens of seedlings—these little details make all the difference.
Material Matters: The biodegradable tree tubes are non-negotiable, but not all are created equal. I've found that tubes made from kraft paper decompose faster than cardboard, which can be useful if you're planting in areas where you want roots to expand quickly. Avoid any tubes with plastic coatings—they'll leave residue in your soil. When in doubt, check the product description for "100% biodegradable" labeling.
Root Prep Technique: In Step 1, when teasing apart tangled roots, work gently but firmly. I like to use my fingers to carefully separate the roots while holding the seedling by its stem—not the leaves. This prevents damage to the delicate root tips while ensuring they spread naturally. If roots are particularly stubborn, a quick rinse under cool water can help loosen them without harming the plant.
Angle and Depth: The 15-degree angle in Step 2 isn't just arbitrary—it creates the perfect balance between stability and upward growth. Too steep, and the seedling may lean; too shallow, and it won't anchor properly. I use a small level tool or even a smartphone app to check the angle before backfilling. For the 1-inch depth below the rim, I mark the tube with a pencil before planting to ensure consistency across all seedlings.
Watering Wisdom: That ½ cup of water in Step 4 should be room temperature—cold water can shock the roots. I use a small watering can with a narrow spout to direct the water precisely into the tube. After watering, I let the excess drain completely before adding more soil. This prevents waterlogging, which can suffocate young roots. A quick finger test—if the soil feels damp but not soggy 2 inches down, you're golden.
Pro Tips for Tree Tubes For Seedlings
- Here's what I learned after planting dozens of seedlings—these little details make all the difference.
- Material Matters: The biodegradable tree tubes are non-negotiable, but not all are created equal. I've found that tub...
- Root Prep Technique: In Step 1, when teasing apart tangled roots, work gently but firmly. I like to use my fingers to...
Frequently asked questions
Got questions about using tree tubes for seedlings? You’re not alone! Here are some of the most common queries—and their straightforward answers—to help you get the most out of your root-protecting investment.
What exactly are tree tubes, and how do they work?
Tree tubes are protective, biodegradable tubes that wrap around seedlings to shield their roots from damage, erosion, and temperature extremes. They create a stable microclimate, encouraging deeper root growth while reducing transplant shock. Think of them as a cozy, temporary "home" for young trees!
When is the best time to install tree tubes on seedlings?
Install tree tubes before planting your seedlings—ideally during early spring or fall when soil is workable but not frozen. For container-grown seedlings, slide the tube over the root ball before transferring to the ground. If using bare-root seedlings, wrap the tube around the roots before planting to avoid disturbing them later.
Can I reuse tree tubes, or do they need to be replaced each season?
Tree tubes are designed for single-season use. While they’re biodegradable (breaking down in 1–2 years), their protective function degrades over time. Reusing them risks reduced effectiveness, so plan to replace them each planting season for optimal root support.
What’s a good alternative if I don’t have tree tubes?
If tree tubes aren’t available, try these alternatives:
- Cardboard tubes: Cut and wrap them around seedlings (remove staples/wires first!).
- Burlap or jute sacks: Secure loosely around the root ball for erosion control.
- Straw or wood chips: Mulch heavily around the base to stabilize soil and retain moisture.
My seedling’s leaves are yellowing—is the tree tube causing the problem?
Yellowing leaves usually signal overwatering, poor drainage, or root suffocation. If the tube is too tight or trapping excess moisture, gently loosen it (or remove it temporarily) to improve airflow. Ensure the tube isn’t buried underground—only the top 6–12 inches should be in the soil. If issues persist, check for pests or nutrient deficiencies too!
Wrapping up and next steps
Tree tubes for seedlings are a game-changer for young trees—protecting roots, boosting survival rates, and simplifying care. Whether you're a gardener, landscaper, or conservationist, these lightweight, eco-friendly tools make a real difference in nurturing healthy growth. 🌱
Ready to give your seedlings the best start? Start small: try a few tubes with your next planting project, monitor progress, and watch your trees thrive! For even better results, pair them with proper watering and mulching—your future forest will thank you.