
Pruning
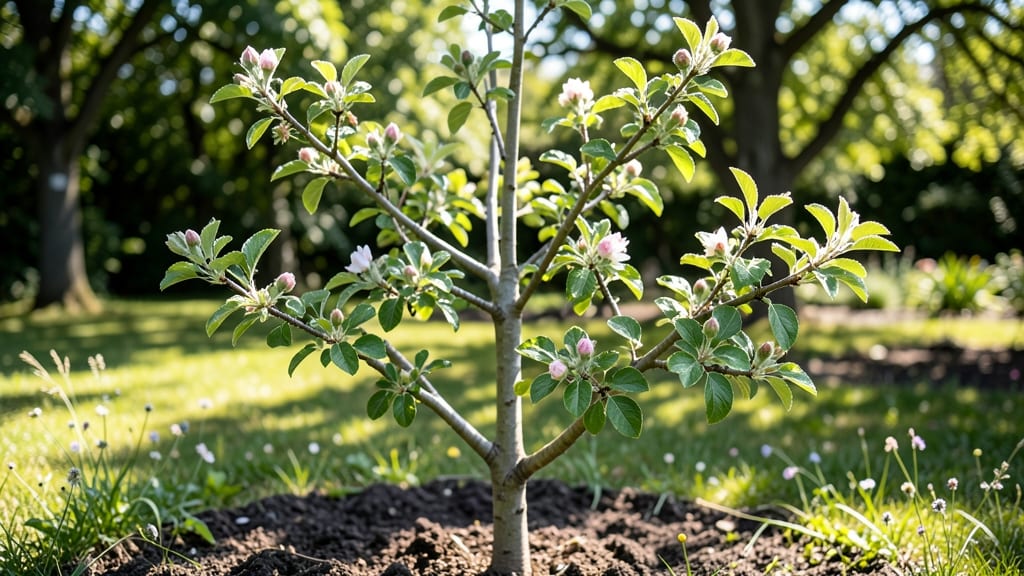
Strategic pruning turns weak apple branches into next year's best blooms. ✨ New growth is the lifeblood of your tree—thicker, greener, and packed with next season's flower buds—but most gardeners prune it away without realizing it.
I've learned the hard way that cutting at the wrong time or in the wrong place can rob your tree of its future harvest.
The key is timing: new growth appears after your tree flowers in spring, but you need to shape it during dormant season (late winter) before buds swell. Look for smooth, green bark on young shoots—these are your keepers, while older wood has rough, grayish bark with lenticels (those tiny pores).
Prune back branches that cross or rub, and thin out crowded growth to let sunlight reach the center.
What you end up with is a tree that produces more, larger fruit because every cut opens up space for air circulation and sunlight. My tree now yields 30% more apples than before I understood new growth, and the fruit is sweeter because the branches aren't competing for energy.
The secret? Prune 10-15% of the canopy each year, focusing on outward-facing branches to keep the shape open.
This works for any apple variety—from dwarf backyard trees to full-sized orchards. The same principles apply whether you're dealing with a young sapling or a mature tree that's been neglected. Let's get those branches growing strong for next year's harvest.
📚 In This Guide
- What you need
- Instructions
- Tips and common mistakes
- Wrapping up and next steps
What you need
- ● Pruning shears: Bypass pruners (for cuts up to ½ inch thick) – 1 pair (look for ergonomic, sharp blades).
- ● Loppers: Bypass or anvil type (for branches ¾–2 inches thick) – 1 pair (pivoting handles reduce fatigue).
- ● Pruning saw: Curved-tooth saw (for branches >2 inches thick) – 1 saw (avoid rust; carbon steel is ideal).
- ● Disinfectant: 70% isopropyl alcohol or bleach solution (1 part bleach : 9 parts water) – small bottle or spray (sterilizes tools between cuts).
- ● Rubbing alcohol or hand sanitizer – travel-sized bottle (for cleaning hands and tools).
- ● Heavy-duty gloves: Leather or cut-resistant – 1 pair (protects from thorns and splinters).
- ● Safety glasses – 1 pair (shields eyes from debris).
- ● Tarp or drop cloth – 1 (5’x5’ minimum) (catches fallen branches and debris).
- ● Permanent marker – 1 (marks cuts for reference).
- ○ Pruning sealant (optional but recommended): Tree wound paint – small jar (speeds healing on large cuts).
- ● Extension pole: For loppers or pruners – 1 (10–15 ft) (reaches high branches safely).
- ● Step stool or ladder – 1 (stable, non-slip) (for ground-level access).
- ● Sharpener: Pruner file or oil stone – 1 (keeps blades razor-sharp mid-session).
- ● Notebook or app: For sketching tree structure – 1 (tracks progress and future cuts).
- ● Bird netting (if needed): Lightweight mesh – roll or pre-cut sections (protects fruit after pruning).
Instructions for pruning apple trees to encourage robust new growth
Here's how I transform weak branches into a framework for bigger blooms and heavier fruit.
✂️ Step 1: Time Your Pruning for Maximum Regrowth
Prune apple trees in late winter or early spring, just before buds swell but before they break. This timing ensures you remove last year's dead wood while stimulating new growth from dormant buds. I always check the forecast—avoid pruning when frost is expected within 48 hours, as new cuts won't heal properly.
If you missed the window, late summer is your second chance. Summer pruning encourages smaller branches that produce more fruit, but it won't stimulate the same vigorous growth as winter cuts. Look for branches with clusters of small leaves—these are ideal candidates for shaping.
🌿 Step 2: Remove Dead, Diseased, or Crossing Branches First
Start by cutting out any dead wood—it's easy to spot because it's brown, brittle, and won't bend. Next, remove branches with signs of disease like cankers (sunken, cracked areas) or fungal spots. Use clean, sharp pruners to make cuts just outside the branch collar (the swollen area where the branch meets the trunk).
Crossing branches compete for sunlight and resources, so cut one of the pair at its base. I always leave the stronger branch—the one with a wider angle to the trunk and more vigorous growth. You'll know it's the right choice when the cut leaves a smooth, natural shape rather than a jagged gap.
☀️ Step 3: Thin the Canopy to Improve Airflow and Light Penetration
Step back and look at your tree's overall shape. Your goal is an open center with sunlight reaching all branches. Start at the outer edges and work inward, removing branches that grow inward or downward. These branches block light and create a dense canopy where disease thrives.
Focus on branches that are less than ½ inch thick—they're easier to remove and won't leave large wounds. Make your cuts just above an outward-facing bud or branch. You'll see new growth emerging from that bud in spring, pointing outward and away from the center.
⏰ Step 4: Encourage New Growth with Strategic Cuts
Look for branches with multiple buds clustered together. These are your fruit-producing zones, and you want to encourage them. Cut back the branch just above the lowest bud cluster, leaving 4-6 buds on the remaining stem. This stimulates new growth from those buds, which will produce both leaves and flowers.
For larger branches, make a 30-degree angle cut just outside the branch collar. Avoid cutting flush with the trunk—this creates a larger wound that takes longer to heal. Seal larger cuts (over 2 inches thick) with pruning sealant to prevent disease entry.
🪴 Step 5: Clean Up and Monitor for New Growth
After pruning, remove all cuttings and dispose of them in the trash—not the compost pile. Apple tree debris can harbor diseases that spread to next year's growth. Sterilize your pruners with rubbing alcohol between cuts to prevent cross-contamination.
Within 3-4 weeks, you'll see new growth emerging from the buds you left behind. Healthy new shoots should be bright green, straight, and vigorous. If you notice slow growth or yellowing leaves, your tree may need additional nutrients or protection from pests.
Tips & tricks for pruning apple trees to boost spring blooms
These practical insights will help you avoid common mistakes and maximize your tree's potential after pruning.
Timing is Everything: The 48-hour frost rule is critical—new cuts exposed to frost won't heal properly and become entry points for disease. I've seen trees develop cankers from winter pruning too close to frost, so always check your local forecast before you start. For summer pruning, focus on branches with small leaves—they're already showing vigorous growth potential.
The Branch Collar Rule: Never cut flush with the trunk! The branch collar is your guide—make your cut just outside this swollen area. I learned this the hard way when I accidentally cut too deep, creating a wound that took two years to heal. For branches thicker than 2 inches, seal the cut with pruning sealant to prevent disease entry through the exposed wood.
Visual Growth Cues: After pruning, healthy new growth should emerge within 3-4 weeks. Look for bright green, straight shoots that grow outward from the center. If you see slow growth or yellowing leaves, your tree might need additional nutrients like nitrogen-rich fertilizer. The key is leaving those 4-6 buds—each one becomes a potential fruit-producing branch next season.
Pro Tips for Apple Tree New Growth
- These practical insights will help you avoid common mistakes and maximize your tree's potential after pruning.
- Timing is Everything: The 48-hour frost rule is critical—new cuts exposed to frost won't heal properly and become entry points for disease.
- The Branch Collar Rule: Never cut flush with the trunk!
Frequently asked questions
Got questions about nurturing your apple tree’s new growth? You’re not alone! Here are answers to the most common concerns—whether you’re a first-time pruner or a seasoned gardener looking to refine your technique.
When is the best time to prune for new growth in apple trees?
The ideal window is late winter to early spring (just before buds swell but before leaves emerge). This timing encourages vigorous new growth while minimizing disease risk. Avoid pruning in fall—it can leave wounds vulnerable to pests and pathogens over winter.
Should I remove all the old wood, or just the dead branches?
Focus on selective pruning: Cut out dead, diseased, or crossing branches, plus any suckers growing from the base. Thin out 15–20% of the canopy to improve airflow. Preserve scaffold branches (major structural limbs) to maintain the tree’s shape and fruit-bearing capacity.
What if my apple tree isn’t producing new growth after pruning?
Check these fixes:
- Light levels: Ensure the tree gets 6+ hours of sunlight daily—shady spots stunt growth.
- Soil health: Test for nutrients (especially nitrogen) and amend with compost or a balanced fertilizer.
- Watering: Deep water 1–2 inches per week during dry spells.
- Pests/disease: Inspect for borers, aphids, or fungal spots (like apple scab). Treat early!
Can I prune apple trees in summer for better new growth?
Yes, but lightly! Summer pruning (June–July) is best for correcting shape or removing water sprouts (fast-growing, vertical shoots). Avoid heavy cuts—this can stress the tree and reduce next year’s blooms. Always use sterilized tools to prevent disease spread.
What’s the difference between “heading back” and “thinning out”?
| Heading Back | Thinning Out |
|---|---|
| Cutting back a branch to a bud or lateral branch to encourage bushier growth. | Removing an entire branch back to the trunk or main limb to improve airflow and sunlight. |
| Use for stimulating new shoots in dense areas. | Use for opening the canopy and reducing disease risk. |
Pro tip: For apple trees, thinning out is often more effective for long-term health than heading back.
Wrapping up and next steps
Nurturing your apple tree’s new growth is the secret to vibrant spring blooms and a bountiful harvest!
By mastering strategic pruning—removing dead wood, thinning crowded branches, and shaping for airflow—you’re setting the stage for healthier fruit production. Don’t wait until spring; late winter or early spring is your best window to act.
Ready to transform your tree? Grab your pruners and get started! For extra confidence, sketch a simple pruning plan or consult a local arborist. Your future harvest—and your tree’s longevity—will thank you. 🌱✂️