
Pruning
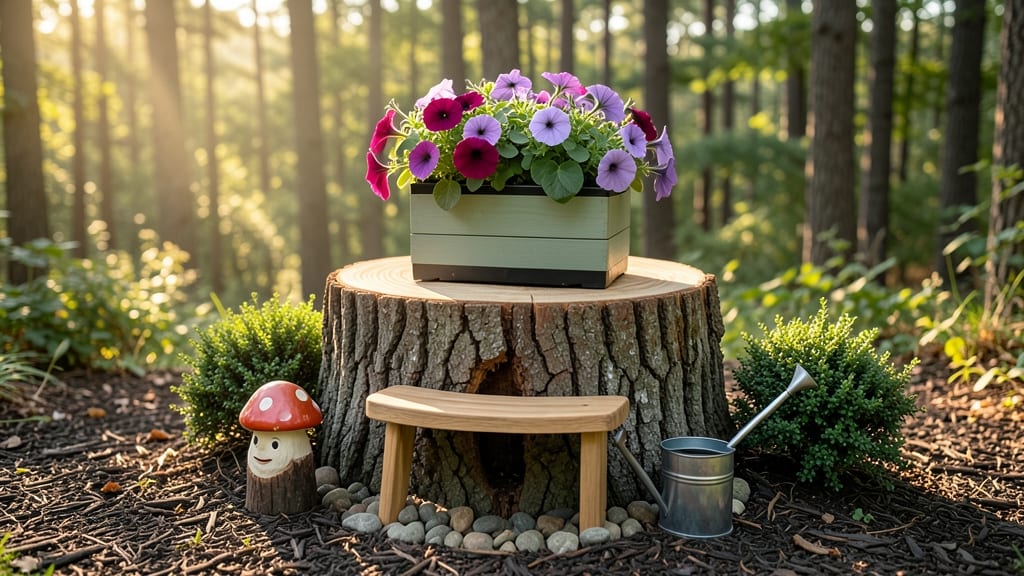
That disguised tree stump isn’t an eyesore—it’s a hidden garden gem waiting to shine. 🌿 I’ve turned stumps into thriving planters that double as seating, and the best part? It takes just one weekend. No fancy tools or expensive materials—just creativity and a few basic supplies.
The secret is simple: start by cleaning the stump, then line it with a waterproof barrier to protect it from moisture. Fill it with lightweight soil and plant drought-tolerant succulents or trailing flowers—something that thrives with minimal care.
The result? A low-maintenance centerpiece that adds texture and life to your yard.
By the end of the weekend, you’ll have a functional planter that’s also a conversation starter. Choose plants that spill over the edges for a soft, natural look, or go bold with a single statement plant. The stump becomes the star, not the problem.
Works for any yard size, from cozy patios to sprawling gardens. Plus, it’s a project that actually adds value—both to your outdoor space and your curb appeal. Ready to transform that stump into something stunning?
📚 In This Guide
- What you need
- Instructions
- Tips and common mistakes
- Wrapping up and next steps
What you need
- ● Tree stump: A freshly cut, clean stump (preferably with a flat top). Size varies based on preference.
- ● Drill: A power drill with 1/4-inch or 3/8-inch drill bits (for drainage holes).
- ● Saw: A handsaw or reciprocating saw (to trim rough edges if needed).
- ● Sandpaper: Medium-grit (80-120) for smoothing edges.
- ● Outdoor paint or stain: Weather-resistant, non-toxic option (e.g., Behr Premium or Rust-Oleum).
- ● Paintbrush or roller: For even application.
- ● Drainage material: Small gravel, pebbles, or broken pottery shards (1–2 inches deep).
- ● Potting soil: Lightweight, well-draining mix (e.g., Miracle-Gro or cactus/succulent blend).
- ● Plants: Choose stump-friendly options like ferns, moss, or shallow-rooted succulents.
- ● Stencils or decals for custom designs.
- ● Waterproof sealant (to protect paint from moisture).
- ● LED solar lights (for a magical nighttime glow).
- ● Waterproof adhesive (to attach lightweight decor like ribbons or charms).
Step-by-Step instructions for transforming a tree stump into a planter
Turn that eyesore into a functional, decorative planter with these simple steps.
🪴 Step 1: Clean and Prepare the Stump Surface
Start by removing any loose bark or debris from the stump using a wire brush or putty knife. This ensures your paint or planter materials adhere properly. I like to use a stiff-bristle brush to scrub away any moss or dirt trapped in the crevices—this step is critical for preventing rot later.
Once clean, sand the surface with 80-grit sandpaper to roughen it slightly. This helps with adhesion whether you're painting or applying sealant. Wipe away all dust with a damp cloth, then let the stump dry completely. If the stump is still wet, moisture can trap between layers and cause peeling or mold.
✂️ Step 2: Choose and Apply Your Design Treatment
For a painted planter, use exterior-grade paint designed for wood (like acrylic latex). Stir the paint thoroughly before applying—lumps will show up once it dries. I recommend two coats for full coverage, letting each dry for 4-6 hours between applications. For a more natural look, apply a wood sealant or stain instead—this preserves the wood's texture while protecting it.
If you're creating a raised bed, line the stump's interior with landscape fabric to prevent soil from washing out through cracks. Cut the fabric to fit snugly, then staple it securely along the edges. This step prevents soil erosion and keeps your planting medium contained—especially important if the stump has deep crevices.
🌱 Step 3: Add Drainage and Fill with Soil
Drill ½-inch drainage holes along the bottom of the stump if you're using it as a container. Space them every 4-6 inches to ensure water escapes freely. For larger stumps, you might need a cordless drill with a wood bit—just be patient and let the bit do the work to avoid splintering.
Fill the stump with a mix of topsoil and compost (a 50/50 blend works well). Press the soil lightly to eliminate air pockets, then add a 1-inch layer of mulch on top. This keeps moisture in and weeds out. I always test the soil's moisture by squeezing a handful—it should hold together but not drip water.
☀️ Step 4: Select and Plant Your Stump-Friendly Plants
Choose plants that thrive in shallow root conditions, like ferns, hostas, or ornamental grasses. Avoid deep-rooted varieties—they'll struggle in the confined space. For a vertical garden effect, use succulents or air plants secured with coconut coir or moss. These plants need minimal soil and adapt well to the stump's unique shape.
Water thoroughly after planting, then let the soil settle for 24 hours before adding more mulch. Monitor the first few weeks closely—stump planters dry out faster than ground-level beds. I set up a drip irrigation line around the base to keep moisture consistent without overwatering.
🌿 Step 5: Maintain and Enjoy Your New Planter
Check the soil moisture every 2-3 days during the first month, then adjust based on weather. Stump planters often need more frequent watering because their small volume drains quickly. Fertilize lightly with a balanced, slow-release fertilizer in spring and again in midsummer to support growth.
If you painted the stump, touch up any chipped areas annually. For natural finishes, reseal the wood every 2-3 years to protect against weathering. With proper care, your stump planter will last for years—turning a once-unwanted stump into a charming garden feature.
Tips & tricks for transforming a tree stump into a functional planter
These practical insights will help you avoid common pitfalls and create a planter that lasts for years.
Surface Prep Secret: Don't skip the sanding step in Step 1—it's the foundation for everything that follows. I've seen paint peel off within weeks when people skipped this. Use a 80-grit sandpaper and sand with the grain for a smooth finish. For extra adhesion, lightly dampen the sandpaper to reveal any hidden imperfections before drying completely. This ensures your paint or sealant bonds properly and lasts through seasons.
Paint Application Technique: When applying your two coats of exterior-grade paint in Step 2, work in thin, even layers rather than thick globs. Thick paint can trap moisture and lead to peeling. Let each coat dry for the full 4-6 hours—cutting corners here means repainting sooner. I like to use a small roller for the top surface and a brush for edges to ensure full coverage. For a more durable finish, consider adding a clear outdoor sealant after the paint dries completely.
Drainage System: In Step 3, when drilling your ½-inch drainage holes, space them closer together (every 3-4 inches) if your stump is particularly dense. This prevents water from pooling at the bottom where roots can rot. For very large stumps, consider adding a ½-inch PVC pipe vertically through the center as a main drain—this works beautifully for container-style planters. Always test your drainage by filling the stump with water and ensuring it drains completely within 10 minutes.
Soil Mix Strategy: The 50/50 blend of topsoil and compost in Step 3 is perfect, but add a handful of perlite or vermiculite to improve drainage if your climate is particularly rainy. For container-style planters, mix in a slow-release fertilizer directly into the soil at planting time—this eliminates the need for frequent feeding. I've found that adding a 1-inch layer of coarse sand at the very bottom before the soil mix creates an extra drainage layer that works wonders for preventing soggy roots.
Pro Tips for Disguise Tree Stump
- These practical insights will help you avoid common pitfalls and create a planter that lasts for years.
- Surface Prep Secret: Don't skip the sanding step in Step 1—it's the foundation for everything that follows. I've seen...
- Paint Application Technique: When applying your two coats of exterior-grade paint in Step 2, work in thin, even layer...
Frequently asked questions
Got questions about turning that eyesore into a stunning planter?
You’re not alone! Here are answers to the most common queries about disguising tree stumps—so you can tackle the project with confidence.
How long does it take to transform a tree stump into a planter?
Most DIYers complete the project in one weekend (4–8 hours total). Sanding and painting take the longest—plan for 2–3 hours if you’re doing it by hand. Power tools speed things up! Allow extra time for sealant to dry (usually 24 hours) before planting.
Do I need to remove the stump entirely, or can I work around it?
Nope! You can absolutely disguise the stump without removing it. The key is to sand it smooth, seal the wood, and add a sturdy planter box or liner (like a half-barrel or PVC pipe) to contain soil. Just ensure the stump is dry and stable—no rot or pests!
What’s the best paint or sealant for outdoor stump planters?
Use exterior-grade paint or stain (like Behr Premium or Rust-Oleum) for durability. For extra protection, add a waterproof sealant (e.g., Thompson’s WaterSeal). Avoid cheap paints—they’ll peel faster when exposed to rain and sun. Pro tip: Prime the stump first for a smoother finish!
Can I plant anything in a disguised stump planter?
Yes! Opt for shallow-rooted plants like succulents, herbs (basil, thyme), or small shrubs (e.g., dwarf boxwood). Avoid heavy feeders like tomatoes—they’ll drain soil quickly. Line the bottom with landscape fabric to prevent roots from touching the wood and rotting it over time.
What if my stump starts rotting after planting?
Rotting is a common issue if the wood isn’t properly sealed. Signs: Soft spots, mold, or a musty smell. Fix it: Remove decayed sections, sand smooth, and reapply sealant. For severe rot, consider replacing the planter liner (e.g., a plastic pot inside the stump) to extend its life.
Bonus Tip: Skip the sandpaper!
If sanding feels tedious, try a stump grinder attachment for your angle grinder (safety gear required!). For a rustic look, skip sanding entirely and use stain or dark paint to hide texture. Goal: Make it look intentional!
Wrapping up and next steps
Transforming an old tree stump into a stylish planter is a rewarding project that breathes new life into your garden—without breaking the bank.
Whether you opt for a rustic bucket, a chic painted design, or a cozy fairy garden, the possibilities are endless! 🌿✨ With just a little creativity and a weekend’s effort, you can turn an eyesore into a stunning centerpiece that enhances your outdoor space.
Ready to get started? Grab your supplies, roll up your sleeves, and let your imagination run wild! Your future planter is waiting—what will you create? 🛠️💚