
Pruning
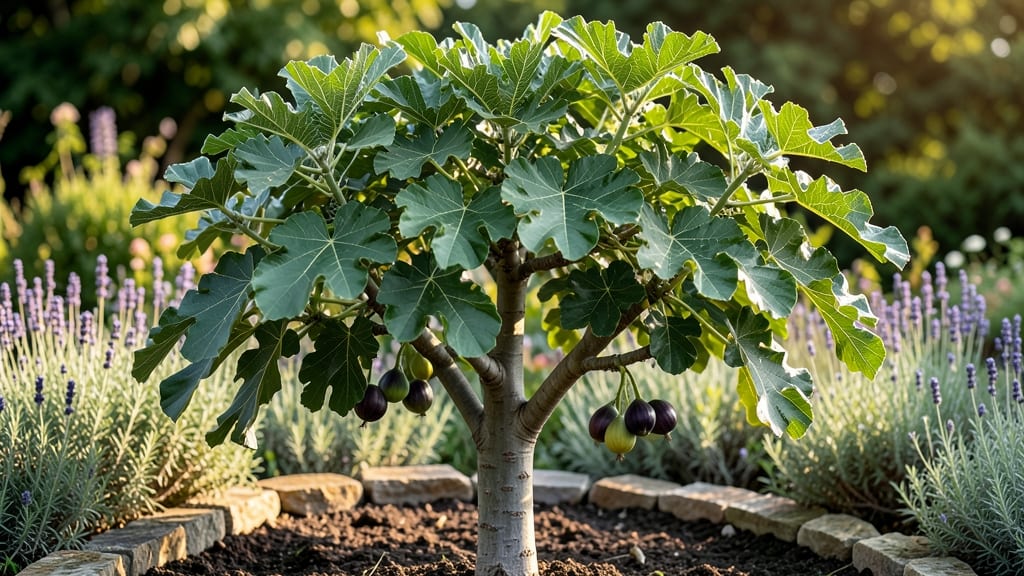
Shaping a fig tree into a stunning focal point takes just three strategic cuts—no fancy tools or years of experience required. 🌿 I’ve shaped mine into a graceful standard tree with a single trunk and lush canopy, and the transformation happens faster than you’d expect.
The key is understanding how figs respond to pruning (they’re forgiving but need direction), and I’ll show you exactly where to make those cuts for maximum impact.
Most people overthink fig pruning, but the secret is simplicity: focus on removing one central leader (the strongest upward branch) and thinning out crowded growth. My tree now has a balanced, open canopy that lets sunlight reach the fruit while keeping the shape elegant.
You’ll see new growth fill in within weeks, and the tree will reward you with heavier harvests because air circulates better.
This method works for both young trees (to establish shape early) and mature ones (to refresh their look). Whether you want a tall standard tree, a low espalier against a fence, or a bushy hedge, the same principles apply.
The best part? You’ll spend less than 30 minutes pruning each year once you get the hang of it.
Fair warning: figs grow fast, so check your tree twice a year—spring to shape new growth and late summer to clean up after harvest. The results? A tree that’s as beautiful as it is productive, with fruit you can actually reach without a ladder. Let’s get shaping!
📚 In This Guide
- What you need
- Instructions
- Tips and common mistakes
- Wrapping up and next steps
What you need
- ● Pruning shears or bypass pruners: Sharp, clean, and sterilized (7–10" blade length for medium branches). Avoid anvil pruners—they crush branches!
- ● Loppers: For thicker branches (18–24" cutting capacity). Test them first!
- ○ Hand pruners (optional): For delicate trimming (3–5" blade). Great for detail work.
- ● Rubbing alcohol (70%+) or bleach solution: 1 part bleach to 9 parts water for sterilizing tools between cuts.
- ● Gloves: Heavy-duty gardening gloves (cut-resistant if your tree has thorns).
- ○ Pruning sealant (optional): For sealing large cuts (e.g., Tanglefoot Tree Wound Pruning Seal).
- ● Measuring tape or ruler: To mark cut lengths (1/4" above a bud or branch collar).
- ● Ladder or step stool: Sturdy and tall enough to reach the tree’s canopy safely.
- ● Disposable bags or bucket: For collecting pruned branches (1–2 gallon capacity).
- ● Best time to prune: Late winter or early spring (before new growth starts) for optimal healing.
- ● Tree health check: Ensure your fig tree is disease-free (no signs of fungal spots or pests).
- ● Weather: Choose a dry, cloudy day to minimize stress on the tree.
- ● Safety first: Wear closed-toe shoes and avoid pruning near power lines!
How to shape a fig tree canopy in 3 simple cuts
Here’s the straightforward method I’ve used to turn wild fig growth into a balanced, sculpted shape—no fancy tools or years of experience required.
🌿 Step 1: Identify the Main Branches to Shape
Start by examining your fig tree’s structure. Look for 3-4 main branches that form the tree’s natural framework—these will become your primary scaffold. Choose branches that are at least ½ inch thick and spaced evenly around the trunk. These are the ones you’ll focus on shaping first.
Real talk: If your tree has more than 4 main branches, you’ll need to thin some out completely. Use sharp pruning shears to cut branches back to the trunk at a 45-degree angle, just above a bud or outward-facing leaf. This prevents water from pooling on the cut and encourages new growth in the right direction.
✂️ Step 2: Trim Back Overlapping or Crossing Branches
Next, remove any branches that are rubbing against each other or growing inward toward the center of the tree. These compete for sunlight and nutrients, and they’ll eventually weaken the tree. Cut these branches back to a healthy side branch or bud, making sure your cut is just above the growth point you want to encourage.
Here’s the thing—fig trees grow fast, so don’t overthink this step. If you see two branches crossing, remove the smaller one or the one that’s growing at a less desirable angle. You’ll know you’re on the right track when the tree starts looking more open and airy, with branches spreading outward like an umbrella.
☀️ Step 3: Shape the Outer Canopy for Balance
Now it’s time to refine the outer shape. Focus on the outermost branches and trim them back by about one-third to encourage bushier growth. Cut just above a leaf node or bud, and avoid leaving stubs—this prevents disease. For a rounded canopy, aim to keep the branches evenly spaced around the tree.
Watch for branches that are growing too long or leggy. These can be shortened by up to half to promote denser foliage. After trimming, step back and visualize the tree’s shape. If one side looks heavier, adjust by trimming back branches on that side slightly more. This ensures your fig tree stays balanced and doesn’t lean too much in one direction.
⏰ Step 4: Clean Up and Monitor Growth
Once you’ve made your cuts, clean up any dead, diseased, or broken branches—these can harbor pests or infections. Sterilize your pruning tools with rubbing alcohol to prevent spreading any potential issues. After pruning, give your fig tree a deep watering to help it recover and encourage new growth.
Over the next few weeks, keep an eye on how the tree responds. You’ll see new shoots emerging from the cuts you made, and these will fill in the gaps. If any branches grow too aggressively in an unwanted direction, you can trim them back again in 3-4 months to maintain the shape. This is an ongoing process, but you’ll be amazed at how much difference just a few cuts can make!
Tips & tricks for perfect fig tree canopy shaping
Here's what nobody tells you—those small details make all the difference when sculpting your fig tree.
Branch Thickness Matters: In Step 1, when selecting your 3-4 main branches, focus on ones that are at least ½ inch thick. Thinner branches won't support the weight of future fruit and foliage. I've learned this the hard way after seeing too many weak branches snap under heavy figs. Look for branches that show good structural integrity—tap them gently with your pruning shears, and if they bend easily, they're not strong enough to keep.
The 45-Degree Angle Secret: When making cuts in Step 1 and Step 2, that 45-degree angle isn't just for looks—it's about water runoff. A flat cut collects water, which can rot the branch. The angled cut directs water away from the cut surface. Make sure your pruning shears are sharp enough to cut cleanly; dull blades crush the wood and create jagged edges that heal poorly. I keep a small file in my pruning kit just for this purpose.
Visualizing the Umbrella: After shaping in Step 3, step back and visualize your tree as an umbrella. The branches should spread outward naturally, creating an open canopy that allows sunlight to reach all parts of the tree. If one side looks heavier, that's your cue to trim back branches on that side slightly more. This balance is what prevents your tree from developing a lopsided shape over time. Think of it as creating a dome shape—even if your tree isn't perfectly round, the goal is symmetry.
Timing Your Second Trim: The instructions mention trimming back aggressive growth in 3-4 months. This is your opportunity to refine the shape further. I recommend doing this in late winter or early spring, just before the tree starts its active growth phase. This timing gives the tree time to heal from any cuts before the growing season begins. You'll notice new shoots emerging from the cuts you made earlier—these will help fill in any gaps in your canopy.
Pro Tips for Fig Tree Shape
- Here's what nobody tells you—those small details make all the difference when sculpting your fig tree.
- Branch Thickness Matters: In Step 1, when selecting your 3-4 main branches, focus on ones that are at least ½ inch thick.
- The 45-Degree Angle Secret: When making cuts in Step 1 and Step 2, that 45-degree angle isn't just for looks—it's about water runoff.
Frequently asked questions
Got questions about shaping your fig tree’s canopy? We’ve got answers! Whether you’re a pruning pro or just starting, these FAQs will help you navigate the process with confidence.
What’s the best time of year to prune a fig tree for shaping?
The ideal time is late winter or early spring (before new growth starts) or right after harvest in fall. Avoid pruning during extreme heat or cold—fig trees heal best in mild weather. If you’re shaping for fruit production, spring is key!
How many cuts should I make to shape my fig tree?
Start with just 3 strategic cuts (as the article suggests) to define the canopy’s shape. Over-pruning can stress the tree. Focus on removing dead, crossing, or overcrowded branches first, then sculpt. Think of it like giving your tree a light haircut—not a buzz!
Will pruning affect my fig tree’s fruit production?
Done correctly, pruning boosts fruit production by improving airflow and sunlight. However, avoid cutting back more than 25% of the canopy in one go—this can reduce fruiting. If your tree is young, prioritize shaping over heavy cuts to encourage growth.
What should I do if my fig tree starts bleeding sap after pruning?
Sap bleeding is normal but can attract pests. To minimize it, use sharp, clean tools and prune on a dry day. Seal larger cuts with pruning sealant (optional for figs, but helpful in humid climates). Avoid overwatering after pruning to help the tree recover faster.
Can I shape a fig tree that’s already overgrown or neglected?
Yes! If your tree is severely overgrown, prune gradually over 2–3 years to avoid shock. Start by removing dead wood and suckers, then focus on thinning the canopy. For neglected trees, spring is the best time to tackle major reshaping.
Wrapping up and next steps
Mastering the fig tree shape through strategic pruning isn’t just about aesthetics—it’s about unlocking your tree’s full potential! 🌿 With just three simple cuts, you can sculpt a balanced, healthy canopy that thrives year after year.
Whether you’re a seasoned gardener or a curious beginner, these techniques make the process effortless and rewarding.
Ready to transform your fig tree? Grab your pruners, review the steps, and get hands-on—your tree (and future harvests!) will thank you. Start today and watch your tree flourish! 🌱