
Propagation
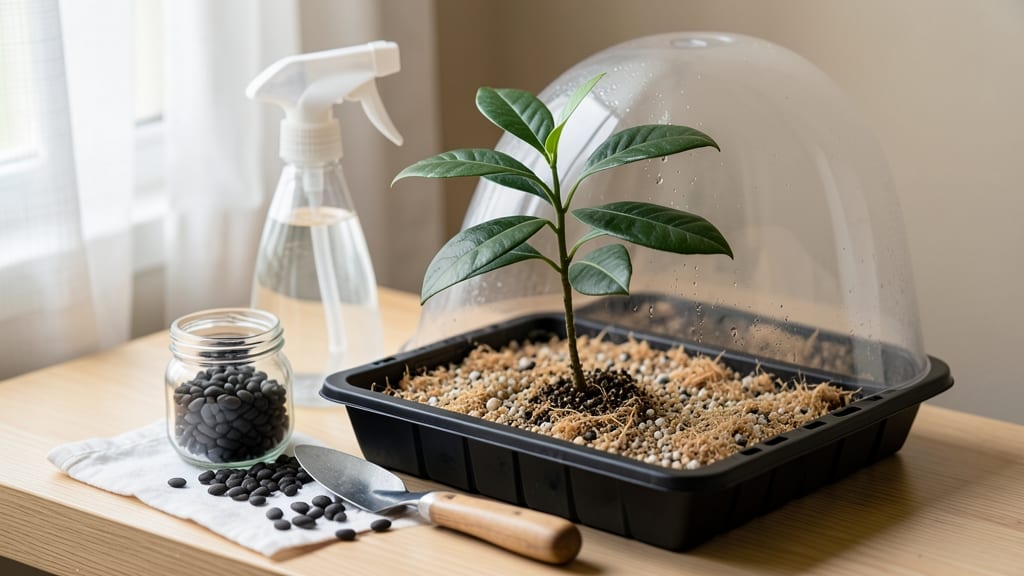
Growing a clove tree from seeds means fragrant spice plants on your windowsill in just 6 weeks—though the real payoff takes years. 🌱 The trick starts with fresh, viable seeds (store-bought cloves won't work—they're dried and dead).
I learned this the hard way after my first batch of grocery-store cloves sat in damp paper towels for weeks with no sprouts.
You'll need a humid propagation setup, well-draining potting mix, and patience for the slow start. Most seeds take 2-4 weeks to crack through their tough shell, and the first seedlings grow like snails.
But once they break through, those glossy leaves tell you you're on the right track—this is where the magic begins.
By month three, you'll have sturdy young trees ready for repotting, their leaves smelling faintly of the spice they'll one day produce. The real reward? A living connection to the world's most valuable spice, growing in your own home.
Just don't expect clove buds for another 5-7 years—this is a marathon, not a sprint.
Works best in warm climates or as a houseplant, though they'll need bright light year-round. Here's how to keep those first seedlings thriving through their critical early months without losing them to damp-off or leggy growth.
📚 In This Guide
- What you need
- Instructions
- Tips and common mistakes
- Wrapping up and next steps
What you need
- ● Clove seeds: 5-10 fresh, plump seeds (harvested from organic cloves or store-bought, but avoid ground spices).
- ● Well-draining potting mix: 2-3 gallons of a blend of peat moss, perlite, and coconut coir (70:20:10 ratio).
- ● Small pots or seed trays: 4-6 3-4 inch diameter pots with drainage holes.
- ● Plastic wrap or humidity dome: To maintain moisture during germination.
- ● Spray bottle: For gentle watering (avoid soaking).
- ● Grow lights or sunny windowsill: A south-facing window or LED grow lights (12+ hours/day) for seedlings.
- ● Fertilizer: A balanced liquid fertilizer (10-10-10) or organic compost tea (diluted).
- ● Pruning shears: Small, sharp pair for future trimming.
- ● Seed scarifier: Lightly sand seeds to speed up germination (if seeds are hard-coated).
- ● Heating mat: Keeps soil at 75-85°F (24-29°C) for faster sprouting.
- ● Humidity tray: A shallow tray with pebbles and water to boost moisture.
- ● pH test kit: Ensures soil pH is 5.5-6.5 (ideal for clove trees).
- ● Mulch: Pine bark or shredded leaves to retain soil moisture.
Step-by-step instructions for growing clove trees from seeds
Ready to grow fragrant clove trees? Here's my foolproof method for sprouting these tropical beauties.
🌱 Step 1: Prepare Seeds for Faster Germination
Clove seeds have a tough outer shell that slows germination. First, soak them in warm water for 24-48 hours to soften the coating. Change the water every 12 hours to prevent mold. You'll know they're ready when the outer layer starts to loosen—just press gently with your fingernail.
After soaking, wrap the seeds in a damp paper towel and place them in a sealed plastic bag. Store in a warm spot (80-85°F), like on top of your fridge. Check daily—when the seeds split open slightly, they're ready to plant. This pre-treatment cuts germination time from 6-8 weeks to just 2-3 weeks.
🪴 Step 2: Plant in Well-Draining, Warm Soil Mix
Use a light, airy potting mix designed for tropical plants. I blend equal parts peat moss, perlite, and coconut coir to ensure excellent drainage—clove trees hate soggy roots. Fill small pots (3-4 inches deep) with the mix and moisten it until damp but not wet.
Plant each seed ½ inch deep in its own pot. Space them 2 inches apart if using a single container. Press lightly around the seeds to make good contact with the soil. Place the pots in a warm, humid environment (like a propagator or covered tray) to encourage sprouting.
☀️ Step 3: Provide Consistent Warmth and Humidity
Clove seeds need steady warmth (75-85°F) to germinate. Place a seedling heat mat underneath the pots or keep them near a warm spot in your home. A humidity dome or plastic wrap helps maintain moisture—just remove it daily for 10 minutes to prevent mold.
Keep the soil evenly moist but never soggy. You'll see tiny sprouts in 2-3 weeks—they'll look like tiny green shoots breaking through the surface. Once they appear, move the pots to a bright, indirect light spot. Avoid direct sun until seedlings are 2 inches tall.
🌿 Step 4: Transplant and Train for Strong Growth
After 4-6 weeks, when seedlings have 2-3 sets of true leaves, transplant them into 5-inch pots with fresh potting mix. Handle the seedlings gently—they're delicate at this stage. Water lightly after transplanting to help settle the roots.
Clove trees grow best in bright, indirect light with 70-80°F temperatures. Rotate the pots quarter-turn weekly so they grow straight. Once they reach 6 inches tall, you can gradually introduce morning sun to harden them off for outdoor conditions.
⏰ Step 5: Maintain Through the First Year
Water when the top inch of soil feels dry, but avoid letting the roots sit in water. Fertilize lightly every 4-6 weeks with a balanced tropical plant fertilizer. Prune leggy growth to encourage bushier development—just snip above a leaf node to promote branching.
By 12 months, your clove trees should be 2-3 feet tall with a sturdy trunk. They'll still need 3-5 years to produce cloves, but the journey is worth it. Keep them warm in winter (above 60°F) to prevent dormancy.
Tips & tricks for growing clove trees from seeds
Here's what nobody tells you about getting those clove seeds to sprout like a pro.
Soaking Secret: When you're soaking those clove seeds for 24-48 hours, use warm water that's around 85°F—this mimics their tropical growing conditions. I like to place the bowl on top of my fridge to maintain consistent warmth. The key is changing the water every 12 hours—this prevents mold growth while keeping the seeds hydrated. If you notice any white fuzz developing, that's mold, and you'll need to start fresh with new seeds.
Planting Depth Matters: Those ½-inch deep plantings might seem shallow, but clove seeds need room to breathe. Press the soil gently around the seeds to ensure good contact without compacting it too tightly. I've found that using small pots (3-4 inches deep) gives the roots plenty of space to establish without getting waterlogged. If you're planting multiple seeds in one container, keep them 2 inches apart to prevent overcrowding as they grow.
Germination Timeline: The 2-3 week window for sprouting can feel like forever, but there's a trick to speed things up. After planting, place a clear plastic bag over the pots to create a mini greenhouse effect—just remember to remove it for 10 minutes daily to prevent mold. You'll know you're on track when you see those first tiny green shoots breaking through the soil. If nothing appears after 3 weeks, gently check for signs of life by pressing lightly on the soil surface.
Light Transition: Moving your seedlings from warm, humid conditions to bright indirect light is crucial. Start by placing them near an east-facing window where they'll get gentle morning sunlight. Once they reach 2 inches tall, you can gradually introduce more light by moving them to a south-facing window for a few hours each day. Sudden exposure to direct sun can scorch those delicate young leaves, so take it slow—think of it like sunbathing for your plants!
Pro Tips for Grow Clove Tree From Seeds
- Here's what nobody tells you about getting those clove seeds to sprout like a pro.
- Soaking Secret: When you're soaking those clove seeds for 24-48 hours, use warm water that's around 85°F—this mimics their tropical growing conditions.
- Planting Depth Matters: Those ½-inch deep plantings might seem shallow, but clove seeds need room to breathe.
Frequently asked questions
Got questions about sprouting your own clove tree from seeds? You’re not alone—here are answers to the most common curiosities! Whether you're troubleshooting slow growth or wondering about alternatives, we’ve got you covered.
How long does it take for clove tree seeds to germinate?
Clove tree seeds (Syzygium aromaticum) can take anywhere from 2 to 6 weeks to germinate, depending on conditions like warmth (75–85°F) and moisture. Patience is key—keep the soil consistently damp and avoid overwatering, which can rot seeds. If nothing sprouts after 6 weeks, try fresh seeds or check for viability by soaking in warm water (sinkers are likely dead).
Can I grow a clove tree indoors?
Yes! Clove trees thrive indoors with bright, indirect light (like a south- or west-facing window) and high humidity (60%+). Use a grow light if natural light is limited, and mist leaves or place a tray of water nearby. Just avoid drafts or cold spots—these tropical plants need warmth year-round (ideal temp: 65–85°F).
Why aren’t my clove tree seedlings growing fast?
Slow growth is often due to lack of light, nutrients, or warmth. Move seedlings to a sunnier spot (or under grow lights), and fertilize lightly with a balanced liquid fertilizer every 4–6 weeks. Overcrowding can also stunt growth—thin seedlings to 6+ inches apart once they’re 3–4 inches tall. If leaves yellow, check for root rot or underwatering.
What’s a faster alternative to growing from seeds?
If you’re eager for cloves, consider propagating from cuttings instead! Take 4–6 inch stem cuttings from a healthy clove tree, dip in rooting hormone, and plant in moist perlite or sand. Roots form in 4–8 weeks—much quicker than seeds! Just ensure your source plant is disease-free for best results.
Do clove trees need special soil?
Clove trees prefer well-draining, slightly acidic soil (pH 5.5–6.5). Mix equal parts peat moss, perlite, and coconut coir for a light, airy blend. Avoid heavy garden soil, which can suffocate roots. For containers, ensure drainage holes are present to prevent waterlogging—root rot is a common killer of young seedlings!
Wrapping up and next steps
Growing a clove tree from seeds is a rewarding journey—full of patience, care, and the joy of nurturing life from tiny beginnings! 🌱 With the right conditions, you’ll watch those seeds sprout into fragrant, aromatic plants that could one day yield your own homegrown cloves. Start small, stay consistent, and trust the process!
Now that you’re armed with the know-how, why not take the next step? Try planting those seeds this weekend and document your progress. Share your clove-growing adventures with fellow gardeners—you might just inspire someone else to start their own spice garden! 🌿