
Planting
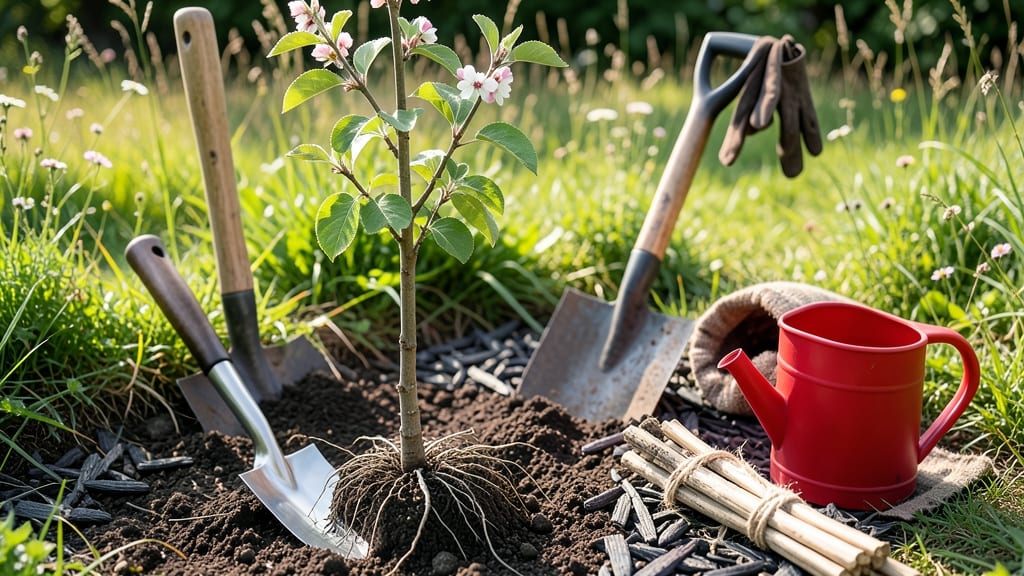
Learning how to plant an apple tree step by step is one of the most rewarding long-term gardening projects you can start—because in five years, you'll be harvesting fruit from a tree you nurtured. 🌱 The key to success isn't just digging a hole; it's choosing the right spot, prepping the soil, and giving your young tree the best possible start for winter survival.
I planted my first tree last autumn, and now it's already sending out new shoots—proof that patience pays off with apples on the branch.
You'll need a few simple supplies: a cold-hardy apple tree seedling (dwarf varieties are perfect for small spaces), a shovel, compost, mulch, and a 10-foot radius of open space where sunlight can reach for at least 6 hours a day.
The best time to plant is in early spring or late fall, when the ground is workable but not frozen. If you plant in spring, give the roots a chance to establish before summer heat arrives.
Once you've picked your spot, dig a hole twice as wide as the root ball but no deeper—planting too deep can suffocate the roots.
Loosen the soil at the bottom of the hole, mix in compost, and set the seedling in so the graft union (the bump where the scion meets the rootstock) sits 2-3 inches above soil level. This protects it from rot and encourages strong growth.
Backfill, water deeply, and mound mulch around the base to retain moisture and regulate temperature.
After planting, the real work begins: watering weekly (10-15 gallons), pruning in late winter to shape the tree, and watching for pests like aphids or borers.
My tree's first harvest was just a few small apples, but the year after, we had enough to make a pie—and the satisfaction of growing your own fruit is unmatched. Stick with it, and you'll be enjoying homegrown apples for decades.
📚 In This Guide
- What you need
- Instructions
- Tips and common mistakes
- Wrapping up and next steps
What you need
- ● Apple tree seedling or bare-root sapling (choose a cold-hardy variety like Honeycrisp, Granny Smith, or McIntosh).
- ● Shovel or digging spade (for planting and loosening soil).
- ● Garden fork or tiller (to aerate heavy or compacted soil).
- ● Organic compost or well-rotted manure (5–10 gallons, depending on hole size).
- ● Mulch (straw, wood chips, or pine needles) (2–3 inches, spread in a 3-foot radius around the base).
- ● Pruning shears or loppers (for trimming dead branches or shaping the tree).
- ○ Tree stake (optional but recommended for young trees) (1–2 stakes, 4–6 feet tall).
- ● Tree tie or soft garden twine (to secure the tree to the stake).
- ● Watering can or hose with a gentle spray nozzle (for post-planting hydration).
- ● Garden gloves (to protect your hands from thorns and soil).
- ● Soil test kit (to check pH and nutrient levels—apple trees thrive in slightly acidic soil, pH 6.0–6.5).
- ● Slow-release fertilizer (balanced 10-10-10 or organic options like fish emulsion).
- ● Tree guard or protective barrier (to deter rabbits or deer from nibbling young bark).
- ● Drip irrigation system (for consistent moisture, especially in dry climates).
- ● Pest control (neem oil or copper spray) (preventative measure for aphids or borers).
Step-by-Step guide to planting an apple tree for long-term fruit
Here's the method I trust for planting cold-hardy apple trees that thrive for decades.
🪴 Step 1: Choose the Right Location and Prepare the Soil
Apple trees need full sun (6-8 hours daily) and well-draining soil with a pH between 6.0 and 7.0. I always test my soil first—you can buy a simple kit at any garden center. If your soil is heavy clay, amend it with 2-3 inches of compost mixed into the top 12 inches of soil. Dig a hole twice as wide as the root ball but only as deep—planting too deep suffocates the roots.
Here's the thing—apple trees have shallow roots that spread wide, so avoid compacting the soil around the edges. Loosen the native soil with a broadfork to encourage root expansion. If you're planting in fall, do it at least 6 weeks before frost so roots establish before winter. Spring planting works too, but get it done before buds swell.
🌱 Step 2: Plant the Seedling at the Correct Depth
Remove the tree from its container and gently tease the roots outward if they're circling. Position the root flare—the swollen area where roots meet trunk—just above soil level. This prevents the trunk from sitting too deep, which causes rot. Place the tree in the center of the hole and backfill with native soil mixed with 1 part compost.
Don't pack the soil too tightly—you want air pockets for root growth. Water deeply to settle everything, then create a 4-inch high berm around the outer edge of the hole. This directs water toward the roots during irrigation. I always add a 3-inch layer of wood chips around the base (but keep it 6 inches away from the trunk) to retain moisture and suppress weeds.
☀️ Step 3: Install a Support System and Watering Plan
Young apple trees need staking for the first 2 growing seasons to prevent wind rock. Use 2 wooden stakes driven into the ground 12 inches from the trunk and tie the tree to them with soft tree ties—not wire, which cuts into bark. Space the ties 6 inches apart vertically. Water immediately after planting to eliminate air pockets in the soil.
Real talk: Overwatering is worse than underwatering for young trees. Water 1-2 times per week during the first year, giving 10 gallons per tree each time. You'll know it's enough when water drains 6 inches deep into the soil. Mulch helps retain moisture, but check soil moisture with your finger—top 2 inches should feel dry before watering again.
✂️ Step 4: Prune for Structure and Disease Prevention
Prune immediately after planting to remove any broken or crossing branches. Use clean, sharp pruners to make cuts just outside the branch collar—the swollen area where the branch meets the trunk. Open the canopy slightly to improve airflow, which reduces fungal diseases like apple scab. Remove any suckers (shoots growing from the base) and water sprouts (vertical shoots growing from the trunk).
This is the moment that matters: Apply a 2-inch layer of mulch around the base, but never touch the trunk. The goal is to protect roots from temperature swings while keeping the trunk dry. I always fertilize lightly with 10-10-10 at half strength after planting to give the tree a gentle nutrient boost without overwhelming it.
⏰ Step 5: Monitor and Maintain for First-Year Success
Check the tree weekly for signs of stress—yellowing leaves, wilting, or pest activity. Apple trees are susceptible to codling moths and aphids, so I inspect the undersides of leaves regularly. If you see pests, treat with horticultural oil or insecticidal soap early. Water deeply every 7-10 days during dry spells, always directing water at the base, not the foliage.
Here's where it gets fun—watch for the first signs of growth in spring. You'll see new leaves emerge within 2-3 weeks of warm weather. By the end of the first year, your tree should have established roots and a strong framework for future fruit production. The key is patience—apple trees typically take 4-6 years to bear fruit, but proper planting now ensures decades of harvests.
Tips & tricks for perfect apple tree planting
These game-changing insights will help you avoid common pitfalls and set your cold-hardy apple tree up for decades of success.
Soil Preparation Secret: When amending heavy clay soil with 2-3 inches of compost in Step 1, mix it into the top 12 inches—not just the surface. This creates a deep, well-draining zone where roots can spread horizontally. I've seen trees planted in unamended clay struggle for years, while amended soil produces trees that thrive within their first season. The key is working that compost deep enough to break up compaction.
Root Flare Placement: In Step 2, positioning the root flare just above soil level is non-negotiable. I've seen too many gardeners bury it too deep, which causes trunk rot and stunted growth. After planting, gently pull back the mulch to verify the flare is visible—it should be the highest point where roots meet trunk. This simple check prevents years of frustration down the road.
Watering Wisdom: The 1-2 times per week guideline in Step 3 is perfect, but timing matters just as much. Water deeply in the morning so leaves dry quickly—this prevents fungal diseases like apple scab. I always check soil moisture by pushing my finger 2 inches down; if it feels dry, that's when I water. The goal is consistent moisture without waterlogging, which can suffocate roots.
Pruning Pro Tip: When pruning in Step 4, make your cuts just outside the branch collar where it meets the trunk. This ensures the tree can seal the wound properly. I like to prune on a dry day when branches are less likely to spread disease. The first year's pruning sets up your tree's structure—take your time and aim for an open center that allows sunlight to reach all branches.
Pro Tips for Plant An Apple Tree Step By Step
- These game-changing insights will help you avoid common pitfalls and set your cold-hardy apple tree up for decades of success.
- Soil Preparation Secret: When amending heavy clay soil with 2-3 inches of compost in Step 1, mix it into the top 12 inches—not just the surface.
- Root Flare Placement: In Step 2, positioning the root flare just above soil level is non-negotiable.
Frequently asked questions
Got questions about planting your apple tree? You’re not alone! Here are some of the most common concerns—and their straightforward answers—to help you grow with confidence.
What’s the best time of year to plant an apple tree?
Plant your apple tree in early spring (just before buds swell) or late fall (6–8 weeks before the first frost). Spring planting gives roots time to establish before summer heat, while fall planting allows roots to grow in cool soil. Avoid planting in extreme heat or freezing conditions!
Can I plant an apple tree from a seed, or should I buy a grafted sapling?
While you can grow an apple tree from seed, it’s a gamble—your tree may produce fruit that’s very different (or even inedible!) from the parent. For reliable, cold-hardy varieties, opt for a grafted sapling from a nursery. These trees bear fruit faster and match the expected taste and size.
How do I protect my apple tree in winter?
Young trees (under 3 years old) need extra care. Wrap the trunk with tree guard or burlap to prevent rodent damage, and mound mulch (4–6 inches) around the base (but not touching the trunk). Avoid heavy snow buildup on branches—gently brush it off to prevent breakage. Older trees usually handle winter well!
What pests or diseases should I watch for after planting?
Keep an eye out for apple maggots, aphids, and fire blight (a bacterial disease causing blackened branches). Use neem oil or insecticidal soap for pests, and prune infected branches 6 inches below the damage to prevent spread. Regularly inspect leaves and fruit for early signs!
How far apart should I plant multiple apple trees?
Space trees 20–25 feet apart for proper airflow and sunlight. If growing pollination partners (different varieties needed for fruit production), plant them within 50 feet of each other. Dwarf varieties can be planted closer (12–15 feet), but they’ll still need room to mature.
Wrapping up and next steps
Planting your own apple tree is a rewarding journey that blends patience with the joy of nurturing life! 🌱 By following these step-by-step instructions, you’ve equipped yourself with everything needed—from selecting cold-hardy varieties to providing the perfect care for seedlings.
Remember, every expert gardener started with a single seedling, so take pride in your progress.
Now that you’re ready to dig in, your next logical step is to mark your calendar for seasonal tasks like pruning, fertilizing, or even grafting new varieties. Happy planting—your future harvest of crisp, homegrown apples is just around the corner! 🍏✨