
Propagation
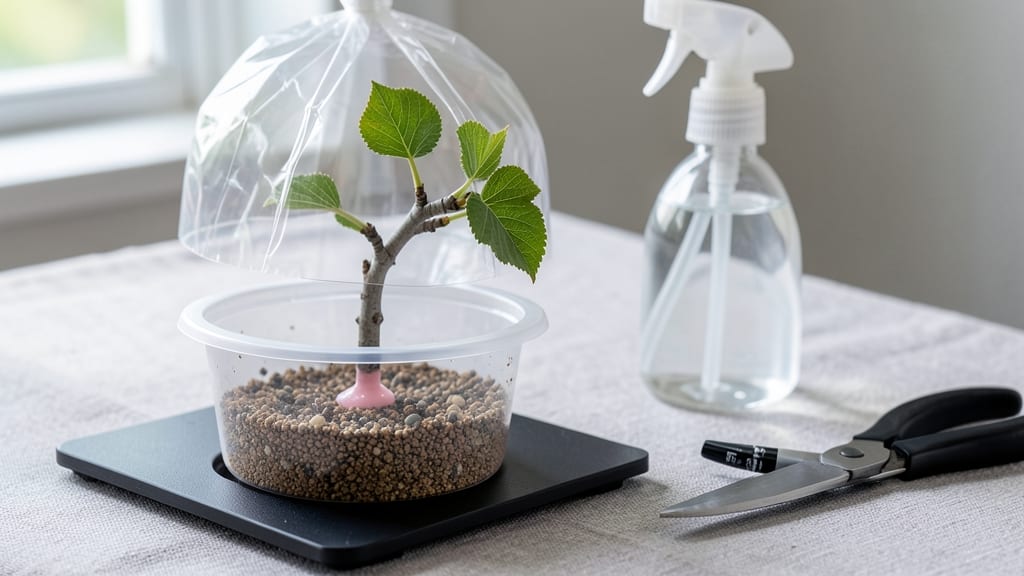
Starting a redbud tree from a cutting means you could grow a stunning spring bloomer without buying a nursery sapling. 🌿 I’ve propagated redbuds this way three times now, and the secret lies in timing—semi-hardwood cuttings in late summer (around August) give the best rooting success.
The process is simple but requires patience: take 4-6 inch cuttings, dip them in rooting hormone, and plant them in a mix of perlite and peat moss. Keep the soil moist and the pot in a warm, shaded spot—roots usually appear in 6-8 weeks if humidity stays high.
Once roots form, you’ll see new growth in spring, and within a year, you’ll have a small tree ready for transplanting. The payoff? A tree with heart-shaped pink blooms that outshines anything you’d buy. This method works for other trees too, like dogwood or serviceberry. Let’s get those cuttings rooted!
📚 In This Guide
- What you need
- Instructions
- Tips and common mistakes
- Wrapping up and next steps
What you need
- ● Mature redbud cutting: A 4–6 inch (10–15 cm) semi-hardwood stem from a healthy redbud tree, taken in late spring or early summer. Ensure it has 2–3 leaf nodes.
- ● Rooting hormone: A powder or gel (e.g., Clonex or Rootone) to boost root growth.
- ● Sharp pruning shears or knife: Sterilized to make clean cuts and avoid damage.
- ● Small pot or container: 4–6 inches (10–15 cm) deep, with drainage holes (e.g., plastic nursery pot or yogurt cup).
- ● Well-draining potting mix: A blend of perlite, vermiculite, and peat moss (or a pre-mixed seed-starting mix).
- ● Plastic bag or clear dome: To create a humid environment (e.g., a gallon-sized Ziploc bag with holes punched for airflow).
- ● Spray bottle: With water to mist the cutting and maintain moisture.
- ● Twist tie or rubber band: To secure the plastic bag around the pot.
- ● Watering can or spray bottle: For gentle hydration.
- ● Heat mat: Set to 70–75°F (21–24°C) to encourage faster rooting.
- ● Fogging system: For consistent humidity if you’re propagating multiple cuttings.
- ● Label or marker: To track your cutting’s progress (e.g., date and variety).
- ● Fungicide: Like Mycorrhizal inoculant to prevent rot.
Step-by-step instructions for propagating redbud trees from cuttings
Layering is the secret to success—here's how to coax roots from redbud cuttings using simple techniques.
🌿 Step 1: Select and Prepare Healthy Cuttings
Choose semi-hardwood cuttings from current year's growth in late summer or early fall, when stems are firm but still green. Look for 4-6 inch long sections with 2-3 leaf nodes—these are the spots where roots will form. Use clean, sharp pruners to make a 45-degree angle cut just below a node.
Strip the lower leaves completely, leaving only the top 2-3 leaves to reduce moisture loss. I like to make a small slit in the bark at the base of the lowest node—this helps roots emerge more easily. Dip the cut end in rooting hormone (optional but recommended) to boost success rates. Real talk: if the cutting feels mushy or oozes sap, it's too old and won't root.
💧 Step 2: Create the Layering Setup
Select a mature redbud tree with flexible, healthy branches. Choose a 1-2 year old branch that can bend without snapping. Make a small cut about 1/3 of the way through the bark at a node, then bend the branch downward and secure it with a U-shaped wire stake or clothespin.
Cover the cut section with moistened sphagnum moss (about 2-3 inches thick) and wrap it tightly with clear plastic wrap. The moss should stay damp but not soggy—think of a wrung-out sponge. Secure the entire bundle with more plastic wrap or a twist tie. You'll see tiny roots forming through the moss in 6-8 weeks if conditions are right.
☀️ Step 3: Maintain Ideal Conditions for Root Development
Keep the layered cutting in partial shade (morning sun is best) and water the moss every 2-3 days until it feels damp to the touch. Overwatering here causes rot—you want moisture without standing water. A 60-70°F soil temperature range speeds up root growth, so avoid extreme heat or cold.
Check weekly for signs of stress: if leaves yellow or wilt, uncover slightly to improve airflow. Once roots are 1-2 inches long (visible through the plastic), you're ready to separate. I always mark the date on the plastic wrap so I don't forget—patience is key with redbuds.
✂️ Step 4: Separate and Transplant New Plants
When roots are well-established (usually late fall to early spring), carefully cut the rooted cutting from the parent plant using sterilized pruners. Gently remove the plastic wrap and moss, then transplant immediately into a 4-6 inch pot filled with well-draining potting mix. Water thoroughly until it drains from the bottom.
Place the new plant in bright, indirect light for the first month to reduce transplant shock. After 4-6 weeks, you can acclimate it to full sun. Here's the thing—redbuds are sensitive to root disturbance, so handle carefully. If the roots break easily, they're not ready to separate yet.
🪴 Step 5: Care for Young Redbud Trees
Keep newly transplanted cuttings in pots for 1 growing season before planting outdoors. Water deeply once a week, letting the top 1-2 inches of soil dry between waterings. Fertilize lightly with a balanced 10-10-10 formula in spring to encourage strong growth without burning tender roots.
By their second year, your redbud cuttings will be ready for permanent planting. Choose a location with full sun and well-draining soil—redbuds hate soggy feet. Mulch around the base with 2-3 inches of organic mulch to retain moisture and protect roots during temperature swings.
Tips & tricks for perfect redbud tree layering
Here's what nobody tells you about getting those roots to grow—these tricks will make all the difference.
Timing is Everything: Late summer to early fall is your sweet spot for semi-hardwood cuttings. The stems need to be firm but still green—think of them like a ripe but not overripe fruit. If you miss this window, wait until early spring when new growth starts. I've tried this in summer and the cuttings just wilted without rooting, so don't rush!
Node Location Matters: Those 2-3 leaf nodes are where roots will form, so position them right at the base of your moss layer. Make sure the slit you create in the bark at the lowest node is clean and about 1/4 inch deep—this tiny cut helps the roots emerge more easily. I learned this the hard way after trying to force roots from nodes that were too high up in the moss.
Moss Maintenance Secret: The 2-3 inches of moistened sphagnum moss should feel like a wrung-out sponge—never soggy. I use a spray bottle to mist it every 2-3 days instead of pouring water directly. Overwatering is the #1 killer of root development, so check the moss daily during hot weather. If it feels damp but not dripping, you're golden.
Root Development Watch: Once you see roots peeking through the plastic (around 6-8 weeks), don't rush to separate! Wait until they're at least 1-2 inches long for best transplant success. I always mark the date on the plastic wrap with a permanent marker so I don't forget—patience really does pay off with redbuds.
Pro Tips for Start A Redbud Tree From A Cutting
- Here's what nobody tells you about getting those roots to grow—these tricks will make all the difference.
- Timing is Everything: Late summer to early fall is your sweet spot for semi-hardwood cuttings.
- Node Location Matters: Those 2-3 leaf nodes are where roots will form, so position them right at the base of your moss layer.
Frequently asked questions
Got questions about propagating redbud trees from cuttings? You’re not alone! Here are answers to the most common ones to help you succeed.
When is the best time to take redbud cuttings?
The ideal time is late winter to early spring (just before new growth begins) or summer (June–July). Avoid taking cuttings during extreme heat or cold, as these conditions stress the plant and reduce rooting success.
How long does it take for redbud cuttings to root?
With proper care, redbud cuttings typically root in 4–12 weeks. Keep them consistently moist and in a warm, humid environment. Patience is key—some may take longer, especially in cooler conditions.
Can I use rooting hormone on redbud cuttings?
Yes! While redbuds can root without hormone, using a rooting powder or gel (like IBA) increases success rates. Dip the cut end for 1–2 seconds before planting to encourage faster root development.
Why aren’t my redbud cuttings rooting?
Common issues include drying out (keep humidity high), poor lighting (indirect light is best), or rot from overwatering. Check for yellowing leaves (overwatering) or crispy edges (underwatering). Adjust care and try again!
What if I don’t have a greenhouse—can I root cuttings indoors?
Use a clear plastic bag over a jar of water (like a DIY humidifier) or a propagation station with a heat mat. Place near a bright, indirect window. Just monitor moisture and mist occasionally to mimic greenhouse conditions.
Wrapping up and next steps
Starting a redbud tree from a cutting is a rewarding way to propagate this stunning spring bloomer—just remember, patience and consistency are key! 🌱 With the right tools, a little know-how, and a watchful eye, you’ll soon be nurturing a thriving young tree.
Once your cutting roots well, it’s time to transplant it into a permanent spot and give it room to grow into the vibrant focal point of your garden.
Now that you’re ready to take the next step, go ahead and give it a try—your future redbud tree is waiting! 🌸