
Pruning
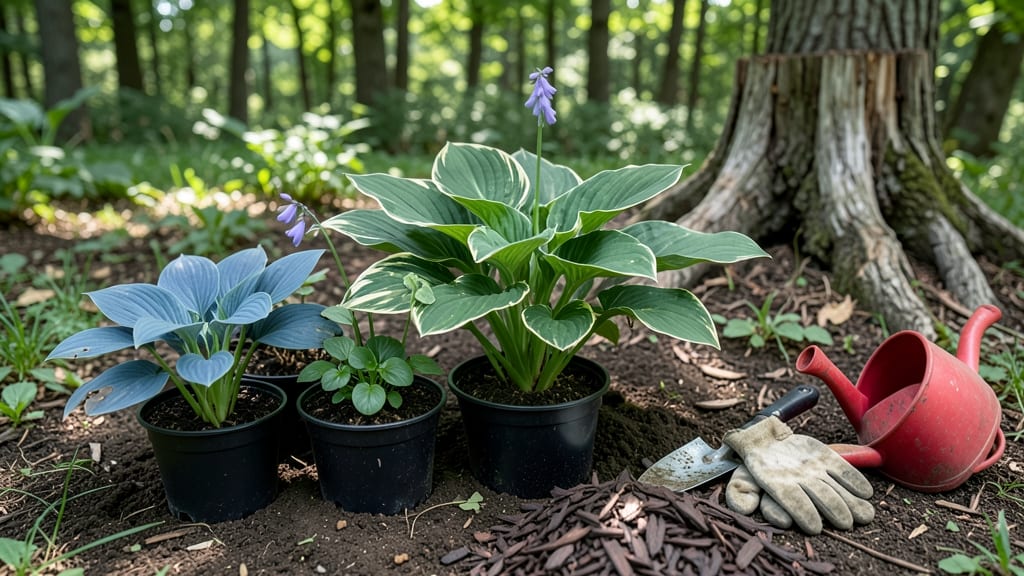
Planting around tree stumps transforms dead wood into a thriving garden feature. 🌱 The key is understanding that stumps create a unique microclimate—moist, shaded soil that most plants struggle with. I’ve turned my own stump into a lush, low-maintenance garden spot using shade-tolerant plants and smart mulching techniques.
Start with soil prep: remove debris and loosen compacted soil around the stump’s base. Choose plants that thrive in low light, like hostas, ferns, or ornamental grasses. Spacing matters—keep plants at least 12 inches from the stump to prevent root competition and allow airflow.
Once planted, mulch heavily (3-4 inches) to retain moisture and suppress weeds. The mulch also insulates roots during temperature swings, keeping plants healthy year-round. Over time, the area becomes a self-sustaining ecosystem that requires minimal upkeep. This method works for any stump size or yard style.
Even in tight spaces, you can create a striking focal point that adds texture and color without sacrificing plant health. Let’s get growing!
📚 In This Guide
- What you need
- Instructions
- Tips and common mistakes
- Wrapping up and next steps
What you need
- ● Mulch: 2–4 cubic feet (depending on stump size) of organic mulch like shredded bark, wood chips, or composted leaves (avoid fresh wood chips to prevent nitrogen theft).
- ● Soil amendments: 1–2 bags of garden soil or compost (50 lbs each) to enrich the area.
- ● Plants: 3–5 perennial plants (e.g., hostas, ferns, or ornamental grasses) for year-round interest.
- ● 1–2 ground covers (e.g., creeping thyme or clover) to suppress weeds.
- ● Tools: A garden trowel or hand shovel for digging.
- ● A pruning shears or loppers (if trimming nearby plants).
- ● A rake for leveling mulch.
- ● A watering can or hose with nozzle (for hydration).
- ● A stump cover (landscape fabric) to block weeds before planting.
- ● Slow-release fertilizer (10-10-10 or organic options) to boost soil health.
- ● Decorative stones or edging to define the planting area.
- ● A measuring tape to ensure proper spacing (12–18 inches between plants).
Step-by-step guide to planting around tree stumps
Transform that stump into a thriving garden bed with these simple steps—your plants will thank you!
🌱 Step 1: Assess the Stump and Soil
Start by examining the stump and surrounding area. Look for any remaining roots—if you see large roots protruding, trim them back with pruning shears to prevent competition with new plants. The soil around stumps often drains poorly, so test it by pressing your finger 1 inch deep—if it feels soggy, you'll need to improve drainage.
I like to rake away any loose debris and old mulch, then gently loosen the top 3-4 inches of soil with a garden fork. This helps roots establish without fighting compacted earth. If the soil smells musty or looks waterlogged, mix in 2-3 inches of compost to lighten it up—this prevents root rot in moisture-loving plants.
💧 Step 2: Choose the Right Plants for the Space
Stump gardens need plants that tolerate partial shade and occasional dry spells. I always opt for 4-6 hardy perennials like hostas, ferns, or astilbes—they thrive in dappled light and don’t demand constant watering. Avoid thirsty annuals like impatiens; they’ll wilt faster in this microclimate.
For a pop of color, try shade-tolerant bulbs like daffodils or alliums—they’ll return year after year with minimal care. Space them 6-12 inches apart to prevent overcrowding. If your stump has a south-facing side, you can sneak in a few sun-loving ground covers like creeping thyme near the edges where light hits.
☀️ Step 3: Prepare the Planting Area
Create a circular or semi-circular bed around the stump, keeping the outer edge at least 12 inches away from the trunk. Use a garden hose to outline the shape before digging—this keeps things neat. Dig holes twice as wide as the plant’s root ball but only as deep as the container’s drainage holes.
Here’s the thing—don’t amend the soil with fresh mulch yet. Instead, backfill the holes with the native soil you removed, pressing gently to eliminate air pockets. This helps roots merge smoothly with the existing earth. Water each hole deeply before planting to settle the soil and remove any air gaps.
🪴 Step 4: Plant and Mulch for Long-Term Health
Place each plant in its hole, ensuring the top of the root ball sits level with the surrounding soil—burying too deep suffocates roots, while planting too high stresses the plant. Fill in around the edges with soil, firming it lightly with your fingers. Water again to eliminate air pockets and encourage root contact with the soil.
Now for the magic: spread 2-3 inches of mulch (like shredded bark or wood chips) over the entire bed, keeping it 3-4 inches away from plant stems to prevent rot. This mulch layer regulates soil temperature, retains moisture, and slowly breaks down to feed your plants. Replenish it annually—it’s the secret to keeping this garden thriving with almost no maintenance.
⏰ Step 5: Maintain and Observe
Water newly planted areas once a week for the first month, then taper off to every 2-3 weeks once established—stump gardens stay moist longer than open beds. Watch for yellowing leaves on hostas or ferns; this usually means too much shade or overwatering. If you notice wilting, check the soil—it’s likely too dry.
Every spring, top off the mulch layer to 2-3 inches to protect roots as temperatures rise. Over time, you’ll notice fewer weeds and healthier plants—this is your reward for choosing low-maintenance companions. Pro tip: Add a few fertilizer spikes in early spring to give perennials a gentle boost without overfeeding.
Tips & tricks for planting around tree stumps
Here's what nobody tells you about turning that stump into a thriving garden—these tricks will keep your plants happy for years.
Root Competition Check: Before planting, test for hidden roots by gently tugging on any visible ones. If they pull out easily, you're good. If they resist, trim them back with pruning shears—this prevents your new plants from competing for nutrients. I've seen stumps with roots extending 12-18 inches outward, so don't assume the problem is solved just because you can't see roots at the surface.
Soil Test Beyond the Finger Test: The finger test is great, but for a more accurate assessment, dig a 4-inch deep hole near the stump. If water pools at the bottom after 10 minutes, you definitely need to improve drainage. I've added perlite or coarse sand to heavy soils in stump gardens—it makes all the difference for moisture-sensitive plants like hostas.
Plant Placement Strategy: Position taller plants like astilbes on the north side of the stump where they'll get less direct sun, and shorter varieties like ferns on the south side. This creates a natural tiered effect while accommodating each plant's light preferences. I've arranged mine in a semi-circular pattern that follows the stump's natural shadow line.
Mulch Layering Secret: After spreading your initial 2-3 inches of mulch, add a thin layer of leaf mold (composted leaves) underneath it. This creates a moisture-retaining barrier that prevents the mulch from breaking down too quickly. I top off my mulch in spring with 1 inch of compost mixed right into the top layer—it's like giving your plants a slow-release fertilizer.
Pro Tips for Planting Around A Tree Stump
- Here's what nobody tells you about turning that stump into a thriving garden—these tricks will keep your plants happy for years.
- Root Competition Check: Before planting, test for hidden roots by gently tugging on any visible ones.
- Soil Test Beyond the Finger Test: The finger test is great, but for a more accurate assessment, dig a 4-inch deep hole near the stump.
Frequently asked questions
How close can I plant to a tree stump without hurting the roots?
Keep new plants at least 3–5 feet away from the stump’s edge to avoid competing for water and nutrients. Smaller plants (like perennials or shrubs) can go closer, but avoid planting anything with deep roots (e.g., trees or large shrubs) within 10 feet. The stump’s hidden roots can still spread!
When is the best time to plant around a tree stump?
The ideal time is early spring or fall when soil is moist but not soggy. Avoid planting in extreme heat or drought—new roots need consistent moisture. If you must plant in summer, water deeply every 2–3 days for the first month to help them establish.
What are the best plants for small spaces around a tree stump?
Opt for shade-tolerant, low-maintenance plants like:
- Hostas (great for shade and texture)
- Ferns (thrive in damp, cool conditions)
- Hellebores (early bloomers, drought-resistant)
- Ground covers (e.g., creeping thyme or ajuga)
How do I keep the soil moist without overwatering?
Use a 2–3 inch layer of mulch (wood chips or straw) to retain moisture and regulate temperature. Water slowly and deeply 2–3 times a week (adjust for rain). A soaker hose or drip irrigation system works best to avoid runoff. Check soil moisture with your finger—if the top inch is dry, it’s time to water!
What if my new plants aren’t growing well around the stump?
Troubleshoot with these fixes:
Too much shade? Try sun-loving annuals (like impatiens) in containers near the stump’s edge.
Competition for water? Water more frequently or add a root barrier if roots are encroaching.
Poor soil? Mix in compost or use slow-release fertilizer for a nutrient boost.
If plants still struggle, they may need relocating to a sunnier spot!Wrapping up and next steps
Transforming a tree stump into a thriving garden spot is easier—and more rewarding—than you think! 🌱 By choosing the right plants, prepping the soil, and using mulch as your secret weapon, you’re not just filling empty space; you’re creating a year-round ecosystem that supports both beauty and biodiversity.
Whether you’re a seasoned gardener or a curious beginner, every small step—like selecting shade-tolerant perennials or monitoring moisture—brings you closer to a lush, low-maintenance oasis.
Ready to roll up your sleeves? Start small: Pick one stump to revamp this weekend, gather your supplies, and let nature do the rest. Before you know it, that bare stump will be the star of your garden—and your neighbors’ envy! 🌟