
Pruning
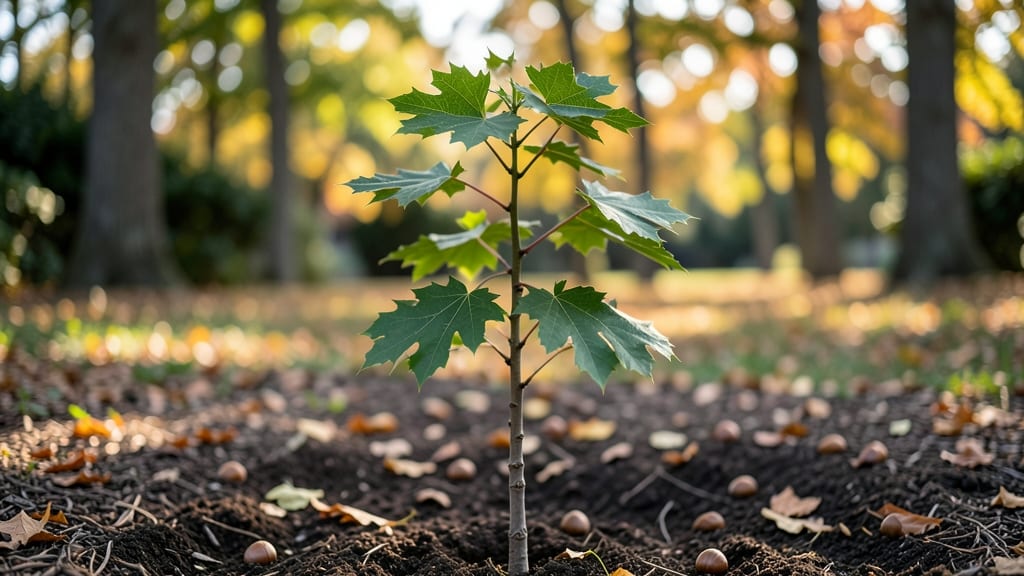
Planting a sugar maple tree sapling means decades of brilliant fall color and strong roots—if you get the early years right. 🌳 The secret to cold-hardy growth starts with the right soil, spacing, and watering routine that mimics its natural forest habitat.
Most people overlook soil prep, but sugar maples thrive in well-draining, slightly acidic soil with organic matter. Dig a hole twice as wide as the root ball but no deeper—this encourages root expansion.
Water deeply after planting, then keep the soil consistently moist (not soggy) for the first 12 months.
By year three, you’ll see sturdy growth with 3-5 foot height gains if you prune correctly: remove only dead or crossing branches in late winter. The tree’s natural resilience kicks in once established, but those first two years set the foundation for a 100-foot giant.
Works in zones 3-8, from city sidewalks to rural woodlots. Here’s how to give your sapling the best start!
📚 In This Guide
- What you need
- Instructions
- Tips and common mistakes
- Wrapping up and next steps
What you need
- ● Sugar maple sapling: Choose a 1- to 3-year-old sapling (1–3 feet tall) with a healthy root system. Look for Acer saccharum varieties labeled for your USDA hardiness zone (typically 3–8 for optimal cold resistance).
- ● Pruning tools: Bypass pruners (sharp, clean—sterilize with rubbing alcohol before/after use!)
- ● Loppers (for thicker branches, 1.5–2.5 inches in diameter)
- ● Hand saw (for stubborn branches, with a fine-tooth blade to avoid tearing)
- ● Planting supplies: High-quality potting mix (or loamy, well-draining soil with compost—aim for pH 6.0–7.5)
- ● Organic mulch (3–4 inches of wood chips or shredded bark—keep it 3 inches away from the trunk)
- ● Slow-release fertilizer (balanced 10-10-10 or maple-specific with micronutrients like magnesium)
- ● Safety gear: Garden gloves (cut-resistant for pruning)
- ● Safety goggles (to protect from debris)
- ● Root stimulator (mycorrhizal fungi or liquid rooting hormone for transplant shock)
- ● Tree collar protector (to guard against lawnmower damage)
- ● Drip irrigation system (for consistent moisture, especially in dry climates)
- ● Soil moisture meter (to monitor root-zone hydration)
- ● Pruning sealant (only if sealing large cuts—use sparingly!)
Step-by-step guide to planting and nurturing a sugar maple sapling
Here's how I ensure sugar maples grow strong, cold-resistant roots from day one.
🌱 Step 1: Choose the Perfect Planting Site
Sugar maples thrive in full sun to partial shade—at least 6 hours of direct sunlight daily—but their roots need deep, well-draining soil. I always pick a spot with 6-8 feet of clearance around the sapling since mature trees spread wide. Avoid low-lying areas where cold air pools, as sugar maples are sensitive to frost pockets.
Dig a hole twice as wide as the root ball but only as deep—planting too deep suffocates the roots. Loosen the sides of the hole with a shovel to encourage root spread. If your soil is clay-heavy, mix in 2-3 inches of compost to improve drainage. The key is mimicking the natural forest floor where sugar maples grow wild.
🌿 Step 2: Plant with Care to Protect Delicate Roots
Remove the sapling from its container and gently tease the roots outward if they're circling. Place it in the hole so the top of the root ball sits level with the surrounding soil—never bury the graft union if it's a nursery-grown tree. Sugar maples hate having their trunks buried, which causes rot.
Backfill with the native soil (not amended mix) and tamp lightly in layers to eliminate air pockets. Water deeply to settle everything, then add a 2-inch layer of mulch (wood chips or bark) around the base, keeping it 6 inches away from the trunk to prevent moisture buildup. This mimics the forest floor's protective layer while preventing disease.
☀️ Step 3: Water Deeply and Establish a Routine
Sugar maples need 1-2 inches of water weekly during their first growing season, but deep soakings encourage root growth. I water every 5-7 days until the soil is 6 inches deep and moist—check by inserting a screwdriver. Overwatering causes root rot, so always let the top inch dry between waterings.
After the first year, they become drought-tolerant, but young saplings benefit from deep watering every 10-14 days during dry spells. Avoid wetting the leaves to prevent fungal diseases like anthracnose, which sugar maples are prone to. A soaker hose or drip irrigation keeps water at the roots where it's needed.
✂️ Step 4: Prune Strategically for Strong Structure
Wait until the sapling is 3-4 feet tall before pruning—this gives it time to establish roots. Remove any dead, crossing, or inward-growing branches using clean, sharp pruners. I make cuts just outside the branch collar (the swollen area where the branch meets the trunk) to promote fast healing.
Never remove more than 25% of the foliage in one season—sugar maples are sensitive to over-pruning. Focus on shaping the tree to develop a strong central leader (main upward stem) and well-spaced branches. This prevents weak crotches that can split under snow or wind loads, a common issue in mature trees.
⏰ Step 5: Protect Through Winter's First Year
Young sugar maples need extra winter protection until their roots are fully established. Wrap the trunk with tree guard (not plastic wrap) to prevent rodent damage and sunscald. I also mound 4-6 inches of mulch around the base in late fall, then remove it in early spring to avoid suffocating roots.
If your region gets extreme cold snaps (below -20°F), consider wrapping the entire sapling in burlap for the first winter. Sugar maples are cold-hardy to -30°F, but young trees can't handle sudden temperature swings. Monitor for signs of frost damage—brown edges on leaves or cracked bark—and adjust protection as needed.
Tips & tricks for perfect sugar maple sapling growth
These are the lessons I learned after nurturing dozens of saplings—what makes the difference between a tree that thrives and one that struggles.
Site Selection Secrets: Sugar maples hate soggy feet—test your chosen spot by digging a 12-inch hole and filling it with water. If it doesn't drain within 6 hours, amend the soil with 3-4 inches of coarse sand mixed into the bottom of the planting hole. This mimics the well-drained forest floors where sugar maples naturally grow. I've seen saplings in low spots develop root rot within months, so don't skip this test!
Root Care During Transplanting: When removing the sapling from its container, score the root ball with a knife if you notice tight circling roots—this encourages new root growth outward. The key is to handle roots gently; even small tears can take weeks to heal. I always wrap the root ball in a damp burlap sack during transport to prevent drying, which can shock the tree.
Watering Wisdom: The 6-inch deep moisture check in Step 3 is crucial—use a soil moisture meter for accuracy. If you're using a hose, water slowly until it begins to pool, then let it absorb for 30 minutes before repeating. Overwatering is the #1 killer of young saplings, so always check soil moisture before watering again. In my experience, container-grown saplings need slightly more frequent watering than bare-root ones.
Winter Protection Pro Tips: For extreme cold snaps below -20°F, I've found that wrapping the entire sapling in burlap—including the root ball—provides better insulation than just trunk protection. Remove the wrap in early spring once temperatures stabilize above freezing. This extra layer helps prevent frost cracks that can kill young trees overnight.
Pro Tips for Sugar Maple Tree Sapling
- These are the lessons I learned after nurturing dozens of saplings—what makes the difference between a tree that thrives and one that struggles.
- Site Selection Secrets: Sugar maples hate soggy feet—test your chosen spot by digging a 12-inch hole and filling it with water.
- Root Care During Transplanting: When removing the sapling from its container, score the root ball with a knife if you notice tight circling roots—this encourages new root growth outward.
Frequently asked questions
Got questions about nurturing your sugar maple tree sapling? You’re not alone!
Here are some of the most common queries—plus straightforward answers—to help you grow a thriving young tree with confidence.
What’s the best time of year to plant a sugar maple sapling?
Plant your sapling in early spring or fall when the soil is workable but not frozen. Avoid extreme heat or drought—these trees dislike transplant shock. If planting in late fall, do it at least 6 weeks before frost to allow roots to establish. Spring planting (March–April) gives roots a full growing season to settle in.
How often should I water a young sugar maple sapling?
Water deeply 1–2 times per week during the first year, ensuring the soil stays moist but not soggy. After that, water every 10–14 days unless there’s steady rain. Mulch heavily (3–4 inches) around the base to retain moisture and protect roots. Overwatering can suffocate roots—always check soil moisture 2–3 inches down.
Should I prune my sugar maple sapling, and if so, when?
Prune in late winter or early spring (before buds swell) to remove dead, diseased, or crossing branches. Avoid heavy pruning—focus on shaping and air circulation. Use clean, sharp tools to make cuts just outside the branch collar. Never top the tree—this weakens growth and invites pests. Aim for no more than 25% of the canopy in any one year.
Can I grow a sugar maple sapling in a container before transplanting?
Yes! Use a 5-gallon container or larger with well-draining soil and drainage holes. Repot every 1–2 years as roots grow. Keep it in partial shade and water consistently. However, transplant outdoors as soon as possible—sugar maples thrive best in the ground. Container-grown saplings may struggle with root-bound stress if left too long in pots.
What pests or diseases should I watch for in young sugar maple saplings?
Common issues include:
- Aphids or spider mites: Spray with water or use insecticidal soap.
- Verticillium wilt: A fungal disease causing leaf yellowing. Improve drainage and remove infected plants.
- Maple borers: Look for exit holes or sawdust-like frass. Treat with systemic insecticides if severe.
Prevent problems by keeping the area weed-free and avoiding overwatering. Healthy saplings are resilient—focus on proper care to minimize risks!
Wrapping up and next steps
Growing a sugar maple tree sapling into a thriving, cold-hardy giant is a rewarding journey that starts with patience and the right techniques. Remember, strong roots, proper pruning, and seasonal care are the keys to unlocking its full potential—so don’t rush the process!
Now that you’re armed with expert tips, take the next step: plant your sapling this spring or early fall, and watch it flourish for decades to come. 🌳✨