
Trees
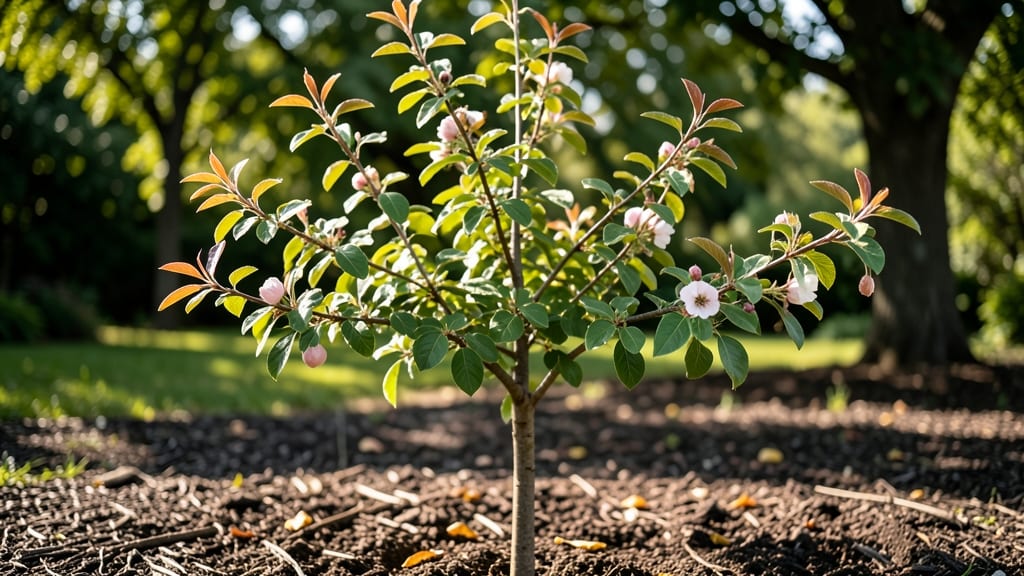
Your young apricot tree’s leaves are the first clue to its health—and fixing problems now keeps your harvest thriving for years. 🌱 I’ve spent three seasons watching apricot leaves turn from velvety green to spotted, curled, or yellowed, and I’ve learned which fixes work fast and which are wasted effort.
The most common culprits are aphids (tiny, sticky clusters on new growth), powdery mildew (white dust on undersides), and nitrogen deficiency (pale, slow-growing leaves). Pruning isn’t just about shaping—it’s about airflow and sunlight, which cut down on fungal diseases.
A sharp pair of pruners and a 5-minute inspection every two weeks saves hours of damage control later. You’ll spot the difference within 10 days of proper care: leaves unfurl vibrant green, pests vanish, and new shoots grow strong.
The key is acting early—once symptoms spread, the tree struggles to recover. I’ll walk you through the exact steps to diagnose and fix each issue.
Start with a clean workspace: 70% rubbing alcohol on pruners, a bucket of soapy water for pests, and a 1-inch layer of mulch around the base to retain moisture. Check leaves for holes (spider mites), sticky residue (aphids), or brown edges (overwatering).
If it’s a pest, a neem oil spray (1 tsp per quart of water) works better than store-bought chemicals.
Prune in late winter or early spring before new growth starts—remove any dead, crossing, or diseased branches first. Thin out crowded spots to let sunlight reach the center. For nutrient issues, a balanced 10-10-10 fertilizer in early spring gives the tree a boost without overwhelming it.
Here’s the secret: apricot trees hate soggy roots. Water deeply once a week (more in summer heat) and let the top 2 inches of soil dry out between waterings. Overwatering is the #1 reason leaves yellow and drop—don’t let that happen to yours.
📚 In This Guide
- What you need
- Instructions
- Tips and common mistakes
- Wrapping up and next steps
What you need
- ● Pruning shears or bypass pruners: Sharp, sterilized shears (1 pair) with a 7- to 10-inch blade for clean cuts.
- ● Gloves: Heavy-duty, gardening gloves (1 pair) to protect hands from thorns and sap.
- ● Disposable pruning bags or buckets: A 5-gallon bucket or pruning bags (2-3) to collect leaves and clippings.
- ○ Disinfectant (optional but recommended): A 10% bleach solution (1:9 bleach-to-water ratio) or rubbing alcohol (70% or higher) to sterilize tools.
- ● Sharpie or permanent marker: For labeling bags or buckets if repurposing leaves for different uses.
- ● Apricot tree: A healthy, young apricot tree (1-3 years old) with mature leaves (avoid harvesting more than 20-30% of foliage at once).
- ● Loppers: For thicker branches (if pruning older growth).
- ● Neem oil or insecticidal soap: (16 oz spray bottle) to treat pests found on leaves during inspection.
- ● Hose with nozzle: For rinsing leaves or tools post-harvest.
- ● Compost bin or trash bags: For disposing of diseased or pest-infested leaves.
- ● Notebook & pen: To track harvest dates, leaf condition, or pest observations.
How to prune and protect young apricot tree leaves
Your apricot tree’s first few years set the stage for its entire life—here’s how to shape strong growth and keep pests at bay.
🌱 Step 1: Identify Healthy Leaves and Weak Branches
Start by examining the tree for three key signs: healthy leaves (bright green, firm texture), weak branches (thin stems, sparse foliage), and crossing limbs (rubbing against each other). Apricot trees grow fast, so you’ll see new shoots emerging from the trunk or old wood—these are called "suckers" and should be removed immediately.
Use your fingers to gently bend small branches. If they snap easily, they’re not strong enough to support fruit later. Healthy leaves should feel slightly leathery, not brittle. Mark these branches with a small piece of twine if you’re unsure—you’ll revisit them after pruning.
✂️ Step 2: Prune for Airflow and Light Penetration
Make your first cuts at a 45-degree angle, about ¼ inch above a bud facing outward from the tree. This encourages growth in the right direction. Remove any branches growing inward or downward—they’ll block sunlight and trap moisture, inviting fungal diseases. I always start with the smallest branches first, working my way up to thicker limbs.
For thicker branches over ½ inch in diameter, use clean, sharp pruners to avoid tearing the bark. Cut just outside the branch collar (the swollen area where the branch meets the trunk). Never leave stubs—these invite rot. After each cut, step back to check if sunlight now reaches the center of the tree.
💧 Step 3: Inspect for Pests and Early Treatment
Flip over leaves to check for tiny eggs, webs, or sawdust-like frass (insect droppings). Apricot trees often attract aphids, mites, or scale insects early on. I spray a strong stream of water from the hose to dislodge soft-bodied pests like aphids—this works best in the early morning when pests are sluggish. For stubborn infestations, mix 1 tablespoon neem oil per quart of water and apply with a spray bottle.
Focus on the undersides of leaves and new growth, where pests hide. If you see curled leaves or sticky residue (honeydew), act fast—these are signs of an established infestation. Prune and dispose of heavily infested branches immediately in a sealed bag, not in your compost pile.
☀️ Step 4: Thin Leaves for Better Fruit Development
Once you’ve removed dead or diseased growth, thin the remaining leaves by 20-30% to improve air circulation. Look for clusters of leaves growing too densely—space them out so each leaf gets at least 6 inches of clearance from others. This prevents fungal diseases like powdery mildew, which thrives in humid, shaded conditions.
Use pruners to trim excess leaves at the base of the stalk. Avoid cutting into the main stem of healthy branches. After thinning, water the tree at the base with 1 gallon per inch of trunk diameter. For a young apricot tree, that’s usually about 2-3 gallons—enough to moisten the root zone without drowning it.
⏰ Step 5: Schedule Follow-Up Checks
Make a note to revisit your apricot tree in 4-6 weeks—this gives you time to spot any new pest activity or weak growth before it becomes a problem. New leaves should emerge vibrant green and upright. If you notice yellowing between the veins, that’s a sign of nutrient deficiency—apply a balanced 10-10-10 fertilizer at half strength.
Prune again in late winter before buds swell, but only remove branches that died over winter or grew excessively. Avoid heavy pruning now—you’re shaping the tree’s structure, not its fruit load. Keep a pruning journal with dates and notes on what you removed—it helps track patterns over the years.
Tips & tricks for pruning young apricot trees
Shaping your young apricot tree the right way now saves headaches later—here’s how to avoid common mistakes that stifle growth.
Tool Prep: Sharpen your pruners before you start—dull blades tear bark and invite disease. I test mine on a scrap piece of wood first; if it slices cleanly, you’re ready. Disinfect blades with rubbing alcohol between cuts on different branches to prevent spreading any hidden pathogens. This is especially important if your tree shows signs of stress or disease.
Timing Secret: The best time to prune is late winter before buds swell, but for young trees, you can do light shaping in early spring too. Avoid pruning during wet weather—wet cuts take longer to heal and are more vulnerable to fungal infections. If you must prune when rain is forecast, do it in the morning so cuts have time to dry before evening moisture sets in.
Visual Cue for Cuts: When making that 45-degree cut in Step 2, imagine the bud you’re targeting is the top of a clock—position your cut so the bud is at 12 o’clock. This ensures new growth emerges in the right direction. For thicker branches, look for the branch collar (that swollen area where the branch meets the trunk) and cut just outside it. Never leave stubs—they’re like open wounds that never heal properly.
Pest Prevention: After pruning, collect all clippings and dispose of them in a sealed bag, not in your compost pile. Many pests and diseases hide in plant debris, and you don’t want to give them a second chance to reinfect your tree. I also recommend spraying the cuts with a 1:10 water and hydrogen peroxide solution (3% concentration) to help seal the wounds and prevent infection.
Pro Tips for Young Apricot Tree Leaves
- Shaping your young apricot tree the right way now saves headaches later—here’s how to avoid common mistakes that stif...
- Tool Prep: Sharpen your pruners before you start—dull blades tear bark and invite disease. I test mine on a scrap pie...
- Timing Secret: The best time to prune is late winter before buds swell, but for young trees, you can do light shaping...
Frequently asked questions
Got questions about young apricot tree leaves? You’re not alone! Here are some of the most common concerns—and straightforward answers—to help you navigate harvesting, pruning, and pest management like a pro.
When is the best time to harvest young apricot tree leaves for pruning?
The ideal time to harvest leaves for pruning is late winter or early spring, just before new growth begins (typically February–March in most climates). This ensures you’re removing dead or weak leaves while stimulating fresh, healthy foliage. Avoid harvesting during peak summer, as the tree needs its leaves for photosynthesis.
How do I tell if my young apricot tree leaves have pests or diseases?
Watch for these red flags: yellowing leaves (nutrient deficiency or aphids), tiny holes (leaf miners), sticky residue (scale insects), or black spots (fungal issues like powdery mildew). Inspect the undersides of leaves and stems closely—pests often hide there! If you spot damage, act fast with neem oil or insecticidal soap for organic control.
Can I use young apricot leaves for cooking, or are they only for pruning?
While apricot leaves are edible and used in Middle Eastern and Mediterranean cuisines (think stuffed leaves or teas), young leaves are milder and less bitter than mature ones. Harvest small, tender leaves from non-sprayed trees, rinse well, and use sparingly—start with 1–2 tsp per dish to avoid bitterness. Never use leaves from trees treated with pesticides!
How long does it take for a young apricot tree to recover after pruning leaves?
With proper technique (removing no more than 20–30% of foliage), your tree should bounce back in 4–6 weeks. Focus on pruning during dormancy to minimize stress. Water deeply after pruning and monitor for new growth. If leaves wilt or drop excessively, you may have over-pruned—scale back next time and prioritize healthier branches.
Are there alternatives to apricot leaves for pest control?
Try these natural pest deterrents:
- Garlic or chili spray: Blend 2 cloves garlic + 1 tbsp cayenne pepper in water, strain, and spray on leaves (repels soft-bodied pests like aphids).
- Diatomaceous earth: Sprinkle food-grade DE around the base (kills crawling insects like mites—reapply after rain).
- Companion planting: Add marigolds or basil nearby to confuse pests with their scents.
- Beneficial insects: Introduce ladybugs or lacewings to eat aphids naturally.
Wrapping up and next steps
Harvesting young apricot tree leaves is a rewarding way to boost your garden’s health—whether for pruning, pest control, or even culinary experiments! 🌱 By following the right timing, tools, and techniques, you’ll keep your tree thriving while minimizing stress. Remember: consistency is key, and a little effort now means fewer pests and stronger growth later.
Ready to take the next step? Start small: prune a few branches this season, monitor your tree’s response, and gradually expand your efforts. With patience and care, your apricot tree will thank you with lush foliage and bountiful fruit! 🌟