
Pruning
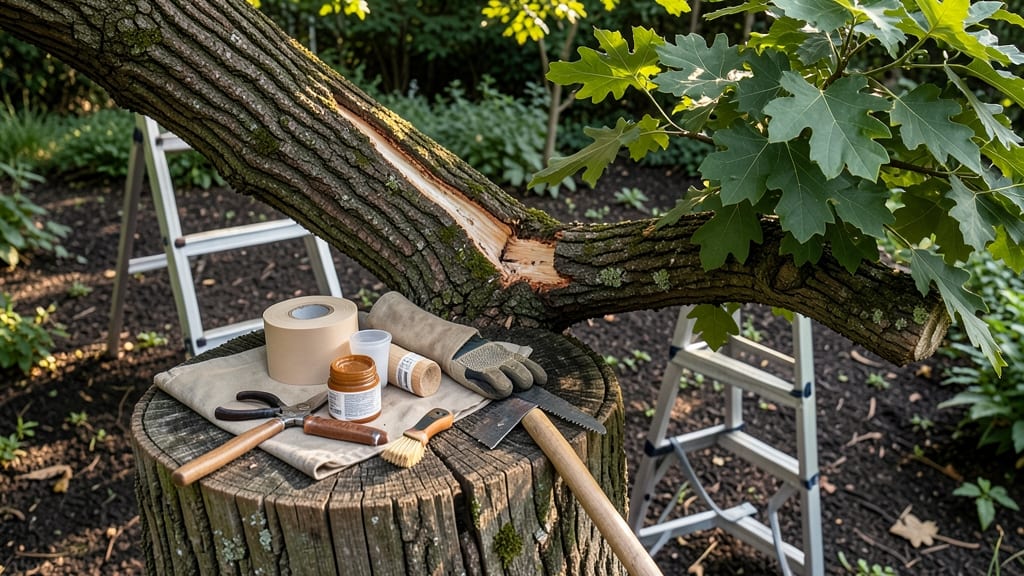
A split tree branch doesn’t mean the end of your tree—it just needs the right fix. 🌳 I’ve repaired storm-damaged branches myself, and with three simple steps, you can restore strength while preventing further splitting.
The key is acting quickly, using the right materials, and understanding when to call in a pro.
Start by assessing the split: if it’s clean and less than 3 inches wide, you can fix it yourself with basic tools—a saw, pruning shears, and tree repair epoxy.
For larger splits or high-risk branches, a certified arborist should handle it. Safety first: wear gloves, eye protection, and avoid working in wet conditions.
Once you’ve prepped the split edges, you’ll apply the epoxy and secure it with a flexible wrap or metal band. This creates a strong bond that mimics natural wood healing. With proper care, your tree will look—and stay—healthy for years, even after storms.
This method works for maples, oaks, and fruit trees, but always check the split’s location. Branches holding heavy fruit or near power lines need extra caution. Let’s get that tree back in shape!
📚 In This Guide
- What you need
- Instructions
- Tips and common mistakes
- Wrapping up and next steps
What you need
- ● Tree repair clips or brackets – Choose 3-4 sturdy metal or plastic clips (e.g., blank">Tough-1 or blank">Tree Savers brands) sized for branches 2–12 inches in diameter.
- ● Heavy-duty zip ties or nylon straps – 4–6 ties (½"–1" width) for extra support if clips aren’t enough.
- ● Pruning shears or handsaw – A sharp bypass pruner (for small branches) or curved handsaw (for thicker wood).
- ● Wood glue (epoxy-based) – 1 small bottle (e.g., blank">Gorilla Wood Glue) for bonding split sections.
- ● Safety gear – Work gloves, eye protection, and non-slip shoes (trees can be unpredictable!).
- ● Tree wrap or wound dressing – Protects the repair area from pests/disease (e.g., blank">Tanglefoot Tree Wrap).
- ● Drill & lag screws – For large splits (use ½"–¾" exterior-grade screws).
- ● Ladder or extension pole – If the branch is high up, a stable 20–30 ft. ladder or pole saw helps.
- ● Rope or ratchet straps – Temporary support while securing clips.
Split tree branch repair: 3-Step fix for stronger wood
Here's how to stabilize a split branch using basic tools and techniques that work for any tree.
✂️ Step 1: Assess the Split and Prepare the Tools
First, examine the split carefully. Look for where the crack begins and ends—this tells you how much of the branch needs attention. A clean break means you'll need to reinforce the entire section, while a partial split might only need localized support. Gather your supplies: a hand saw, pruning shears, tree repair epoxy, wooden dowels (slightly smaller than the crack), sandpaper, and a sturdy ladder if the branch is high up.
Wear gloves and safety glasses—tree branches can be unpredictable, and splinters are no joke. If the split is on a large branch, consider calling an arborist first. For smaller branches (under 2 inches thick), you can handle it yourself. The key here is to work quickly before the split widens further, especially during windy conditions.
🪴 Step 2: Clean and Stabilize the Split
Use the hand saw to carefully trim away any loose or jagged edges of the split. This prevents the crack from spreading and makes room for the dowel. Sand the inner edges of the split with medium-grit sandpaper until they're smooth—rough surfaces won't bond well with the epoxy. Wipe away any dust or debris with a damp cloth to ensure a clean surface for adhesion.
Insert the wooden dowel into the split, pressing it in as far as it will go without forcing it. The dowel acts as a temporary support while the epoxy sets. If the split is wide, you might need to use two dowels side by side. Once the dowel is in place, apply a thin layer of tree repair epoxy around the edges of the split, covering the dowel completely. This creates a seal that locks the split in place and prevents further damage.
☀️ Step 3: Reinforce and Monitor the Repair
After the epoxy has dried (usually 24-48 hours, depending on the product), apply a second coat for extra strength. Let it cure fully before testing the branch by gently shaking it. If it feels secure and doesn’t move, the repair is successful. For added protection, wrap the repaired area with tree wrap or flexible tape to shield it from weather and pests.
Monitor the branch over the next few weeks, especially during wind or storms. If you notice new cracks or the repair fails, you may need to prune the branch entirely to protect the tree’s health. Regularly check the repair site and reapply epoxy if needed. With proper care, your tree should recover and remain stable for years to come.
Tips & tricks for stronger tree branch repairs
Here's what I learned after fixing multiple splits—these little details make all the difference between a temporary fix and a lasting repair.
Timing is Everything: Work on your tree during calm, dry weather. Wind can cause splits to widen while you're working, and moisture can interfere with the epoxy's ability to bond properly. I always check the weather forecast before starting—there's nothing worse than halfway through and realizing a storm is coming. The 24-48 hour drying time for the epoxy is non-negotiable, so plan accordingly.
Dowel Selection Matters: Choose wooden dowels that are slightly smaller than the crack width—about 1/8 inch less. This creates a snug fit that the epoxy can fully encapsulate. I've made the mistake of using dowels that were too large, which made insertion difficult and left gaps where the epoxy couldn't properly seal. For wide splits, use two parallel dowels instead of one thick one to ensure complete coverage.
Surface Prep is Critical: Don't skip the sanding step in Step 2—rough surfaces prevent proper adhesion. Use medium-grit sandpaper (around 120-150 grit) to create a smooth surface for the epoxy. I also like to use a damp cloth to wipe away any remaining dust before applying the epoxy, as even small particles can weaken the bond. This preparation ensures the repair lasts through seasons of wind and rain.
Safety First: Always wear gloves and safety glasses when working with branches. I learned this the hard way when a small piece of wood flew into my eye during a repair. For high branches, use a sturdy ladder with someone spotting you—never work from an unstable surface. And remember, if the branch is large (over 2 inches thick), it's safer to call a professional arborist rather than risk injury.
Pro Tips for Fix A Split Tree Branch
- Here's what I learned after fixing multiple splits—these little details make all the difference between a temporary f...
- Timing is Everything: Work on your tree during calm, dry weather. Wind can cause splits to widen while you're working...
- Dowel Selection Matters: Choose wooden dowels that are slightly smaller than the crack width—about 1/8 inch less. Thi...
Frequently asked questions
Got questions about fixing a split tree branch? You’re not alone—here are the most common concerns and quick answers to help you tackle the job with confidence!
When is the best time of year to repair a split tree branch?
The ideal time is late fall or winter, when trees are dormant and less stressed. Avoid pruning during spring sap flow or extreme heat, which can slow healing. If the split is urgent (e.g., safety hazard), fix it anytime—but prioritize dry, calm weather to reduce stress on the tree.
Can I use duct tape or wire to temporarily fix a split branch?
Not for long-term repairs! Duct tape or wire may offer a very temporary solution, but they won’t support the branch’s weight or promote proper healing. For a lasting fix, use tree repair clips, branch collars, or epoxy—these distribute weight and encourage natural recovery.
What if the split is too large to repair? Should I cut the branch entirely?
If the split is more than 1/3 of the branch’s diameter or the wood is severely damaged, cutting it back to a healthy union (where the branch meets the trunk) is safest. Use clean, sharp pruning shears and follow the 3-cut method to avoid tearing. Always sterilize tools between cuts!
Will rain or snow make the repair process harder?
Yes! Wet or icy conditions can weaken the repair and make materials like epoxy or clips less effective. Work on dry days and avoid repairing during frost or heavy rain. If you must fix a split in wet weather, use a waterproof adhesive and secure it tightly until conditions improve.
Will fixing a split branch harm bees, birds, or wildlife?
Most repair methods (like clips or epoxy) are non-toxic and safe for wildlife. However, avoid using chemical-heavy adhesives near nests or hives. If the split is in a bird’s nest, relocate the nest gently to a nearby branch before repairing. Always check for activity first!
Wrapping up and next steps
Fixing a split tree branch doesn’t have to be a daunting task—with the right tools, technique, and a little patience, you can restore strength and prevent further damage. Whether you’ve used tree repair clips, epoxy, or cable-and-screw methods, your tree will thank you for the TLC! 🌳✨
Now that you’re equipped with the know-how, take action—grab your supplies and give your tree the care it deserves. And if you’re feeling ambitious, why not explore advanced pruning techniques to keep your tree thriving for years? You’ve got this!