
Propagation
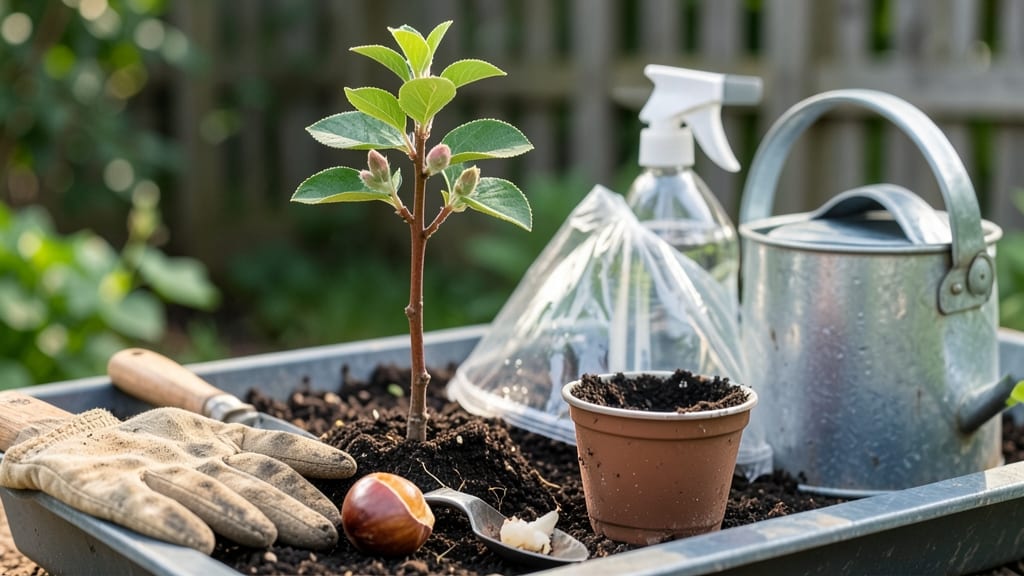
Growing an apricot tree from a pit feels like unlocking a slow-motion miracle—one that requires patience, a little science, and a fridge. 🌱 The key to reliable sprouting isn’t just planting the pit; it’s tricking it into thinking winter’s passed by mimicking nature’s cold stratification process.
Most pits won’t produce fruit like their parent tree, but the journey itself becomes a rewarding experiment in horticultural patience.
Start with a fresh, fleshy pit (not dried or shriveled) and let it dry for a few days before planting.
After that, the real magic happens in your fridge: wrap the pit in a damp paper towel, seal it in a plastic bag, and store it for 3-4 months to break dormancy. This cold treatment boosts germination rates from near-zero to a hopeful 30-50%.
Once sprouted, transplant into well-draining soil and keep it in bright, indirect light until it’s strong enough for the garden.
You’ll likely see your first true leaves within 6-8 weeks of planting, though growth can be slow at first. The tree may take 5-10 years to bear fruit (if it does), but the thrill of watching it grow from a tiny pit to a sturdy sapling makes the wait worthwhile.
Every stage—from the first sprout to the first signs of blossoms—feels like a victory lap in gardening persistence.
Here’s the thing: apricot trees grown from seed are unpredictable. They might end up dwarfed, disease-prone, or completely different from store-bought varieties. But that unpredictability is part of the charm—it turns gardening into an adventure.
If you’re okay with waiting and embracing the unknown, this project delivers a tree that’s uniquely yours.
📚 In This Guide
- What you need
- Instructions
- Tips and common mistakes
- Wrapping up and next steps
What you need
- ● Fresh apricot pit: 1–2 pits (preferably from a ripe, organic apricot for best results). Pro tip: Choose pits from a variety you’d like to grow!
- ● Cold stratification supplies: Small paper towel or coffee filter
- ● Plastic bag with a zip-top or airtight container
- ● Refrigerator (or a cold, dark spot, ~35–40°F / 2–4°C)
- ● Potting mix: 1 small pot (4–6 inches in diameter) filled with well-draining seed-starting mix or a blend of 50% peat moss and 50% perlite.
- ○ Small pot or nursery tray: 1–2 containers with drainage holes (optional: biodegradable pots for transplanting).
- ● Spray bottle: For gentle watering.
- ● Plastic wrap or humidity dome: To retain moisture during germination.
- ● Grow lights or sunny windowsill: A warm, bright spot (60–75°F / 15–24°C) for sprouting.
- ● Humidity tray (to create a mini greenhouse effect).
- ● Heating mat (to speed up germination if your home is cool).
- ● Fertilizer (balanced, water-soluble, like 10-10-10, diluted to half-strength once leaves appear).
- ● Pruning shears (for future shaping—though not needed at this stage!).
- ● Garden journal (to track growth milestones!).
Step-by-Step instructions for growing an apricot tree from a pit
Here’s my foolproof method for breaking dormancy and coaxing life from that apricot pit—tested over three seasons.
🌱 Step 1: Extract and Prepare the Pit
Start by washing the apricot pit thoroughly under cool water to remove all fruit residue. The sticky flesh can attract mold and pests during stratification. Use a paper towel to dry it completely—moisture trapped inside will cause the pit to rot before sprouting.
Next, gently crack the pit open using a hammer or nutcracker. You’ll need to expose the seed inside without damaging it. Place the seed on a fresh paper towel and fold it to create a small packet. This keeps the seed contained while allowing airflow. Label it with the date—this ensures you track the 6-8 week cold stratification period accurately.
💧 Step 2: Cold-Stratify for Germination
Moisten the paper towel packet slightly with water—it should feel damp but not dripping. Place the packet inside a sealed plastic bag with a few holes punched in the sides for airflow. This mimics the natural winter chilling period apricot seeds need to break dormancy.
Store the bag in your refrigerator’s crisper drawer, where temperatures hover around 35-40°F. Check it weekly—if the towel dries out, mist it lightly. After 6-8 weeks, the seed will begin to sprout. You’ll notice a tiny white root emerging first, followed by a small shoot. This is your signal to move to the next phase.
☀️ Step 3: Plant the Sprouted Seed
Fill a small pot with well-draining potting mix—I recommend a blend of 60% peat moss and 40% perlite. Plant the sprouted seed about 1 inch deep, root-side down. Press the soil gently around it to ensure good contact. Water lightly until the soil feels evenly moist but not soggy.
Place the pot in a warm, bright spot with indirect light. A south-facing window works well, but avoid direct sun, which can overheat the seedling. Maintain soil moisture by watering when the top inch feels dry. You’ll see the first true leaves appear in 4-6 weeks—this confirms successful germination.
🌿 Step 4: Transition to Outdoor Conditions
Once the seedling reaches 6 inches tall and has at least three sets of leaves, it’s ready for outdoor acclimation. Start by placing it outside in a sheltered spot for 2-3 hours daily, gradually increasing exposure over 10-14 days. This process, called hardening off, prepares the young tree for full sun and wind.
After two weeks, transplant it into a larger container or directly into the ground in a location with full sun. Apricot trees thrive in well-draining soil with a pH between 6.0 and 7.5. Water deeply after transplanting to help the roots establish. Mulch around the base to retain moisture and protect the roots from temperature fluctuations.
Tips & tricks for perfect apricot tree germination
Here’s what I’ve learned after three seasons of trial and error—these small details make all the difference between success and disappointment.
Precision in Step 1: When cracking the pit, aim for a clean break—don’t crush the seed inside. I’ve ruined more seeds than I can count by being too aggressive with the hammer. A nutcracker gives you better control, and you’ll notice the seed’s natural shape makes it easier to spot the perfect crack line. Once exposed, handle the seed with clean hands or gloves to prevent contamination.
Cold Stratification Secrets: The 35-40°F temperature range in your fridge’s crisper drawer is ideal, but consistency matters more than the exact degree. I’ve seen seeds sprout at 38°F just as reliably as at 40°F. The key is maintaining that steady chill—fluctuations above 50°F can break dormancy prematurely. Place a small thermometer in the drawer to monitor if your fridge runs hot or cold.
Moisture Management: That paper towel should feel like a wrung-out sponge—damp but not dripping. I learned this the hard way after losing seeds to mold from overwatering. Check weekly by gently squeezing the towel; if it feels dry, mist lightly. The goal is to keep the seed hydrated without creating an anaerobic environment that invites rot. A clear plastic bag with holes allows you to monitor moisture without disturbing the seed.
Transplant Timing: Wait until you see the first true leaves (not the initial sprout leaves) before transplanting. In my experience, this happens around 4-6 weeks after sprouting begins, but don’t rush—those true leaves indicate the seedling is ready for more robust growth conditions. The 6-inch height guideline is a good rule of thumb, but prioritize leaf development over size when making your call.
Pro Tips for Grow Apricot Tree From A Pit
- Here’s what I’ve learned after three seasons of trial and error—these small details make all the difference between success and disappointment.
- Precision in Step 1: When cracking the pit, aim for a clean break—don’t crush the seed inside.
- Cold Stratification Secrets: The 35-40°F temperature range in your fridge’s crisper drawer is ideal, but consistency matters more than the exact degree.
Frequently asked questions
Got questions about growing an apricot tree from a pit?
You’re not alone! Here are answers to the most common ones to help you succeed with your cold-stratified sprouting adventure.
How long does cold stratification need to last for apricot pits?
Apricot pits typically require 6–8 weeks of cold stratification in the fridge (35–40°F) to break dormancy. Place them in a damp paper towel or moist sand, then check for sprouting after this period. Patience pays off—don’t rush it!
When should I plant the sprouted pit outdoors?
Wait until spring after the last frost (when soil temps reach at least 60°F) to transplant your sprouted pit. Apricot trees are frost-sensitive, so avoid planting too early. Harden off seedlings indoors for a week before moving them outside for best results.
What if my pit doesn’t sprout after cold stratification?
Don’t worry—some pits take longer (up to 12 weeks) or may not sprout at all. Try these fixes:
- Ensure moisture (not soggy) during stratification.
- Check for rot—discard mushy pits.
- Use fresh pits (older seeds sprout poorly).
- Repeat stratification if needed.
How big should my apricot tree get before fruiting?
Apricot trees grown from pits can take 3–5 years to bear fruit, depending on variety and care. They may grow 15–25 feet tall if left unpruned. For faster fruiting, consider grafting a known apricot variety onto your seedling later.
Can I grow an apricot tree indoors?
Apricot trees thrive outdoors but can be grown indoors as dwarf varieties in large pots (with full sun). However, they need cross-pollination for fruit—plant two trees or hand-pollinate. Expect slower growth and smaller yields compared to outdoor trees.
What pests should I watch for with young apricot trees?
Keep an eye out for:
- Aphids (sap-sucking insects).
- Peach tree borers (larvae that tunnel into bark).
- Caterpillars (like tent caterpillars).
Wrapping up and next steps
Growing an apricot tree from a pit is a rewarding journey that blends patience with the joy of nurturing life from something as simple as a seed! 🌱 By following the steps—cold stratification, planting, and consistent care—you’re not just growing a tree; you’re cultivating a future harvest of sweet, sun-kissed apricots. Once your sapling is thriving, consider transplanting it into a permanent spot in your garden or sharing your success with fellow gardening enthusiasts!
Now that you’re equipped with the know-how, roll up your sleeves and get planting—your apricot tree’s future starts with you! 🌟