
Propagation
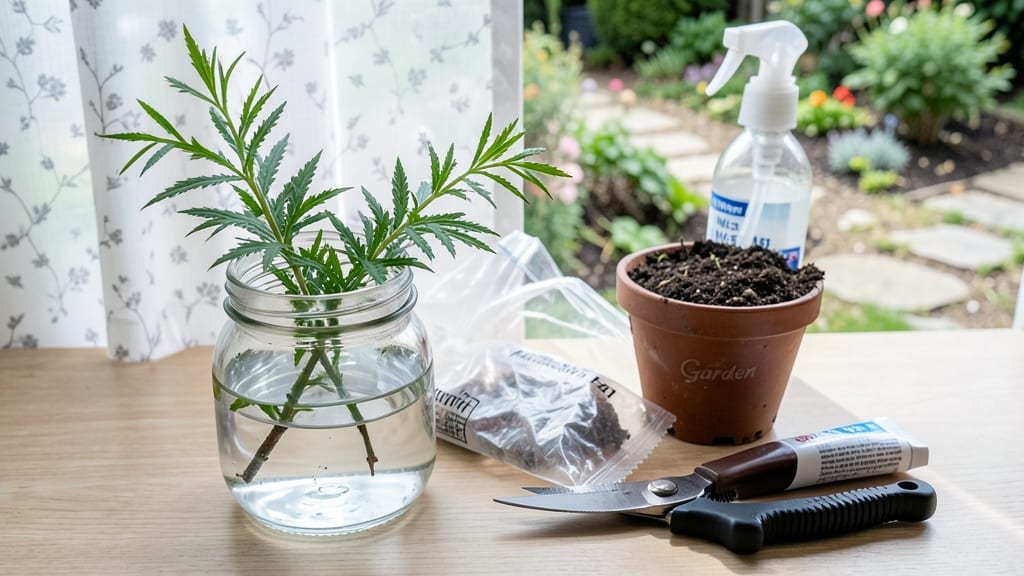
Starting a tree from a clipping feels like magic—especially when you see those first roots appear after just 4-6 weeks. 🌱 I’ve turned willow cuttings into small trees this way, and the process works surprisingly well for olive, apple, and even some citrus varieties with the right technique.
The key is choosing the right time (late spring or early summer) and using semi-hardwood cuttings—thick enough to hold but still flexible. You’ll need a sharp knife, rooting hormone (optional but helpful), and either water or a well-draining soil mix.
Some people swear by the water method, but I’ve had better luck with soil because it mimics natural conditions.
Once rooted, these little trees grow 2-3 times faster than seedlings because they’re already genetically mature. You’ll see new leaves in 6-8 weeks, and by the end of the first year, they’ll be sturdy enough to transplant.
The best part? You’re saving a tree that might’ve otherwise been lost to pruning.
Fair warning: willow and poplar root easiest, while fruit trees take patience. But with the right species and care, you’ll end up with a tree that’s genetically identical to the parent—just smaller and more manageable to start.
📚 In This Guide
- What you need
- Instructions
- Tips and common mistakes
- Wrapping up and next steps
What you need
- ● Healthy plant clipping: A 4–6 inch (10–15 cm) stem cutting from a mature, non-flowering branch (take it in early spring or late summer for best results).
- ○ Rooting hormone (optional but recommended): A powder or gel (e.g., Clonex or Rootone) to boost root growth.
- ● Well-draining soil or medium: Option 1: Perlite or vermiculite (sterile, 100% inorganic).
- ● Option 2: Sphagnum moss (moisture-retentive, 1–2 inches thick).
- ● Option 3: Sand + peat moss mix (50/50 ratio).
- ● Small pots or containers: 3–4 inch (7–10 cm) diameter, with drainage holes (reuse yogurt cups or plastic cups if needed!).
- ● Clear plastic bag or humidity dome: To trap moisture (a ziplock bag with holes works too!).
- ● Spray bottle: For gentle watering (avoid soaking the cutting).
- ● Sharp pruning shears or scissors: Clean and sterilized to prevent disease.
- ● Heat mat: A rooting heat mat (set to 70–75°F/21–24°C) speeds up root development.
- ● Fertilizer: A diluted liquid seaweed fertilizer (after roots form, ~2–3 weeks in).
- ● Grow lights: If natural light is weak (12–16 hours/day of indirect light).
- ● Label markers: To track your cuttings (trust us, you’ll forget which is which!).
- ● Hydrogen peroxide (3% solution): For sterilizing water or tools.
Step-by-Step instructions for propagating trees from clippings
Here's the method I use to root cuttings quickly—no fancy tools or years of waiting.
🌱 Step 1: Select the Right Clipping at the Right Time
Choose 4-6 inch long semi-hardwood cuttings from the current season's growth. These are the pencil-thick stems that have matured but aren't fully woody. The best time is late spring to early summer when new growth has hardened off but isn't yet dormant. Look for healthy, disease-free branches—avoid any with spots, cracks, or signs of pests.
Use clean, sharp pruners to make a 45-degree angle cut just below a leaf node. This angled cut increases surface area for root growth. Immediately strip all leaves from the lower half of the stem—these will rot in the rooting medium. Keep just a few leaves at the top to feed the plant while roots develop.
💧 Step 2: Prepare the Rooting Hormone and Medium
Fill a small pot with sterile rooting medium—I use a mix of 50% perlite and 50% peat moss—or buy pre-made propagation mix. Moisten it until damp but not soggy. You want it to hold moisture without feeling wet to the touch. The right consistency is like a wrung-out sponge.
Dip the cut end of each clipping into rooting hormone powder (or gel). Shake off any excess—too much can slow rooting. Insert the cutting 2-3 inches deep into the medium at a slight angle. This mimics natural conditions and prevents the stem from rotting at the base. Space 4 cuttings in a 4-inch pot for our project.
☀️ Step 3: Create the Ideal Rooting Environment
Place the pot in a clear plastic bag or cover it with a humidity dome to trap moisture. This creates a mini greenhouse effect that speeds rooting. Set the pot in bright, indirect light—no direct sun yet. Too much heat will dry out the cuttings before roots form. A 65-75°F environment works best, so a kitchen windowsill or under grow lights is perfect.
Check the medium every 2-3 days—it should stay lightly moist. Mist the leaves if they look dry but don't soak the soil. Roots typically appear in 4-8 weeks, but some fast growers like willow or poplar may sprout roots in just 2 weeks. You'll see new growth at the top first—that's your signal roots are forming below.
✂️ Step 4: Encourage Root Growth and Transplant
Once you spot new leaves at the top (usually after 6-8 weeks), gently tug on the cutting. If resistance meets your fingers, roots have formed. Remove the plastic cover gradually over 5-7 days to acclimate the cutting to normal humidity. Water lightly but don't overdo it—overwatering now will rot tender new roots.
Transplant to a smaller pot (3-4 inches) with regular potting mix when roots fill the original container. Keep the new pot in partial shade for a week to reduce stress. After that, move it to morning sun for a few hours daily, increasing exposure over 2 weeks. Your new tree is now ready for permanent planting or a larger container.
Tips & tricks for fast tree propagation
Real talk: Growing trees from cuttings takes patience, but these tricks cut weeks off your waiting time.
Selection is Everything: In Step 1, focus on pencil-thick stems that bend slightly but don't snap—this indicates perfect semi-hardwood maturity. I've learned the hard way that thicker branches take forever to root, while thinner ones rot before they take. The 4-6 inch range is ideal because it balances root development speed with stability. Look for stems with a slight sheen, which usually means they're healthy and ready to propagate.
Hormone Hack for Faster Roots: When using rooting hormone in Step 2, don't just dip—roll the cut end in the powder to create a thick coating. This creates a stronger barrier against moisture loss and gives roots more surface area to form. For an extra boost, I like to dip the cut end in water first to activate the hormone before rolling. This little trick can shave 2-3 weeks off your rooting time, especially with slower growers like maple or oak.
Light and Heat Balance: The 65-75°F temperature range in Step 3 is critical—too cold slows rooting, but too hot causes desiccation. I place my propagation setups on top of refrigerators (not inside) where the heat rises just enough to maintain that sweet spot. If your home runs cooler, consider using a small space heater with a thermostat set to 70°F near your propagation station. Bright indirect light is key—south-facing windows work best, but if you're using grow lights, keep them 6-12 inches above the cuttings.
Pro Tips for Start A Tree From A Clipping
- Real talk: Growing trees from cuttings takes patience, but these tricks cut weeks off your waiting time.
- Selection is Everything: In Step 1, focus on pencil-thick stems that bend slightly but don't snap—this indicates perf...
- Hormone Hack for Faster Roots: When using rooting hormone in Step 2, don't just dip—roll the cut end in the powder to...
Frequently asked questions
Got questions about growing a tree from a clipping? You’re not alone! Here are some of the most common concerns—and straightforward answers—to help you succeed.
Can any tree branch be rooted from a clipping?
Not all trees root easily from cuttings. Hardwood (woody) and semi-hardwood (partially hardened) cuttings from trees like willow, poplar, or maple work best. Softwood (new growth) cuttings from fruit trees or shrubs can also root, but avoid evergreens or trees with thick sap—they’re trickier! Check if your tree is propagation-friendly first.
How long does it take for a clipping to root?
Roots usually appear in 2–8 weeks, depending on the tree type, humidity, and care. Willow and poplar cuttings might sprout roots in 2–3 weeks, while fruit trees or shrubs can take 6–8 weeks. Patience is key—keep the soil moist and avoid disturbing the clipping until you see new growth!
What if my clipping isn’t rooting after a month?
Don’t panic! First, check for rot (mushy stems) or dryness (brown, crispy cuttings). If the base is still firm and green, it’s alive. Try these fixes:
- Increase humidity: Cover with a plastic bag or use a humidity dome.
- Adjust light: Move to bright, indirect light (no direct sun).
- Check hormones: If using rooting hormone, ensure it’s fresh and applied correctly.
- Try water propagation: Place the clipping in water to see if roots form there first.
Can I root a tree clipping in water instead of soil?
Water propagation is a great way to test rooting success before planting. Use room-temperature water and change it every 3–5 days to prevent bacteria. Once roots reach 2–3 inches, transplant to soil. Pro tip: Add a drops of hydrogen peroxide (1 tsp per gallon) to keep water fresh longer!
How do I know when my rooted clipping is ready to plant outdoors?
Your clipping is ready for the great outdoors when it has:
- Strong roots (1–2 inches long).
- New leaves or shoots (signs of vigorous growth).
- Sturdy stems (not floppy or weak).
What if my clipping grows roots but then dies after planting?
This usually happens due to transplant shock or poor acclimation. To prevent it:
- Water deeply before and after planting.
- Mulch around the base to retain moisture.
- Avoid full sun for the first week—keep it in partial shade.
- Don’t overwater; let the soil dry slightly between waterings.
Wrapping up and next steps
Starting a tree from a clipping is a rewarding journey that combines patience, care, and a little green thumb magic! 🌱 By following these steps—selecting the right cuttings, preparing them properly, and providing the ideal environment—you’re well on your way to nurturing a thriving new tree.
Remember, consistency is key, so stay attentive to moisture, light, and root development.
Now that you’re armed with the know-how, why not give it a try? Grab those clippings, set up your propagation station, and watch your garden grow—one rooted cutting at a time. Happy planting! 🌿