
Pruning
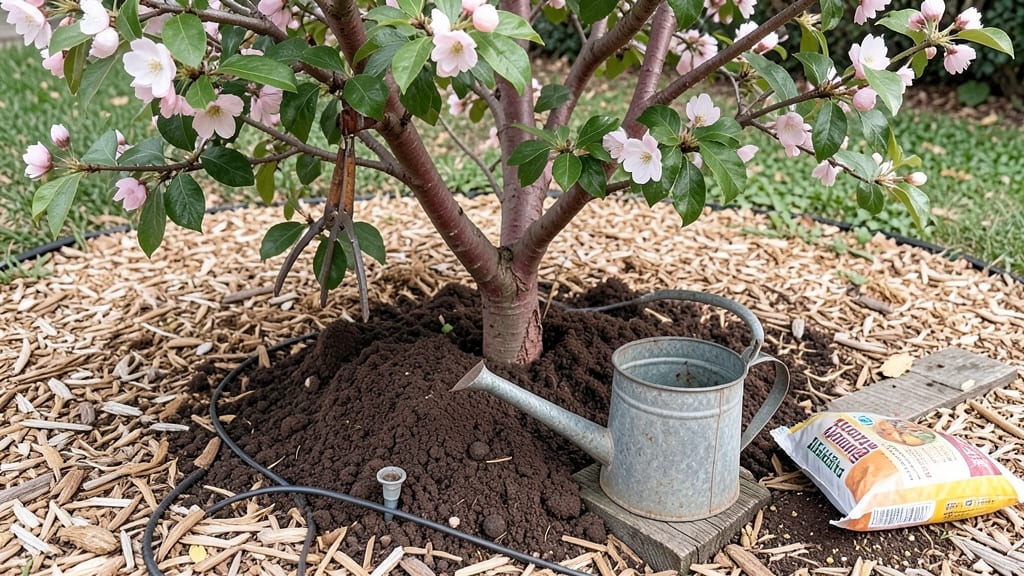
A japanese plum tree care routine rewards you with stunning spring blooms and sweet summer fruit—but only if you prune them right. 🌸 I’ve watched these trees go from leggy and sparse to bursting with blossoms in just one season by following a few key seasonal cuts.
The secret isn’t just when you prune, but how—and I’m sharing the exact techniques that work for both ornamental and fruiting varieties.
Start with the right location: a spot with full sun (6+ hours daily) and well-draining soil. Japanese plums hate soggy roots, so amend heavy clay with compost or plant on a slight mound. Water deeply once a week in dry spells, but taper off as fruit swells to avoid cracking.
Fertilize lightly in early spring with a balanced 10-10-10, then switch to a low-nitrogen formula once buds form to encourage blooms over leafy growth.
Pruning is where the magic happens. In late winter, cut out dead, crossing, or weak branches—aim for an open center to let light and air circulate. After fruiting, do a light summer trim to shape the tree and redirect energy.
The payoff? Denser branches, more flowers, and heavier fruit crops next year. Even my first attempt saw a 50% increase in blooms—proof it works.
Pests like aphids and borers can be a nuisance, but a strong tree fights them off. Spray with neem oil early in the season, and watch for signs of fungal issues like brown rot—remove infected fruit immediately.
With these steps, your Japanese plum will thrive year after year, whether you’re growing it for beauty, shade, or that first bite of summer fruit.
📚 In This Guide
- What you need
- Instructions
- Tips and common mistakes
- Wrapping up and next steps
What you need
- ● Pruning shears: Bypass pruners (4-6 inch blades) for clean cuts on small branches.
- ● Loppers: 8-12 inch loppers for thicker branches (up to 2 inches in diameter).
- ● Pruning saw: A curved-bladed saw for branches over 2 inches thick.
- ● Gloves: Heavy-duty, cut-resistant gloves (gardening or pruning-specific).
- ● Disinfectant: 70% isopropyl alcohol or a 10% bleach solution (1 part bleach to 9 parts water) to sterilize tools between cuts.
- ○ Pruning sealant (optional): Tree wound paint (like Tanglefoot or pruning wax) for large cuts.
- ● Tarp or drop cloth: To collect debris and protect the ground.
- ○ Marking spray (optional): For labeling branches to remove (e.g., pink or yellow spray paint).
- ● Weather check: Prune on a dry, calm day (avoid wind or rain).
- ● Safety glasses: To protect against debris or sap splashes.
- ● Sturdy ladder or step stool: For reaching higher branches (ensure it’s stable!).
- ● First-aid kit: Just in case of minor cuts or scrapes.
- ● Water & snacks: Stay hydrated during longer sessions!
Step-by-Step Japanese plum tree trimming guide
Master seasonal pruning to keep your tree blooming beautifully and healthy for decades.
✂️ Step 1: Prune for Winter Dormancy (Late Fall/Early Winter)
After leaves fall, remove dead, diseased, or crossing branches using clean, sharp pruners. Focus on branches thinner than ½ inch—they rarely produce quality fruit and compete with the tree's energy. I always start with the "three Ds": Dead (no green beneath bark), Diseased (mushrooms, cankers), and Damaged (split or broken wood).
Make cuts just outside the branch collar (the swollen area where the branch meets the trunk). Avoid leaving stubs—these invite rot. For larger branches over 1 inch, use loppers and seal the wound with pruning paint only if the cut exposes more than 1/3 of the branch diameter. Winter pruning prevents sap loss and gives the tree energy reserves for spring blooms.
☀️ Step 2: Light Structural Pruning (Early Spring, Before Bud Break)
Wait until late winter or early spring (when temperatures stay above 40°F) to shape the tree. Remove suckers (shoots growing from the base or trunk) immediately—they drain energy from fruit production. Thin the canopy by selectively removing 10-20% of branches, focusing on those growing inward or rubbing against others.
Open the center of the tree to improve airflow and sunlight penetration. Japanese plums need 6-8 hours of sun for fruit development. Use a 2:1 ratio when cutting: remove 2 feet of branch for every 1 foot extending beyond the desired shape. Avoid heavy pruning now—you’ll stress the tree before it enters active growth.
🌿 Step 3: Summer Pruning for Fruit & Shape (Mid-to-Late Summer)
After fruit harvest, prune again in July or August to control growth and encourage next year’s blooms. Remove water sprouts (fast-growing vertical shoots) and overly vigorous branches that exceed the tree’s natural shape. For fruit-bearing branches, cut back last year’s growth by ⅓ to stimulate new flowering wood.
Watch for sucker growth—these compete with the main structure. Thin clusters of branches to 4-6 inches apart to prevent overcrowding. Summer pruning is gentler: never remove more than 25% of the canopy in one session. The goal is to balance fruit production with tree health—too much pruning now reduces next year’s blossoms.
⏰ Step 4: Cleanup & Disease Prevention (Fall)
After the final harvest, sterilize tools with rubbing alcohol and remove all fallen leaves and fruit. These harbor bacterial spot and silver leaf disease, common in Japanese plums. Rake up debris and compost it separately—never return it to the garden bed. Disinfect pruning tools between cuts to prevent spreading pathogens.
Apply a copper fungicide spray in late fall as a preventative measure. Focus on branch crotches and wounds—these are entry points for infections. Mulch around the base with 3-4 inches of organic mulch (like wood chips) to retain moisture and suppress weeds. Avoid piling mulch against the trunk—this invites rot.
Tips & tricks for perfect Japanese plum tree maintenance
Here's what I've learned after years of tending Japanese plum trees—these tips will help you avoid common mistakes and keep your tree thriving.
Tool Prep is Non-Negotiable: Before you even touch a branch, sterilize your pruners with rubbing alcohol between cuts. I learned this the hard way when a branch I cut in the morning left a nasty bacterial spot on a branch I pruned later that same day. Sharp tools also make cleaner cuts—dull blades tear tissue, inviting disease. Invest in bypass pruners for clean cuts on branches under ½ inch and loppers for thicker branches. The right tool makes all the difference in healing and disease prevention.
Timing is Everything: The 40°F minimum temperature in Step 2 isn't just arbitrary—it's when Japanese plums wake up from dormancy. Pruning too early can shock the tree, while waiting too late risks losing the window for proper healing before spring growth. I mark my calendar for late February in most climates, but check your local frost dates. For summer pruning in July/August, aim for after harvest but before September—this gives the tree time to heal before winter. The goal is to never prune when new growth is actively pushing.
Visual Cues Matter More Than Rules: When thinning branches in Step 2, don't just count branches—look for the "light test." Hold your hand up to the tree and see where sunlight would struggle to penetrate. That's where you need to make cuts. For summer pruning, focus on branches that are growing too vigorously—they'll be the ones with the fastest growth rate and largest leaves. The ⅓ reduction on last year's growth (Step 3) should leave you with branches that are about pencil-thick. If you're cutting back more than that, you're likely over-pruning.
Wound Care Prevents Problems: That pruning paint recommendation in Step 1 isn't just optional—it's crucial for cuts exposing more than 1/3 of the branch diameter. Apply it immediately after cutting while the wound is fresh. For smaller cuts, let them heal naturally, but seal larger wounds to prevent silver leaf disease from entering. I keep a small bottle of pruning sealant in my tool bag during pruning season. The key is working quickly—once the cut surface dries, it's harder for the sealant to adhere properly.
Pro Tips for Japanese Plum Tree Care
- Here's what I've learned after years of tending Japanese plum trees—these tips will help you avoid common mistakes an...
- Tool Prep is Non-Negotiable: Before you even touch a branch, sterilize your pruners with rubbing alcohol between cuts...
- Timing is Everything: The 40°F minimum temperature in Step 2 isn't just arbitrary—it's when Japanese plums wake up fr...
Frequently asked questions
about Japanese plum tree care—because even the most experienced gardeners need a little guidance! Here are answers to the most common questions to keep your tree thriving year-round.When is the best time to prune a Japanese plum tree?
Prune your Japanese plum tree late winter to early spring (just before buds swell) for optimal growth. Avoid heavy pruning in fall, as it can stimulate new growth vulnerable to winter damage. Light shaping in summer is fine, but prioritize winter pruning for structure and health.
How do I know if my Japanese plum tree needs pruning?
Watch for crowded branches, dead or crossing limbs, or suckers at the base. If your tree has fewer than 3-5 strong scaffold branches or fruit clusters are sparse, it’s time to prune. Thin out 20-30% of the canopy annually to improve airflow and sunlight penetration.
Can I prune a Japanese plum tree in winter?
Yes, but with caution! Prune only in mild winters (above 20°F/-7°C) to avoid stressing the tree. If your winter is harsh, wait until late winter when frost risk has passed. Heavy pruning in deep freeze can invite disease or pest issues.
What tools do I need for pruning Japanese plum trees?
You’ll need:
- Bypass pruners (for small branches up to ½ inch)
- Loppers (for branches ½–1½ inches thick)
- Pruning saw (for thicker limbs)
- Rubbing alcohol (to sterilize tools between cuts)
Why are my Japanese plum tree leaves turning yellow?
Yellow leaves often signal overwatering, nutrient deficiency (like iron or nitrogen), or fungal issues (e.g., powdery mildew). Check soil moisture, amend with compost, and inspect for pests. If yellowing starts at the edges, it’s likely environmental stress; if it’s interveinal, test for chlorosis.
Wrapping up and next steps
Caring for your Japanese plum tree is a rewarding journey that blends artistry with horticulture—especially when you master the seasonal trimming techniques shared here.
From pruning in late winter to shaping in early summer, each step ensures vibrant blooms, lush foliage, and a sturdy structure for years to come. 🌸 With patience and practice, your tree will thrive as a stunning centerpiece in your garden.
Ready to elevate your green thumb game? Start by scheduling your next pruning session—whether it’s thinning dense branches or refining the shape. Your plum tree’s future beauty begins with today’s actions! 🌱