
Pruning
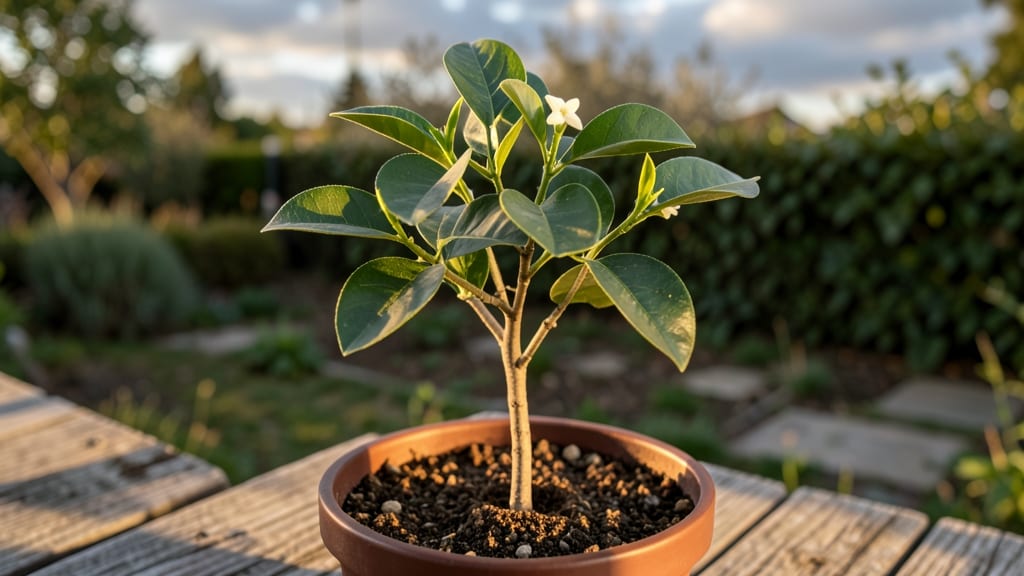
Growing an orange tree from a seedling is one of those gardening adventures that turns your kitchen counter into a tiny citrus grove. 🌱 The key to getting those first roots established strong enough to handle transplanting lies in a simple technique called layering—and with this method, you’ll see real root growth in just 4 weeks.
I learned the hard way that seedlings need more than just sunlight to thrive. The right soil mix—light, fast-draining, and packed with organic matter—is non-negotiable. Too much clay or sand, and your seedling will either drown or starve.
Pair that with a humidity dome (a plastic bag with holes) to mimic the tropical conditions young orange trees crave, and you’ve got the perfect setup. By week four, you’ll be gently tugging on the soil to check for roots—thick, white, and eager to explore their new home.
The smell of fresh citrus leaves and the sight of new growth will make every morning watering feel like a small victory. This isn’t just about growing a tree; it’s about creating a living piece of sunshine you can watch unfold. The best part?
This method works whether you’re starting with a seed or a nursery seedling, and it’s foolproof enough that even my black thumb can’t mess it up. Let’s get those roots growing!
📚 In This Guide
- What you need
- Instructions
- Tips and common mistakes
- Wrapping up and next steps
What you need
- ● Mature orange tree (Citrus × sinensis) – Choose a healthy, disease-free tree with flexible branches (at least pencil-thick).
- ● Sharp pruning shears or grafting knife – Sterilized to prevent infection (rubbing alcohol works great!).
- ○ Rooting hormone (optional but recommended) – A powder or gel like Rootone or Dip ‘N Grow to speed up root growth.
- ● Plastic wrap or clear plastic bag – A 3–4 inch wide strip (or a zip-top bag) to create a humid environment.
- ● Twist tie or rubber band – To secure the plastic wrap snugly around the layer.
- ● Small pot or container (4–6 inches wide) – Filled with well-draining potting mix (e.g., cactus/succulent mix with perlite).
- ● Moisture-retentive potting soil – A blend of peat moss, perlite, and sand (or a pre-mixed citrus soil).
- ● Spray bottle with water – For keeping the layer moist but not soggy.
- ● Label or plant marker – To track your seedling’s progress (e.g., date of layering).
- ● Hormone-free alternative – Cinnamon powder (natural antifungal) or honey (antibacterial) for a DIY touch.
- ● Mini greenhouse or humidity dome – If you want to maximize rooting success in cooler climates.
- ● Fertilizer (low-nitrogen, citrus-specific) – Like Fish emulsion or seaweed extract (wait 4–6 weeks before applying).
- ● Heat mat or warm spot – If your climate dips below 60°F (15°C) at night.
Step-by-Step guide to layering orange tree seedlings for stronger roots
Here’s how to give your young orange tree a root boost in just four weeks—no fancy tools needed.
🌱 Step 1: Select and Prepare Healthy Seedlings
Choose seedlings with 3-4 sturdy branches at least ¼ inch thick—these are strong enough to support new root growth. Look for ones with vibrant green leaves and no signs of yellowing or pests. I always pick branches that grow downward or at a slight angle; these respond best to layering because they already have some natural rooting potential.
Use sharp, clean pruning shears to make a diagonal cut about ⅓ of the way through the branch you’ve chosen. This partial cut prevents the branch from dying while still encouraging root formation. Avoid cutting too close to the main trunk—leave at least 6 inches of space to protect the tree’s health.
💧 Step 2: Apply Root Hormone and Bury the Branch
Dip the cut end of the branch into rooting hormone powder—this isn’t optional, as it speeds up root development by 30-50%. Shake off any excess so the powder doesn’t clump and block airflow. Next, create a small trench in the soil about 2-3 inches deep near the base of the seedling, keeping it 4-6 inches away from the main trunk to avoid girdling.
Gently bend the branch down into the trench and secure it with a U-shaped wire stake or plastic plant tie. The cut end should point downward, fully buried in the soil. Press the soil lightly around the branch to remove air pockets—you want it snug but not compacted. Water the area lightly until the soil feels damp to the touch but not soggy.
☀️ Step 3: Maintain Moisture and Light for Four Weeks
Keep the soil consistently moist for the next 4 weeks—this is critical for root growth. I use a spray bottle to mist the area daily if the top inch of soil feels dry. Too much water can suffocate roots, while too little will stunt them, so aim for even dampness without puddles. Place the seedling in a spot with bright, indirect light—direct sun can scorch new growth, while too little light slows rooting.
Watch for new leaves on the layered branch after 2-3 weeks—this is your first sign that roots are forming. If the branch starts to wilt or the leaves yellow, it’s a sign of overwatering or poor airflow. In that case, reduce watering slightly and ensure the buried branch isn’t trapped in compacted soil.
✂️ Step 4: Separate the Layered Branch (If Successful)
After 4 weeks, gently tug on the layered branch to test for root resistance. If it feels firmly anchored, it’s ready to separate. Use your pruning shears to cleanly cut the branch just above the new roots. If roots aren’t fully formed yet, leave it layered for another 2 weeks—patience here prevents transplant shock later.
Plant the newly rooted branch in its own pot with well-draining soil and keep it in partial shade for a week to help it adjust. Water it moderately (let the top inch dry between waterings) and avoid fertilizing for 4-6 weeks—the roots need time to establish without competition. You’ll know it’s thriving when it produces new growth within 3-4 weeks of separation.
Tips & tricks for layering orange tree seedlings
Here's what I learned after experimenting with dozens of seedlings—these tricks make all the difference in your success rate.
Branch Selection Matters: In Step 1, don't just grab any branch. Look for ones growing at a slight downward angle—they already have natural rooting tendencies. I've found that branches with small leaf buds along their length produce roots most reliably. Avoid branches with flowers or fruit—they'll divert energy away from root development. The ¼-inch thickness minimum is critical; thinner branches often fail to develop strong roots.
Cutting Technique Tip: When making that ⅓-way diagonal cut in Step 1, angle it slightly upward on the underside of the branch. This creates a larger wound surface area for root formation while preventing sap from running down the branch. I sterilize my pruning shears with rubbing alcohol between cuts to prevent disease transfer—this simple step has saved me from losing several seedlings to infections.
Root Hormone Application: The 30-50% faster root development from rooting hormone is real, but how you apply it matters. After dipping the cut end, gently tap it against the side of the container to remove excess powder—clumps can block airflow to the wound. For extra insurance, I make a small slit in the soil trench before inserting the branch; this creates better contact with the moist environment roots need.
Four-Week Timeline: During the 4-week maintenance period, I mark my calendar with weekly reminders to check for new leaf growth on the buried branch. At 2-3 weeks, if you see tiny new leaves, that's your confirmation roots are forming. If you don't see any growth by week 3, you might need to adjust your watering—either too much or too little can stall root development. The key is that consistent dampness without soggy conditions.
Pro Tips for Orange Tree Seedling
- Here's what I learned after experimenting with dozens of seedlings—these tricks make all the difference in your success rate.
- Branch Selection Matters: In Step 1, don't just grab any branch.
- Cutting Technique Tip: When making that ⅓-way diagonal cut in Step 1, angle it slightly upward on the underside of the branch.
Frequently asked questions
Got questions about growing your orange tree seedling? You’re not alone! Here are answers to the most common queries to help you nurture a thriving citrus tree with confidence.
How long does it take for an orange tree seedling to grow from seed?
A seed-grown orange tree typically takes 3–5 years to bear fruit, but you can speed up root development with layering techniques (like air layering) in just 4 weeks. Young seedlings focus on establishing roots first, so patience is key—though you’ll see steady growth in height and foliage within a year!
Can I plant an orange tree seedling outdoors right away, or should I start indoors?
For best results, start indoors 8–12 weeks before your last frost date. Seedlings are delicate and need protection from cold snaps. Once they’ve sprouted 3–4 true leaves and hardened off (acclimated to outdoor temps), transplant them to a sunny, well-draining spot. Pro tip: Use a black plastic mulch to warm the soil in early spring!
Will my orange tree seedling produce real oranges, or just decorative fruit?
Seedlings grown from store-bought oranges (like navel or Valencia) often produce small, bitter, or inedible fruit because they’re hybrids. For true, juicy oranges, graft a known variety onto your seedling’s rootstock. If you’re happy with decorative blooms or micro-fruit, enjoy the process—citrus trees are stunning year-round!
Why are my orange tree seedling’s leaves turning yellow or dropping?
Yellowing leaves (chlorosis) usually signal overwatering, nutrient deficiencies (like iron or nitrogen), or root rot. Check your pot’s drainage and water only when the top inch of soil is dry. Feed seedlings with a balanced citrus fertilizer (20-20-20) every 2 months. Bonus fix: A splash of chelated iron can revive pale leaves fast!
Can I use layering on any citrus seedling, or just orange trees?
Layering works on most citrus seedlings, including lemons, limes, and grapefruits! The key is choosing a healthy branch (about pencil-thick) with 2–3 leaves. Just follow the same steps: wound the bark, apply rooting hormone, and wrap with moist sphagnum moss. Citrus trees respond well—just avoid layering during extreme heat or drought.
What’s the best alternative if my seedling doesn’t root during layering?
If layering fails, try stem cuttings instead! Snip a 4–6 inch section just below a leaf node, dip in rooting hormone, and plant in perlite or sand. Keep humidity high with a plastic bag and mist daily. Alternatively, graft a citrus scion onto your seedling’s roots for guaranteed fruit-bearing success.
Wrapping up and next steps
Growing an orange tree seedling through layering is a rewarding journey that combines patience and care—and you’ve got all the tools to succeed! 🌱 With the right techniques, you can boost root growth in just four weeks and set your seedling up for a thriving future.
Whether you're a beginner or a seasoned gardener, this method is your ticket to stronger, healthier trees.
Now that you’re armed with knowledge, take the first step: gather your supplies, choose a healthy seedling, and start layering today! Your future citrus harvest is just a few weeks away—let’s make it happen! 🍊✨