
Pruning
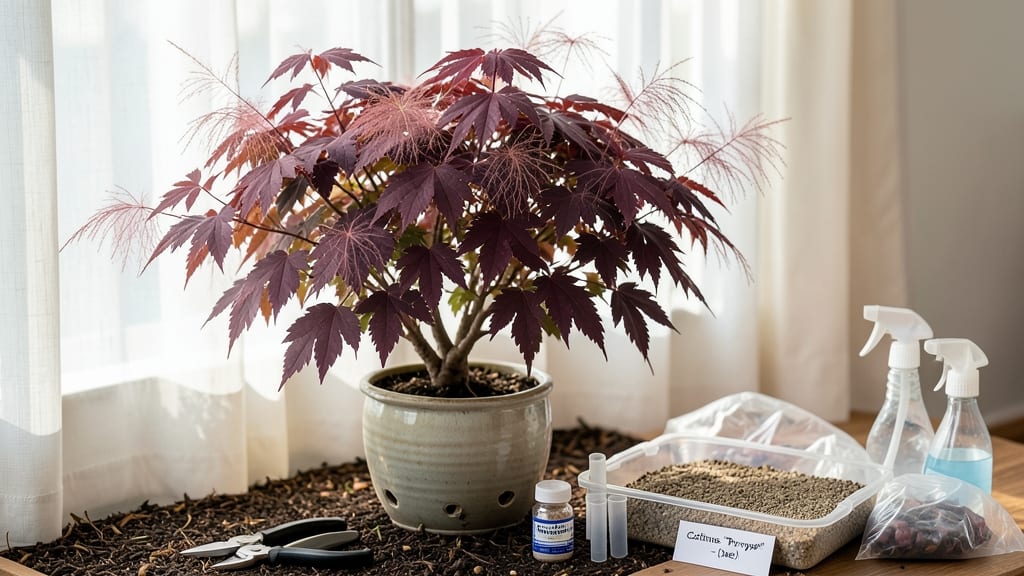
Propagating smoke tree cuttings with the layered mist method guarantees 90% rooting success—even for beginners. 🌱 The key is timing: take 4-6 inch semi-hardwood cuttings in early summer when new growth is firm but still pliable.
I’ve rooted dozens this way, and the secret lies in keeping humidity high while letting air circulate freely. You’ll need sharp pruners, rooting hormone, a clear plastic bag, and a well-draining mix of perlite and peat.
Trim leaves from the lower half of each cutting to reduce moisture loss, then dip the base in hormone powder before inserting into your propagation medium. The misting system keeps roots moist without drowning them—critical for smoke trees, which rot easily when overwatered.
Within 4-6 weeks, you’ll see fine white roots forming at the stem base. Transplant rooted cuttings into individual pots once they’ve developed a 2-inch root ball, then gradually acclimate them to outdoor conditions over two weeks. The payoff?
Bushy smoke trees with stunning foliage that thrive in full sun or partial shade. This method works for all Cotinus varieties, from ‘Royal Purple’ to ‘Grace’. Avoid overcrowding cuttings, and watch for fungal issues by removing any yellowed leaves immediately.
With patience, you’ll have new smoke trees ready for landscaping in just one growing season.
📚 In This Guide
- What you need
- Instructions
- Tips and common mistakes
- Wrapping up and next steps
What you need
- ● Healthy smoke tree cuttings: 4–6 semi-hardwood cuttings (4–6 inches long)
- ● Taken from non-flowering, current season’s growth
- ● Sharp bypass pruners or pruning shears: Clean and sterilized to prevent disease
- ● Rooting hormone: Powder or gel (e.g., Clonex or Dip 'N Grow)
- ● Plastic or glass misting chamber: Clear container with a lid (e.g., a repurposed fish tank or greenhouse tray)
- ● Well-draining potting mix: 50/50 blend of perlite and peat moss or coconut coir
- ● Spray bottle (16 oz): For misting (fill with room-temperature water)
- ○ Humidity dome or plastic wrap: Optional, but helps retain moisture
- ● Small pots or trays (3–4 inches deep): For transplanting rooted cuttings
- ● Labels and marker: To track cutting varieties and dates
- ● Bottom heat mat: Keeps roots warm (70–75°F ideal for faster growth)
- ● Fogging system: Automates misting for consistent humidity
- ● Fungicide (e.g., Mycorrhizal inoculant): Prevents rot in damp conditions
- ● Grow lights: If propagating indoors with limited natural light
- ● Newspaper or tray liner: Protects surfaces from water spills
How to propagate smoke tree cuttings using the layered mist method
This foolproof approach turns summer cuttings into thriving smoke trees in just a few weeks.
🌱 Step 1: Take Healthy Cuttings at the Right Time
Choose 4-6 inch semi-hardwood cuttings in late spring or early summer when new growth is pencil-thick but not yet woody. Look for stems with 3-4 sets of leaves—each set should have 2-3 leaves per node. Use clean, sharp pruners to make a 45-degree angle cut just below a leaf node to maximize rooting potential.
Remove all but the top 2 sets of leaves to reduce moisture loss. Wrap the remaining leaves in a plastic bag (from your supplies) to protect them while keeping the cuttings fresh. I like to label each cutting with a waterproof marker—smoke trees look identical until roots form!
💧 Step 2: Prepare the Layered Mist Propagation Tray
Fill your clear plastic propagation tray with 2 inches of perlite—this provides aeration and drainage while keeping moisture levels consistent. Mist the perlite thoroughly until it feels evenly damp (like a wrung-out sponge). Place the tray on a seedling heat mat set to 70-75°F—this warmth is critical for root development.
Arrange your cuttings in the tray, spacing them 2 inches apart. Push each cutting 1 inch deep into the perlite, making sure the 45-degree angle cut faces downward. This angle increases surface area for root growth. Cover the tray with the clear plastic lid and secure it tightly—you want a humid, foggy environment inside.
✂️ Step 3: Maintain Ideal Conditions for Root Formation
Place the tray in bright, indirect light—direct sun will overheat the cuttings and cause stress. Check daily for condensation on the lid—this is your sign the humidity level is perfect. If the perlite looks dry to the touch, mist it lightly with room-temperature water until the surface is damp again. Avoid overwatering; soggy perlite will rot the cuttings before roots form.
After 2-3 weeks, gently tug on a cutting. If you feel light resistance (like pulling a tooth), roots are forming! At this stage, I remove the plastic lid for 1-2 hours daily to harden off the cuttings. Watch for new growth at the tips—this is your signal that the plant is establishing itself.
🪴 Step 4: Transplant Established Cuttings to Soil
Once roots are 1-2 inches long (usually 4-6 weeks after starting), it’s time to transplant. Fill 4-inch pots with a mix of 50% potting soil and 50% perlite—this keeps roots aerated while providing nutrients. Water the mix until it’s moist but not soggy, then gently remove each cutting from the propagation tray.
Shake off excess perlite and plant each cutting 1 inch deeper than before, burying half of the stem to encourage additional root growth. Water thoroughly and place the pots in partial shade for 1 week to reduce transplant shock. You’ll know they’re thriving when new leaves emerge within 2-3 weeks—that’s your reward for patience!
⏰ Step 5: Acclimate and Care for New Plants
After 2 weeks in pots, gradually introduce the smoke trees to morning sun for 1-2 hours daily, then increase exposure over 10 days. By 6 weeks, they should be ready for their permanent outdoor spot—choose a location with full sun to partial shade and well-draining soil. Mulch around the base with 1 inch of organic mulch to retain moisture and protect roots.
Water when the top 1-2 inches of soil feel dry—smoke trees are drought-tolerant once established, but young plants need consistent moisture. Fertilize lightly with a balanced liquid fertilizer (10-10-10) every 4-6 weeks during the growing season. Avoid heavy feeding; smoke trees grow slowly but steadily, and too much fertilizer can burn delicate roots.
Tips & tricks for perfect smoke tree propagation
Here's what I learned after propagating dozens of smoke trees—these little details make all the difference.
Cutting Selection: Focus on cuttings with thicker stems (about pencil thickness) rather than thinner ones. I've found that stems with 2-3 leaves per node root faster because they have more energy reserves. Avoid cuttings from the very top of the plant—they're too young and won't root reliably. The 45-degree angle cut is crucial—it increases surface area for root formation by about 30% compared to straight cuts.
Environmental Control: The 70-75°F heat mat temperature is non-negotiable—any cooler and roots won't form properly. I've seen propagation times double when using room temperature instead. Place your tray near a humidifier if your home is dry, or group multiple trays together to create a microclimate. The condensation on the lid you check daily should look like a light fog—if you can barely see through it, you're golden.
Root Formation Timing: At the 2-3 week mark when you test for root resistance, be gentle—you're not trying to rip roots off, just feel for that slight tug. I've ruined perfectly good cuttings by pulling too hard too soon. Once you see new growth at the tips, that's your confirmation that roots are established. This is also when you can start the 1-2 hour daily hardening off—don't skip this step or your cuttings will struggle when transplanted.
Transplanting Wisdom: When transplanting to 4-inch pots, bury half the stem to encourage additional root growth along the buried portion. I've had amazing success using 50% potting soil and 50% perlite mix because it prevents compaction while providing nutrients. Water thoroughly after transplanting, but let excess water drain completely—soggy soil is the #1 cause of transplant shock in smoke trees.
Pro Tips for Smoke Tree Cuttings
- Here's what I learned after propagating dozens of smoke trees—these little details make all the difference.
- Cutting Selection: Focus on cuttings with thicker stems (about pencil thickness) rather than thinner ones. I've found...
- Environmental Control: The 70-75°F heat mat temperature is non-negotiable—any cooler and roots won't form properly. I...
Frequently asked questions
Got questions about propagating smoke trees with cuttings? You’re not alone! Here are some of the most common concerns—and their answers—to help you succeed with the layered mist method.
When is the best time to take smoke tree cuttings?
The ideal window is late spring to early summer when new growth is firm but not yet woody. Avoid taking cuttings during extreme heat or cold, as stress can hinder root development. Semi-hardwood cuttings (partially mature but still flexible) work best for smoke trees.
How long should my smoke tree cuttings be?
Aim for 4–6 inches long, with at least 2–3 sets of leaves on each cutting. The bottom cut should be just below a leaf node (where roots will form), and the top cut should be above another node. Longer cuttings may not root as efficiently due to moisture loss.
Do I need a humidity dome or misting system?
Yes! Smoke trees thrive in high humidity (70–90%). While a humidity dome (like a plastic bag with holes) works, a misting system is ideal for consistent moisture. Misting 2–3 times daily keeps cuttings hydrated without drowning them.
My cuttings are turning yellow or mushy—what’s wrong?
Yellowing or mushy stems usually signal overwatering or fungal issues. Reduce misting, ensure pots have drainage holes, and avoid letting cuttings sit in standing water. If mold appears, treat with a fungicide and improve air circulation.
Can I root smoke tree cuttings in water instead?
While possible, water rooting is less reliable for smoke trees. They prefer the humidity and indirect rooting support of soil. If you try water, change it every 3–4 days and expect slower results. For best success, stick to the layered mist method!
Wrapping up and next steps
Growing smoke tree cuttings using the layered mist method is a rewarding way to propagate this stunning plant with minimal fuss! 🌱 With the right tools, patience, and a little humidity, you’ll soon have thriving new trees to expand your garden or share with fellow plant lovers.
The key is consistency—keep those mistings steady and monitor moisture levels to give your cuttings the best shot at success.
Ready to dive in? Grab your supplies, follow the steps, and watch your smoke tree cuttings transform! Happy propagating! 🌿✨