
Lawn
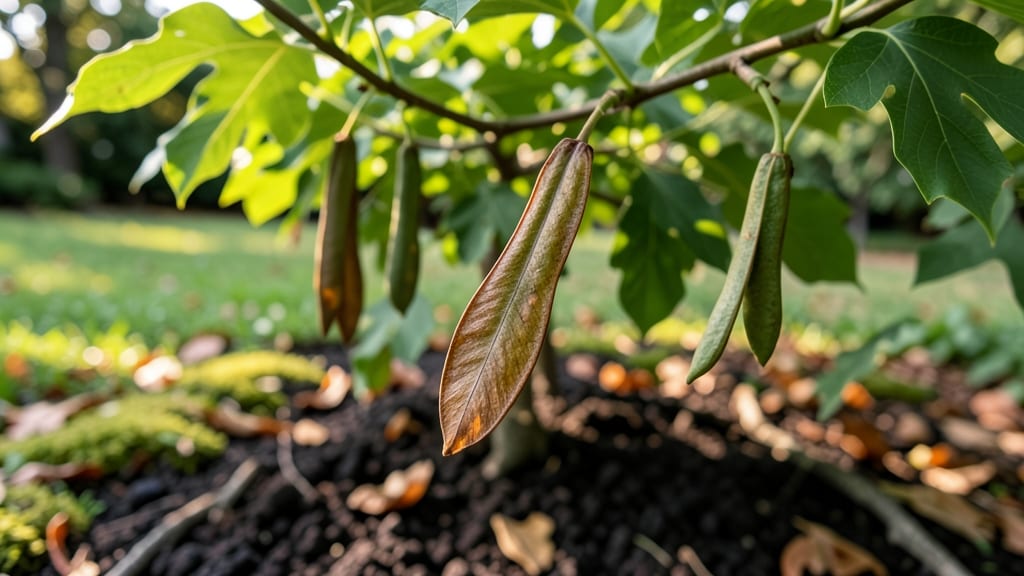
Struggling with those stubborn tulip tree seed pods that refuse to sprout? Cold stratification is the secret weapon that transforms them from dormant to thriving. 🌱 I spent years watching seed pods split open only to see nothing grow—until I learned the proper chilling trick that mimics nature’s timing.
The process starts with collecting mature pods (they turn brown and split open naturally in fall). After cleaning and drying them, you’ll need a cold period of 60-90 days in moist peat or a refrigerator setup. This breaks dormancy, ensuring seeds wake up ready to grow when spring arrives.
By following these steps, you’ll see 50-70% germination rates instead of the usual 10%. The seedlings emerge strong, with dark green leaves that signal healthy growth. Just be patient—it can take 2-3 weeks after planting for the first sprouts to appear.
Works for both backyard gardeners and forest restoration projects. Here’s how to do it right the first time—no more wasted seed pods!
📚 In This Guide
- What you need
- Instructions
- Tips and common mistakes
- Wrapping up and next steps
What you need
- ● Tulip tree seed pods – 5–10 mature pods (harvested in fall or purchased fresh). Pro tip: Choose plump, unblemished pods for best results!
- ● Plastic zip-top bags – 2–3 medium-sized (gallon-size) bags with a sealable closure.
- ● Potting mix – 1–2 cups of well-draining, sterile seed-starting mix (or coconut coir for eco-friendly options).
- ● Small pots or containers – 3–5 4–6 inch nursery pots with drainage holes (or a seed tray with cells).
- ● Water spray bottle – For gentle hydration without disturbing seeds.
- ● Labeling tags & marker – To track stratification dates and seed varieties.
- ● Refrigerator or cold stratification setup – A consistent 35–40°F (2–4°C) space (like a fridge crisper drawer).
- ● Sterilizing solution – 1 part hydrogen peroxide (3%) + 9 parts water to disinfect pots/seeds (prevents mold).
- ● Heat mat – For post-stratification warmth (70–75°F/21–24°C) to speed germination.
- ● Grow lights – If starting indoors before last frost (12–16 hours of light/day).
- ● Humidity dome – To maintain moisture during germination.
- ● Journal/notebook – For tracking seed progress and conditions.
Step-by-Step instructions for cold stratifying tulip tree seed pods
Here's how to break dormancy and boost germination rates for these slow-to-sprout seeds.
🌱 Step 1: Harvest and Clean the Seed Pods
Collect mature tulip tree seed pods when they turn brown and begin splitting open—usually in late fall or early winter. I like to harvest them directly from the tree when they're still dry but starting to crack. Remove any debris or attached leaves, but don't wash the pods yet.
Open the pods carefully with your hands or a small knife to reveal the winged seeds inside. These seeds have a hard outer coating that prevents water absorption, so we'll need to prepare them properly. Spread the seeds on a clean paper towel to dry completely for 24 hours before stratification.
❄️ Step 2: Prepare the Cold Stratification Mix
Fill a clean, sealable plastic bag with a mix of equal parts moistened peat moss and perlite—about 2 cups total for every 4 seed pods. The peat moss holds moisture while the perlite prevents mold. I use a spray bottle to dampen the mix until it feels like a wrung-out sponge, not dripping.
Add the dried seeds to the mix, spacing them about 1 inch apart so they don't touch. Seal the bag tightly, leaving just a little air inside to prevent rot. Label it with the date and store it in your refrigerator's crisper drawer, where temperatures stay consistently between 35-45°F.
⏰ Step 3: Stratify for 60-90 Days
Tulip tree seeds need this cold period to mimic winter conditions and break dormancy. Check the seeds after 30 days—they should look plump and slightly softened. If they're still hard, leave them another 30-60 days. You'll know stratification worked when the outer seed coat starts to crack open slightly.
During this time, I like to give the bag a gentle shake every 2 weeks to prevent mold and ensure even moisture. If you notice any white fuzz (mold), remove the seeds immediately and restart with fresh mix. Once the outer coating softens, they're ready for planting.
🌱 Step 4: Plant Stratified Seeds Indoors
Fill small pots with sterile seed-starting mix and plant the stratified seeds ½ inch deep, spacing them 2 inches apart. I use biodegradable pots to avoid disturbing roots later. Water gently until the soil is moist but not soggy, and place the pots in a warm spot with bright, indirect light—like a sunny windowsill.
Keep the soil consistently moist (not wet) and expect germination in 4-8 weeks. Tulip tree seedlings grow slowly at first, so don’t rush—patience is key. When they reach 3-4 inches tall, you can transplant them into larger containers or the garden after the last frost.
☀️ Step 5: Transition to Outdoor Conditions
Once seedlings have 4-5 true leaves and nighttime temperatures stay above 50°F, it's time to move them outside. Start by placing them in a sheltered, shaded spot for 1-2 hours the first day, gradually increasing their time outdoors over 7-10 days. This process, called hardening off, helps them adjust to sunlight and wind.
After a full week of outdoor exposure, transplant them into their permanent location in well-draining soil with full sun. Water deeply after planting and mulch around the base to retain moisture. Tulip trees grow slowly but will reward you with stunning height and shade in just a few years.
Tips & tricks for perfect tulip tree seed pod stratification
These small details make all the difference when coaxing these stubborn seeds to life.
Timing Secret: The 24-hour drying period in Step 1 is crucial—don't skip it! This ensures the seeds have a completely dry outer coating before stratification begins. I've found that using a fan on low speed for the last 12 hours of drying helps prevent any moisture retention that could lead to mold later. The goal is seeds that feel bone-dry to the touch, not just damp.
Mix Consistency: When preparing your 2 cups of moistened peat moss and perlite mix, aim for the texture of a wrung-out sponge. Too wet and you risk mold; too dry and the seeds won't soften properly. I test by squeezing a handful—water should barely drip out, and the mix should hold its shape when dropped. This balance is what keeps your seeds happy during their 60-90 day cold sojourn.
Storage Wisdom: For the stratification period, I recommend using a clear plastic bag with a twist tie instead of a zip-top. The clear material lets you easily check seed progress without opening the bag, which could introduce warm air and moisture. Place the bag on a shelf in your fridge's crisper drawer where temperatures stay consistently between 35-45°F—the colder end of this range works better for tougher seeds.
Visual Cues: In Step 3, when checking your seeds after 30 days, look for these signs: the outer coating should appear slightly wrinkled and the seeds should feel noticeably softer when gently squeezed between your fingers. If they're still rock-hard, extend the stratification by another 30 days. The moment you see tiny cracks forming in the seed coat, that's your cue they're ready for planting—don't wait for them to fully split open.
Pro Tips for Tulip Tree Seed Pod
- These small details make all the difference when coaxing these stubborn seeds to life.
- Timing Secret: The 24-hour drying period in Step 1 is crucial—don't skip it! This ensures the seeds have a completely...
- Mix Consistency: When preparing your 2 cups of moistened peat moss and perlite mix, aim for the texture of a wrung-ou...
Frequently asked questions
Got questions about tulip tree seed pods? You’re not alone! Here are answers to the most common queries to help you navigate cold stratification and germination like a pro.
How long does cold stratification take for tulip tree seed pods?
Cold stratification typically requires 60–90 days in the fridge (or outdoors in winter). Place the pods in a moist medium (like peat moss) and store them in a sealed container. Patience is key—rushing can reduce germination rates. Pro tip: Check pods monthly for mold or drying; adjust moisture if needed.
Can I skip cold stratification and plant tulip tree seeds directly?
While possible, germination success drops dramatically without stratification. Tulip tree seeds need this process to break dormancy. If you’re in a mild climate, try sowing in late fall for natural cold exposure—but expect slower or inconsistent results. For best outcomes, always stratify!
What’s the best way to store seed pods before stratification?
Keep pods in a cool, dry place (like a paper bag) until you’re ready to stratify. Avoid plastic bags to prevent mold. Label them with the harvest date—older seeds (over 1 year) may lose viability. Bonus: If pods are still attached to the tree, harvest them when they turn brown and papery (late summer/fall).
Why aren’t my tulip tree seeds germinating after stratification?
Common culprits include:
- Improper moisture: Too dry or soggy mediums can fail seeds. Aim for damp (not wet) conditions.
- Temperature shock: Move seeds to a warm spot (70–75°F) gradually after stratification.
- Old seeds: Viability drops after 2 years. Test a few seeds first if unsure.
Can I grow tulip trees from seed pods in containers?
Use a 4–6 inch pot with well-draining soil. After stratification, sow seeds ½ inch deep and keep them in bright, indirect light. Transplant seedlings outdoors after the last frost when they’re 3–4 inches tall. Containers work great for controlling growth—just monitor moisture closely.
Wrapping up and next steps
Growing tulip tree seed pods from scratch is a rewarding journey that connects you with nature’s patience and resilience! 🌱 By mastering cold stratification—whether through refrigeration, outdoor burial, or DIY setups—you’ll unlock the secret to reliable germination and nurture these majestic trees for years to come.
Whether you’re a seasoned gardener or a curious beginner, every step brings you closer to a thriving tulip tree.
Ready to take the next step? Start small: Try a few seed pods this season, experiment with different stratification methods, and observe what works best in your climate. Share your progress with fellow gardeners—you might inspire someone else to grow their own forest! 🌳