
Trees
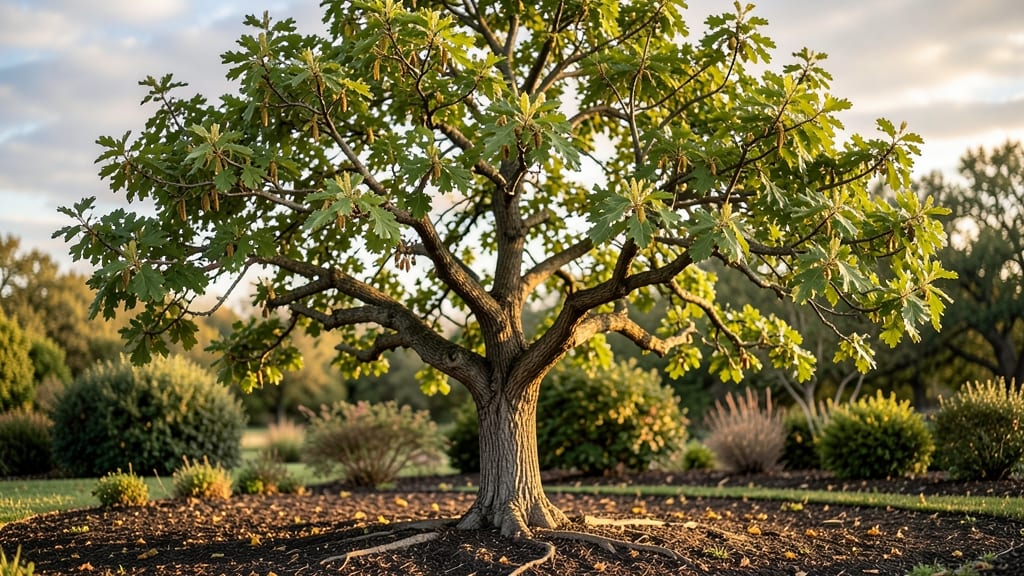
Your willow oak tree acorns hold the key to a future shade tree—if you know how to break their dormancy. 🌱 I’ve grown dozens from acorns, and the secret isn’t just patience—it’s cold stratification, a process that mimics winter’s natural timing.
Without it, those acorns might just rot in the pot. Start by collecting mature acorns in late fall, then store them in a damp mix of peat moss and sand for 90-120 days in the fridge.
This tricks the seed into thinking winter has passed, and when you plant it in spring, roots will sprout within 2-4 weeks. The trickiest part? Keeping squirrels and mold at bay—more on that later. By summer, you’ll have a 1-foot sapling ready to transplant.
These trees grow fast, with sturdy wood perfect for landscapes, and their acorns will eventually produce the next generation. The payoff? A free, native tree that thrives with minimal fuss once established. Works for backyard plantings, erosion control, or even urban gardens.
Here’s how to do it right—no guesswork, just reliable growth.
📚 In This Guide
- What you need
- Instructions
- Tips and common mistakes
- Wrapping up and next steps
What you need
- ● Fresh willow oak acorns: Collect at least 20-30 acorns (more ensures better success rates). Ensure they’re plump, firm, and free of cracks or mold.
- ● Cold stratification supplies: 1 quart-sized zip-top bag (or a small container with breathable material like a paper towel)
- ● 1 moistened paper towel or peat moss (enough to lightly surround the acorns)
- ● 1 refrigerator (set to 34–40°F for 60–90 days)
- ● Potting mix: Well-draining, sterile potting soil (e.g., a blend of 50% peat moss, 30% perlite, and 20% sand). You’ll need about 2–3 gallons for starting seeds.
- ● Containers: Seed trays or small pots (3–4 inches deep) with drainage holes (1–2 per acorn).
- ○ Clear plastic wrap or a humidity dome (optional, for moisture retention).
- ● Watering can or spray bottle (with a fine mist setting for gentle hydration).
- ● Plant labels and markers (to track acorn origins and planting dates).
- ○ Gloves (optional but recommended for handling acorns and soil).
- ● Grow lights (if starting indoors before last frost; 12–16 hours/day of light).
- ● Fungicide (e.g., neem oil or hydrogen peroxide solution) to prevent mold during stratification.
- ● Heat mat (for faster germination if your home is chilly).
- ● Transplanting tools: Small trowel, biodegradable pots (for easier transplanting later).
- ● Outdoor space: A sunny, sheltered spot (after stratification) with well-draining soil (pH 5.0–7.0 is ideal).
Step-by-step instructions for sprouting willow oak acorns
Here's my foolproof method for breaking dormancy and growing sturdy willow oak saplings from acorns.
🌱 Step 1: Collect and Prepare Fresh Acorns
Gather acorns in late fall when they've fallen naturally—they'll have the highest germination potential. Look for plump, intact shells with no cracks or holes. I like to soak them in lukewarm water for 24 hours first to soften the outer shell slightly and encourage early moisture uptake.
After soaking, gently rub each acorn between your fingers to remove any remaining cap. Don't scrub aggressively—you're just loosening the cap, not peeling it away completely. Store them in a paper towel-lined container (not plastic) with a damp (not wet) towel. This mimics natural winter moisture while allowing airflow.
🌿 Step 2: Cold-Stratify for 60-90 Days
This is the critical step that mimics winter conditions. Place your container in a refrigerator set to 35-40°F (the crisper drawer works well). Keep the towel damp by misting lightly every 7-10 days—it should feel like a wrung-out sponge. You'll see some acorns sprout during this period, but don't remove them yet.
Cold stratification breaks the dormancy cycle. I place a small dish of water in the fridge with the container to maintain humidity. After 60-90 days, check for sprouts by gently pressing each acorn—you'll feel a tiny root pushing against the shell. This is your cue that stratification worked.
☀️ Step 3: Plant Sprouted Acorns in Growing Medium
Fill 4-inch pots with a mix of 50% sterile potting soil and 50% perlite for excellent drainage. Plant each acorn 1 inch deep, with the sprout facing downward. I use a pencil to make a small hole—this prevents disturbing the delicate root. Cover lightly with additional mix.
Water gently until moisture appears at the surface, then let it drain completely. Place pots in a warm, bright location (65-75°F) with indirect light. Willow oaks need warmth to germinate properly, so avoid cool windowsills. You'll see first true leaves appear in 4-8 weeks—this is your signal that the seedling is established.
🪴 Step 4: Transplant and Maintain Saplings
When seedlings reach 4-6 inches tall with 3-4 sets of leaves, they're ready for their first transplant. Choose a 6-inch pot with drainage holes and fill with regular potting mix. Dig a hole twice as wide as the root ball and place the seedling at the same depth it was growing before.
Water thoroughly after transplanting and place in partial shade for 1 week to reduce stress. Gradually introduce more sun over 2 weeks. Willow oaks prefer full sun once established, but young plants need time to adjust. You'll notice new growth within 2-3 weeks if conditions are right—this means your sapling is thriving.
⏰ Step 5: Harden Off Before Outdoor Planting
Two weeks before your last frost date, begin hardening off your saplings. Move them outdoors to a sheltered, shaded spot for 1 hour the first day. Gradually increase exposure by 1-2 hours daily over 10-14 days, eventually moving them to full sun. This prepares them for outdoor conditions without shock.
Plant outdoors when soil is 60°F or warmer and all frost danger has passed. Dig a hole twice as wide as the root ball but no deeper. Water deeply after planting to settle the soil. Willow oaks grow quickly once established—you'll see 1-2 feet of new growth per year under ideal conditions.
Tips & tricks for reliable willow oak acorn sprouting
These little-known tricks will help you maximize your acorn germination success and grow strong willow oak saplings.
Selection Tip: When collecting acorns, focus on those that are plump and slightly heavier than average—they contain more energy reserves for sprouting. I always test a few by gently squeezing them; if they feel solid without any soft spots, they're prime candidates. Avoid acorns with cracks or holes, as these are more susceptible to mold and pests during stratification.
Stratification Strategy: The 60-90 day cold stratification period is non-negotiable for breaking dormancy, but I've found that placing a small dish of water in the fridge with your acorn container creates a mini humid environment. This prevents the paper towel from drying out between mistings, which can happen every 7-10 days. The key is maintaining that wrung-out sponge consistency—too wet and you risk mold, too dry and germination suffers.
Planting Precision: When planting your sprouted acorns in 4-inch pots, use a pencil to make a small hole that's exactly twice as wide as the acorn itself. This prevents disturbing the delicate root when you place it in the hole. I've learned the hard way that forcing acorns into tight spaces can damage the emerging root, setting back growth by weeks. After planting, give the soil a gentle press around the acorn to ensure good soil contact without compacting it.
Light Management: Willow oak seedlings need warmth (65-75°F) but not direct sunlight during their first 4-8 weeks. I place mine under a grow light on a timer set for 12 hours of light per day. This mimics natural spring conditions without the risk of overheating that can come with direct window light. The first true leaves will appear when the seedling is ready—don't rush this stage by moving to brighter light too soon.
Pro Tips for Willow Oak Tree Acorns
- These little-known tricks will help you maximize your acorn germination success and grow strong willow oak saplings.
- Selection Tip: When collecting acorns, focus on those that are plump and slightly heavier than average—they contain more energy reserves for sprouting.
- This prevents the paper towel from drying out between mistings, which can happen every 7-10 days.
Frequently asked questions
Got questions about growing willow oak tree acorns? You’re not alone! Here are answers to the most common queries to help you succeed with cold-stratification and sprouting:
How long does cold-stratification take for willow oak acorns?
Willow oak acorns typically need 60–90 days of cold stratification (33–40°F) to break dormancy. Place them in a damp paper towel or moist sand in the fridge for best results. Pro tip: Check periodically for mold—discard any acorns that smell funky or develop slimy spots!
Can I plant willow oak acorns straight from the tree without stratification?
Nope! Willow oak acorns won’t sprout reliably without cold treatment. Skipping stratification often leads to slow germination or no growth at all. If you’re impatient, try soaking acorns in warm water for 24 hours before stratifying to speed up the process.
What’s the best way to tell if an acorn is viable before planting?
Test viability by filling a glass with water, adding acorns, and waiting 24 hours. Viable acorns sink (good!), while floaters are likely dead. For willow oaks, aim for plump, firm acorns with minimal cracks—they’re your best bets for successful sprouting.
How long does it take for willow oak acorns to germinate after stratification?
After cold-stratification, germination can take 2–8 weeks, depending on warmth and moisture. Plant stratified acorns 1 inch deep in well-draining soil, keep it moist (not soggy), and place in a sunny spot. Patience pays off—tiny sprouts may peek through soil slowly!
Are there alternatives if my willow oak acorns won’t sprout?
If stratification fails, try these backups:
- Buy grafted saplings from nurseries for guaranteed growth.
- Test other oak species (like white oak) with similar stratification needs.
- Check for pests—weevils love acorns! Soak in a 10% bleach solution for 10 mins to disinfect.
Wrapping up and next steps
Mastering the art of cold-stratifying willow oak tree acorns unlocks a world of rewarding tree growth—patient, precise, and full of potential! 🌱 Whether you're a gardening novice or a seasoned green thumb, these steps ensure your acorns sprout into sturdy saplings with confidence.
The key? Timing, moisture, and a little chill.
Ready to take the next step? Start small—gather your acorns, set up your cold-stratification station, and watch nature work its magic. Before you know it, you’ll be planting willow oak trees that thrive for decades. Your future forest begins with one acorn today! 🌳✨