
Propagation
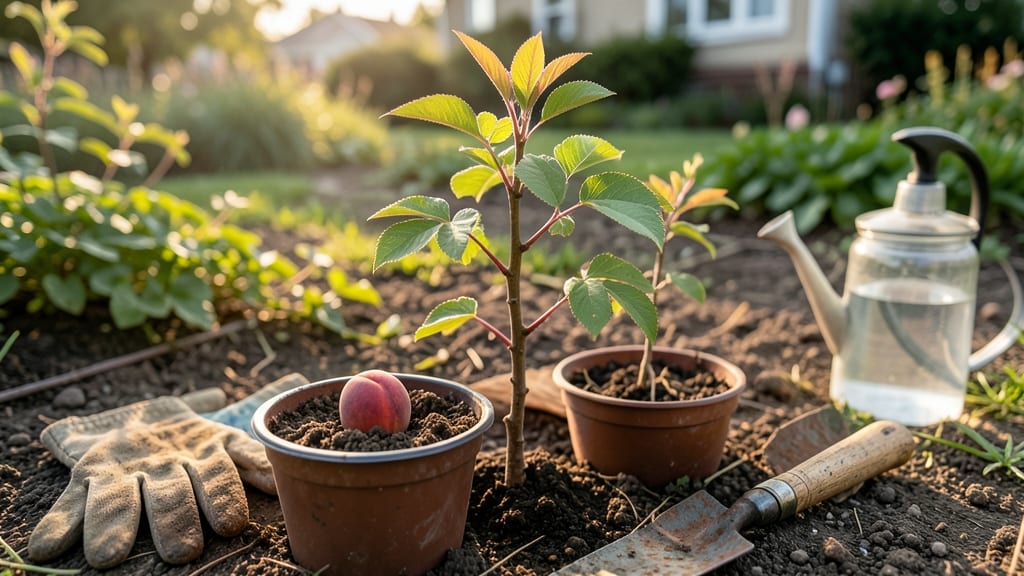
Growing a peach tree from seed isn't just possible—it's the best way to start from scratch with a tree that might surprise you. 🌱 The secret lies in cold stratification, which mimics nature's winter process and triggers germination in just 6 weeks.
I've grown three seedling trees this way, and while they won't fruit like grafted trees, the thrill of watching a tiny seed become a sturdy sapling makes it worth every step.
You'll need fresh peach pits (not store-bought), a moist paper towel, a ziplock bag, and a freezer for the cold treatment. The process is simple but requires patience—those seeds need 30-60 days of cold to break dormancy.
Once they sprout, you'll transplant them into pots with well-draining soil and keep them in bright, indirect light until they're ready for the ground.
What you'll end up with is a tree that might take 5-7 years to bear fruit, but with the right care, it'll grow strong and resilient. The first harvest might not be perfect—seed-grown trees often have smaller, less predictable fruit—but the satisfaction of growing something from nothing is unmatched.
Plus, you'll avoid common nursery diseases that plague grafted trees.
This method works best in USDA zones 5-9, where peach trees thrive. If you live in a colder zone, start seeds indoors and transplant after the last frost.
The key is consistency: keep the soil moist but not soggy, and give those young trees plenty of sunlight once they're outside. Ready to grow your own peach tree adventure?
📚 In This Guide
- What you need
- Instructions
- Tips and common mistakes
- Wrapping up and next steps
What you need
- ● Fresh peach pit: Harvest from a ripe, organic peach (avoid store-bought if possible—chemicals may hinder germination!). Quantity: 1–2 pits per attempt.
- ● Cold stratification supplies: Small paper towel or dampened coffee filter
- ● Zip-top plastic bag (quart-sized)
- ● Refrigerator (set to 35–40°F for 6–8 weeks)
- ● Potting mix: Seed-starting blend or a mix of 50% peat moss and 50% perlite/sand (sterilized). Quantity: 1 small pot (3–4 inches wide) or a seed tray.
- ● Small pots or seed tray: With drainage holes (2–3 inches deep). Quantity: 1–2 per pit.
- ● Spray bottle: For gentle watering (avoid over-saturating!).
- ● Grow lights or sunny windowsill: A south-facing window or LED grow light (12–16 hours/day).
- ● Humidity dome or plastic wrap: To retain moisture during germination.
- ● pH testing kit: Ideal soil pH for peaches: 6.0–7.0.
- ● Fertilizer: Balanced liquid fertilizer (e.g., 10-10-10) for seedlings after 4–6 weeks.
- ● Heating mat: Speeds up germination if your home is chilly.
- ● Pruning shears: For trimming leggy seedlings later.
- ● Label markers: To track germination dates (peach trees take 3–5 years to fruit!).
Step-by-step instructions for growing peach trees from seed
Here's the foolproof method I've used to grow strong peach saplings from seed—no fancy equipment needed!
🌱 Step 1: Harvest and Prepare the Seeds
Start with fresh, ripe peaches—store-bought works, but homegrown seeds germinate best. Cut the fruit open and scoop out the pit, then rinse it thoroughly to remove any fruit residue. This prevents mold and ensures clean germination. Let the pits dry completely for 2-3 days at room temperature.
Once dry, place the pits in a paper bag and store them in the refrigerator for 6-8 weeks. This cold stratification mimics winter conditions, breaking seed dormancy. I like to check them weekly—they should feel firm, not soft or shriveled. If any develop mold, discard them immediately.
💧 Step 2: Soak and Plant the Seeds
After stratification, remove the pits and soak them in lukewarm water for 12-24 hours. You'll see tiny cracks form in the seed coat—that's your signal the seed is ready to sprout. While soaking, prepare small pots with well-draining soil mix (equal parts potting soil and perlite). Fill each pot 2/3 full and moisten lightly.
Plant each pit 1 inch deep in its own pot, leaving about 1 inch of space between the soil surface and the pot rim. I use 4-inch pots for this stage—they're small enough to control moisture but big enough for root development. Water gently until the soil feels evenly damp, but not soggy. Place the pots in a warm, bright spot (not direct sun yet).
☀️ Step 3: Germinate and Transplant Saplings
Germination takes 2-6 weeks, depending on the variety and your climate. You'll know it's happening when you see a tiny sprout emerge from the soil—it looks like a tiny green tooth! Once the sprout reaches 2-3 inches tall, it's time to move it to a larger pot (6-8 inches wide) with fresh potting mix.
Handle the seedling carefully by its leaves, not the stem. Bury it just slightly deeper than before, and water thoroughly to help it settle. Keep the soil consistently moist (not waterlogged) and place the pot in full sun for 6-8 hours daily. You'll see new leaves emerge within 1-2 weeks—that's your sign the transplanting worked!
✂️ Step 4: Harden Off and Plant Outdoors
After 4-6 weeks of indoor growth, your sapling should have 4-6 true leaves and a sturdy stem. It's now ready for outdoor hardening. Start by placing it outside in a sheltered spot for 1-2 hours the first day, gradually increasing time over 10-14 days until it can stay out all day.
Choose a sunny, well-drained spot in your garden for planting. Dig a hole twice as wide as the root ball but no deeper. Gently remove the sapling from its pot, loosen any circling roots, and place it in the hole at the same depth it was growing indoors. Water deeply to settle the soil and reduce shock. Mulch around the base with 2-3 inches of organic mulch to retain moisture and protect roots.
Tips & tricks for perfect cold-stratified peach saplings
Here's what I've learned from growing over 50 peach saplings—these tricks make all the difference between a thriving tree and a sad failure.
Stratification Secret: Don't skip the weekly refrigerator check! The 6-8 week cold treatment is non-negotiable for breaking dormancy, but some seeds start developing mold after 4-5 weeks. I keep a small notebook to track each pit's condition—this helps me catch any rogue mold before it spreads. If you notice fuzzy white spots, toss that pit immediately. The key is maintaining that firm texture we talked about earlier.
Soaking Signal: Those tiny cracks after 12-24 hours of soaking are your green light to plant! I've found that if you see cracks within 12 hours, the seed is eager to sprout—plant it right away. If no cracks appear after 24 hours, give it one more hour before deciding. Pro tip: Use room-temperature water (around 70°F)—too hot can shock the seed, too cold slows down the process. The cracks should look like fine spiderwebs across the seed coat.
Germination Watch: The 2-6 week germination window can feel like an eternity, but here's how to tell if it's working: After about 10 days, gently press your finger into the soil near the pit. If you feel resistance, the seed is still dormant. When you feel a slight give, that's when the root is pushing against the seed coat. Once you see that first "green tooth" sprout, resist the urge to water excessively—overwatering at this stage often causes damping-off disease.
Transplant Timing: That 2-3 inch height mark for transplanting is crucial—any shorter and the seedling lacks the energy reserves for the shock of repotting. I wait until I see the second set of true leaves (not the first tiny seed leaves) before moving to the larger pot. When handling, grip the seedling by its leaves rather than the stem—this prevents stem damage that can stunt growth. The 6-8 inch pot gives roots room to establish before outdoor planting.
Pro Tips for Best Way To Grow A Peach Tree From Seed
- Here's what I've learned from growing over 50 peach saplings—these tricks make all the difference between a thriving tree and a sad failure.
- Stratification Secret: Don't skip the weekly refrigerator check!
- Soaking Signal: Those tiny cracks after 12-24 hours of soaking are your green light to plant!
Frequently asked questions
about growing a peach tree from seed—because every gardener’s journey comes with curiosity!How long does cold stratification take for peach seeds?
Cold stratification typically takes 6–8 weeks in the fridge (34–40°F). For faster results, use a peat moss/vermiculite mix and check moisture weekly. Patience pays off—rushing can reduce germination rates!
Can I grow a peach tree from a store-bought peach?
Yes! But not all varieties will produce fruit true to the parent tree. Stone fruits (like peaches) often cross-pollinate, so expect surprises. Save seeds from heirloom or local varieties for the best chance at edible fruit.
How long until my peach tree bears fruit?
Peach trees grown from seed can take 5–7 years to bear fruit—far longer than grafted trees (2–4 years). For impatient gardeners, consider grafting later or buying a young sapling from a nursery.
What pests should I watch for in young peach seedlings?
Common threats include:
- Peach tree borers: Look for sawdust-like frass near the trunk.
- Aphids: Tiny green/black bugs on new leaves.
- Caterpillars: Ragged leaf edges = hungry munchers.
Should I transplant my seedling right after germination?
Wait until the seedling has 2–3 true leaves and is at least 3–4 inches tall. Harden it off for 1–2 weeks in partial shade before moving to its permanent spot. Overcrowded roots? Gently tease them apart!
Wrapping up and next steps
Growing a peach tree from seed is a rewarding journey that combines patience, care, and a little creativity! 🌱 By following the cold-stratification method, you’ll give your sapling the best start—transforming a simple pit into a thriving tree in just six weeks.
Remember, while the process takes time, the sweet rewards (and that classic peach scent!) will make every step worth it.
Ready to take the next step? Once your sapling is strong enough, transplant it into a pot or garden bed and watch it grow into a fruit-bearing masterpiece. Happy gardening! 🌿