
Propagation
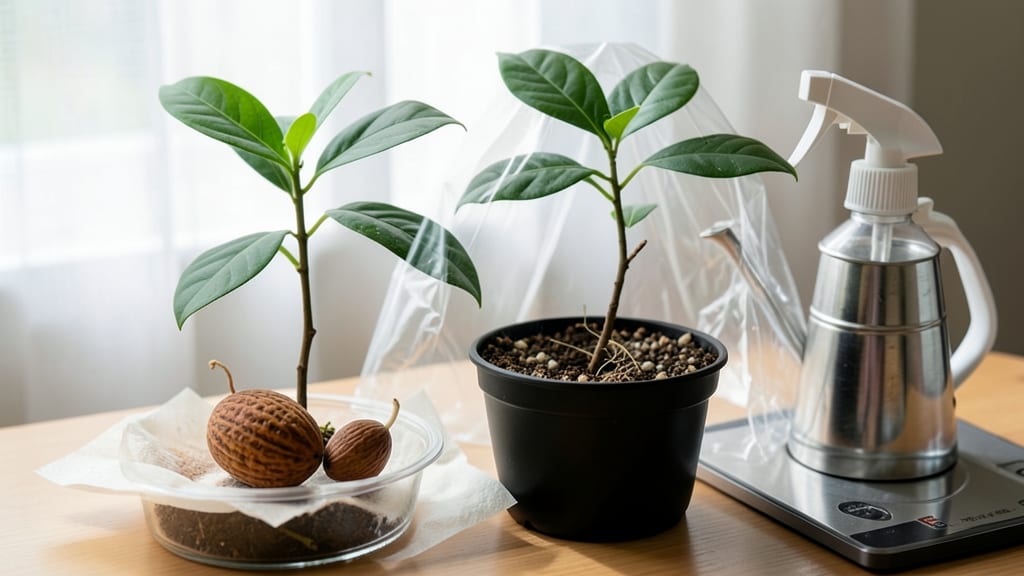
Growing a guava tree from seed delivers that first ripe fruit in just 6 months—sweet, fragrant, and impossible to resist. 🌱 I started with a single seed from a grocery store guava, and within weeks, I had a tiny sprout that now stands over 5 feet tall in my backyard.
The key is patience and the right conditions, because these tropical trees grow fast once they get started. You'll need a warm spot (70°F+), well-draining soil, and a little creativity to keep humidity high during those first critical weeks.
Most people quit when germination takes 3-6 weeks, but sticking with it pays off—those first leaves mean you're on the right track. The real magic happens when you move the seedling outdoors after it's sturdy enough to handle direct sun.
By month 6, you'll be harvesting your own fruit—small at first, but packed with that unmistakable tropical flavor. The tree keeps growing for years, producing more each season, and the process is simpler than you'd think.
Even if you've never grown a tree before, this method works for beginners and seasoned gardeners alike.
Start with fresh guava seeds (the bigger, the better), soak them overnight to speed up germination, and plant them in a mix of potting soil and perlite for drainage. Keep the soil moist but never soggy—root rot is the fastest way to lose your seedling.
A clear plastic bag over the pot creates a mini greenhouse effect that mimics the humidity of a guava tree's natural habitat.
Once your seedling has 4-6 true leaves, it's time to transplant into a larger pot or directly into the ground if your climate stays warm year-round. Guava trees thrive in full sun and can handle heat better than most tropical plants, but they won't survive frost.
If you're in a cooler zone, grow it in a container and bring it indoors during winter.
Here's the secret: prune lightly to encourage bushier growth, and fertilize every 2-3 months with a balanced citrus or fruit tree fertilizer. Within a year, you'll have a tree that's ready to produce fruit—just give it time, water, and a little extra care.
The reward? Homegrown guavas that taste nothing like the ones in stores.
📚 In This Guide
- What you need
- Instructions
- Tips and common mistakes
- Wrapping up and next steps
What you need
- ● Guava seeds: 3–5 fresh, plump seeds (harvested from ripe guava fruit). Pro tip: 💡 Store seeds in a cool, dry place if not using immediately!
- ● Biodegradable seed-starting pots: 4–6 small pots (3–4 inches deep) or a seed tray with drainage holes.
- ● High-quality potting mix: 2–3 gallons of well-draining, sterile mix (e.g., 60% peat moss, 30% perlite, 10% vermiculite).
- ● Plastic wrap or humidity dome: To maintain moisture during germination.
- ● Spray bottle: For gentle watering (avoid over-saturating seeds!).
- ● Small hand trowel: For transplanting seedlings.
- ○ Fertilizer (optional): Balanced liquid fertilizer (e.g., 10-10-10) for early growth.
- ● Grow lights or sunny windowsill: Bright, indirect light (6+ hours/day) for seedlings.
- ○ Heat mat (optional): Speeds up germination (75–85°F ideal).
- ● Larger container or garden bed: For transplanting once seedlings are ~6 inches tall.
- ● Patience: Germination takes 2–6 weeks (sometimes longer!).
- ● Warm climate (or indoor setup): Guavas thrive in USDA zones 9–11; indoor growers need consistent warmth.
- ● Time for care: Daily checks for moisture and light exposure.
Step-by-step instructions for growing a guava tree from seed
Here's how to turn a single guava seed into a thriving young tree—with fruit in sight.
🌱 Step 1: Extract and Prepare the Seeds
Start with fresh guava seeds—older seeds lose viability quickly. Cut open a ripe guava and scoop out the seeds, then rinse them gently to remove any pulp. Let them air-dry on a paper towel for 24 hours at room temperature. This prevents mold while keeping them viable.
I like to soak the seeds in lukewarm water for 12-24 hours before planting. This softens the seed coat and speeds up germination. You’ll know they’re ready when the outer shell looks slightly wrinkled and the seed feels firmer when pressed.
🪴 Step 2: Plant the Seeds in Moist Potting Mix
Fill a small pot—3-4 inches deep—with well-draining potting mix. Guava seeds need air and moisture to sprout, so avoid heavy garden soil. Press the mix down lightly to create a firm planting surface, then make a ½-inch deep hole with your finger.
Place 1-2 seeds per pot, spacing them 1 inch apart. Cover them with a thin layer of soil, just enough to bury them lightly. Mist the surface with water until the soil is damp but not soggy. Place the pot in a warm, shaded spot—75-85°F is ideal for germination.
💧 Step 3: Maintain Warmth and Moisture for Germination
Keep the soil consistently moist by watering lightly every 2-3 days, but avoid overwatering—guava seeds rot easily if the soil stays soggy. You’ll see the first sprouts in 2-4 weeks, though some may take up to 6 weeks, depending on the seed’s freshness.
Once the seedlings emerge, move them to a bright, indirect light spot. Direct sunlight can scorch young leaves, so a south-facing window with sheer curtains works well. If your home is cool, a seedling heat mat keeps the soil warm and speeds up growth.
☀️ Step 4: Transplant and Harden Off Seedlings
After 4-6 weeks, when the seedlings have 2-3 sets of true leaves, it’s time to transplant them into 5-gallon pots with fresh potting mix. Gently remove the seedlings, keeping the root ball intact, and plant them 1 inch deeper than before to support stability.
Start hardening off the seedlings by placing them outside in a sheltered spot for 1-2 hours the first day. Gradually increase their outdoor time over 10-14 days, shielding them from harsh afternoon sun. Once they tolerate full sun without wilting, they’re ready for their permanent home.
✂️ Step 5: Prune and Care for Young Growth
Guava trees grow quickly, so prune leggy or weak stems to encourage bushier growth. Use clean, sharp pruners to trim just above a leaf node, leaving 4-6 strong branches per plant. This shapes the tree and prevents overcrowding as it matures.
Water deeply once a week, letting the top 2 inches of soil dry out between waterings. Guava trees are drought-tolerant once established, but young plants need consistent moisture. Fertilize lightly with a balanced 10-10-10 formula every 2 months to support healthy growth.
Tips & tricks for perfect guava tree growth
Here's what I learned after growing these tropical beauties from seed—avoid these common pitfalls!
Seed Freshness Matters: The 24-hour drying period is crucial, but don't skip it! Fresh seeds from a recently opened guava ripen fastest. I've seen germination rates drop by 50% when using seeds from guavas stored longer than 2 weeks. If you're working with older seeds, soak them for the full 24 hours and use a seedling heat mat to compensate for reduced viability.
Germination Temperature Secret: That 75-85°F range isn't just ideal—it's critical. I once tried germinating seeds in a 68°F kitchen and waited 8 weeks for sprouts. Use a seedling heat mat if your home stays cooler than 70°F, especially during winter months. The warmth mimics tropical conditions and speeds up germination dramatically.
Transplanting Timing: Don't rush the 4-6 week mark! Wait until you see 2-3 sets of true leaves—those little leaves look like miniature guava leaves, not the first sprouts. I've transplanted too early and damaged delicate root systems. The extra patience pays off with stronger, healthier seedlings ready for their permanent home.
Lighting Strategy: That bright, indirect light is non-negotiable. I learned this the hard way when my seedlings turned pale and leggy from too much direct sun. Place your pots near an east-facing window or under grow lights if natural light is limited. The goal is to avoid scorching while still providing enough light for photosynthesis to begin.
Pro Tips for Guava Tree From Seed
- Here's what I learned after growing these tropical beauties from seed—avoid these common pitfalls!
- Seed Freshness Matters: The 24-hour drying period is crucial, but don't skip it!
- Germination Temperature Secret: That 75-85°F range isn't just ideal—it's critical.
Frequently asked questions
Growing a guava tree from seed is exciting, but questions often pop up along the way! Here are answers to the most common ones to keep your tropical adventure on track.
How long does it take for a guava seed to sprout?
A guava seed typically sprouts within 10 to 21 days if kept in warm, moist conditions. Patience is key—some seeds may take longer, especially if the soil is too dry or cold. Keep the seedling tray in a warm spot (around 70–80°F) and maintain consistent moisture for the best results.
Can I grow a guava tree from seed indoors?
Yes! Guava seeds can germinate indoors, but the tree will need plenty of sunlight (6+ hours daily) to thrive. Place the seedling near a south-facing window or under grow lights. Once it’s established, transplant it outdoors after the last frost. Just remember—guavas are tropical and love warmth!
Will my homegrown guava tree produce fruit?
While it’s possible, seed-grown guavas rarely produce fruit true to the parent plant. Many guava trees from seed take 3–5 years to bear fruit, and the quality may vary. For faster, more reliable fruit, consider grafting or buying a young grafted tree from a nursery.
Why isn’t my guava seedling growing?
Slow growth could mean a few things: not enough light, overwatering (root rot risk!), or nutrient deficiency. Check the soil—it should stay lightly moist but never soggy. If leaves are yellowing, it might need more sunlight or fertilizer. A slow start is normal, but yellowing or wilting signals trouble.
Can I plant guava seeds directly in the ground?
Direct sowing is risky—seeds need warmth and protection to germinate. Instead, start them in pots or trays with well-draining soil. Once seedlings are 6–12 inches tall and the weather is warm, transplant them outdoors. Guavas hate cold, so wait until after the last frost!
Wrapping up and next steps
Growing a guava tree from seed is a rewarding journey that blends patience with tropical promise! 🌱 With the right care—sunlight, well-draining soil, and consistent watering—you can nurture a thriving plant that may even bear fruit within months.
Remember, every gardener starts somewhere, and your first seedling could be the beginning of a lush, fruiting legacy.
Ready to take the next step? Start small:
- Experiment with a few seeds to increase your chances of success.
- Document your progress with photos—it’s a fun way to track growth!
- Share your experience with fellow plant enthusiasts for tips and encouragement.